
|
|
Post Reply 
|
Page <1 456 |
| Author |
 Printable Version Printable Version Google Google Delicious Delicious Digg Digg StumbleUpon StumbleUpon Windows Live Windows Live Yahoo Bookmarks Yahoo Bookmarks reddit reddit Facebook Facebook MySpace MySpace Newsvine Newsvine Furl Furl Topic Search Topic Search  Topic Options Topic Options
|
jato 
Senior Member 

Joined: 23 Feb 2012 Location: Kewadin, MI Online Status: Offline Posts: 3237 |
 Topic: 2ND 180 podmod, drawers under mattress Topic: 2ND 180 podmod, drawers under mattressPosted: 17 Nov 2016 at 8:23pm |
|
very nice, excellent craftsmanship!
|
|
|
God's pod
'11 model 177 '17 Ford F-150 4WD 3.5 Ecoboost Jim and Diane by beautiful Torch Lake "...and you will know the Truth and the Truth will set you free." |
|
 |
|
|
voisj
Senior Member

Joined: 19 Jul 2016 Location: San Luis Obispo Online Status: Offline Posts: 471 |
Posted: 16 Nov 2016 at 10:53pm |
|
So...I finished the "his and hers" drawers under the mattress, The 180 mini wardrobe and 2 small drawers, just doesn't have enough clothes storage for us. I moved the mattress up 5 1/2" and installed two 4' long x 18" wide x 5" deep drawers on 36" heavy duty drawer guides between the mattress and the existing platform under it. Home Depot has shelf material that matches pretty well!. I also made the area inside the exterior storage access panel 6" taller and moved the water pump over, allowing the exterior front storage compartment to be 12" deeper to hold longer items. Additionally, I removed the 2-1/2" wood piece under the opening to the heater space and put a piece of 3/4" angle iron up in its place behind the new face frame to make the opening taller and let heat flow out better. It's all done with screws so i can remove everything for access or go back to stock easily. I also added a dual USB port next to the electrical plug.
I now can use the hanging closet for coats and such and all our fold able clothes go in the drawers. This mod should work on most Rpod models with a front queen bed, the drawer would just have to be reconfigured for the space available.
Rgrds, John Video of how it works 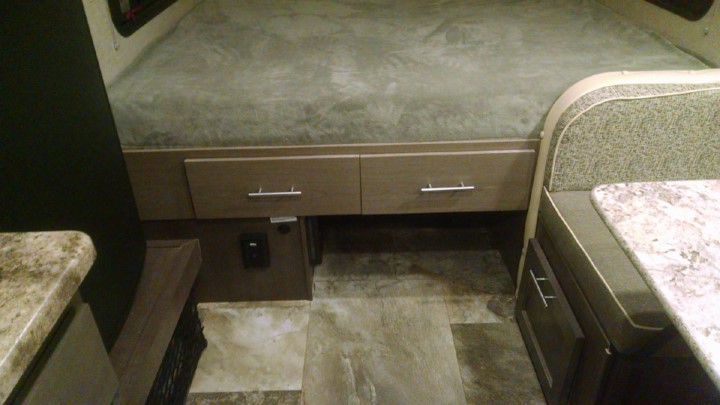 The right drawer pulls out 36". We keep baskets in the back that we just slide forward for access. 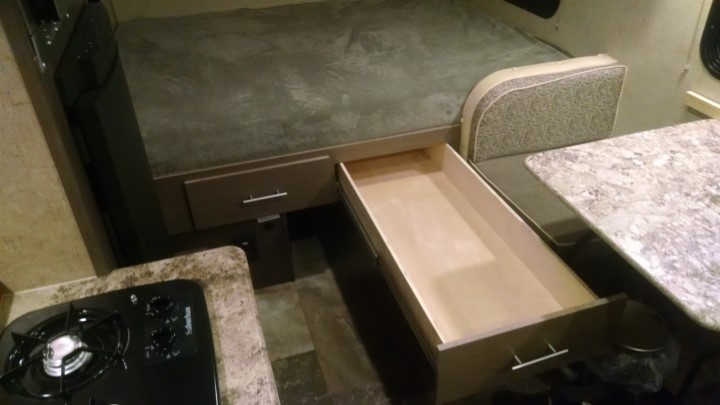 The left drawer pulls out 32" before it hit the kitchen cabinet. 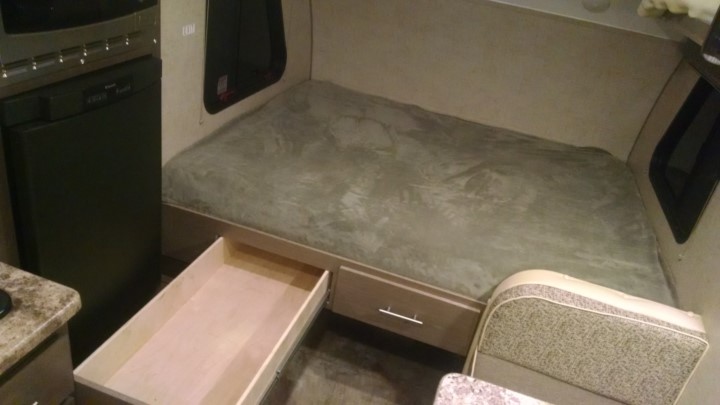 First I put down new plywood and built a new frame where the drawers would go. You can see at the right the area inside the exterior storage door that is now 6" taller inside. Update; I ended up removing the lower plywood for easier access and i decided it wasn't necessary for the support I thought it would need due to adding an angle iron piece in place of the wood piece that is stock. 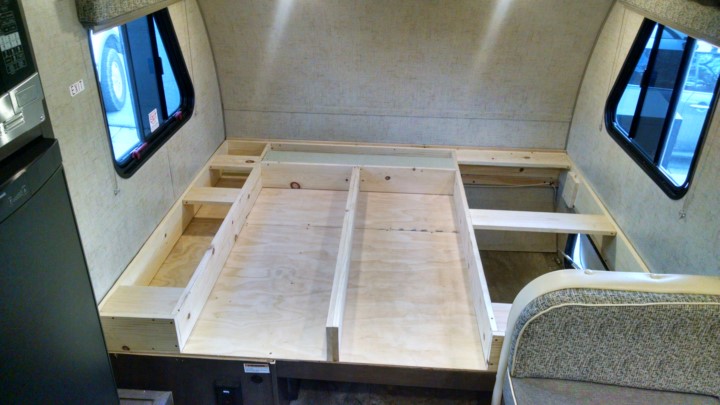 I moved the pump over towards the outside wall and and moved the end panel about 12" for a longer storage area, and I added bracing under where the drawer frame will be. After I installed the plywood I cut an access for servicing this area. 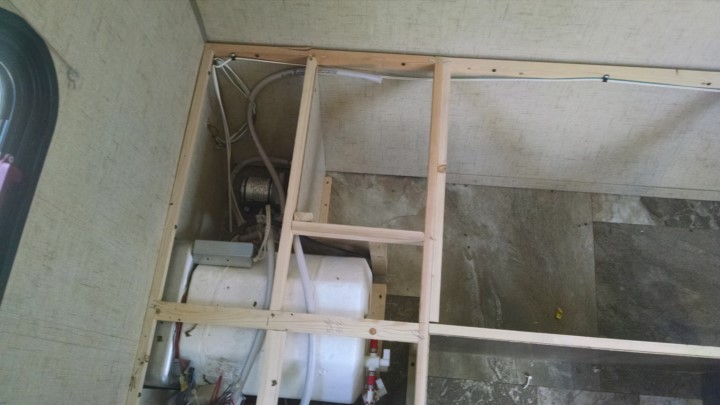 I then removed the drawer frame box, made drawers,and mounted the drawers on the slides. I did this because I couldn't put the left drawer in once the box is in place and because nothing was square on the original frame and this made it easy to square up the drawer box, The drawers are 5" tall. 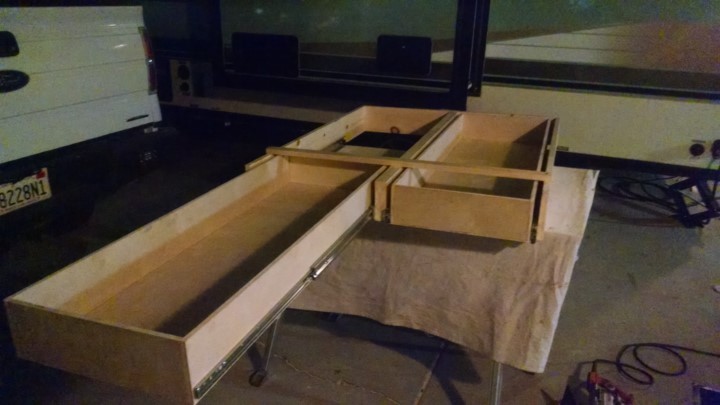 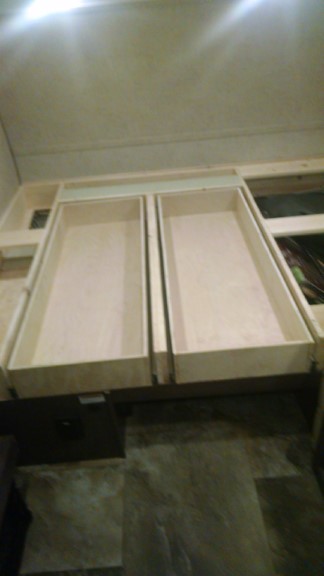 Here's what it looked like when I took off the plywood, I like this photo because it shows how simple the framing in the Rpod is. Just 3/4" X 1- 1/2" cleat material for the frame, and 1/8" veneer ply for cabinet sides. 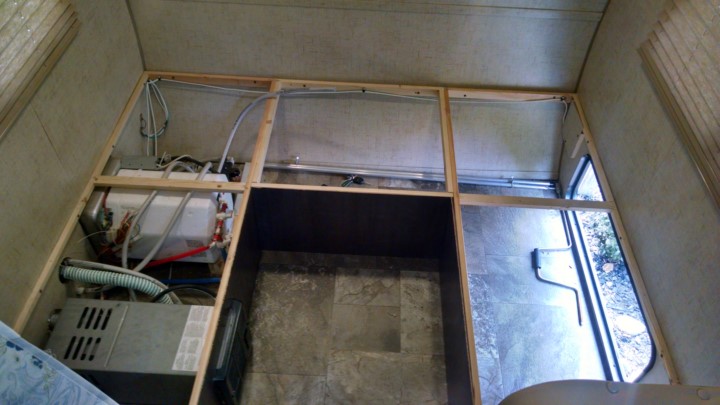 Angle iron to open up the underbed entrance 2.5 ", and let the heat out better. 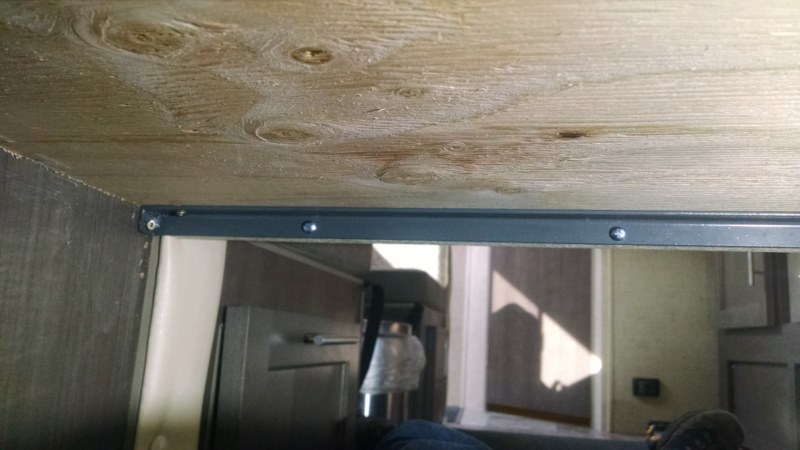 Matching home depot shelving. They have 11.5" x 4' and 7.5" X 36", that I used for drawers and face frames. 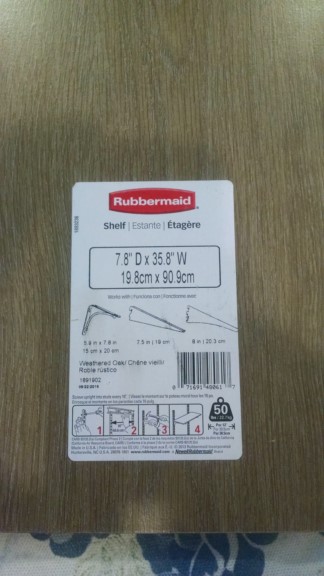  Did most of the work with a Skilsaw. 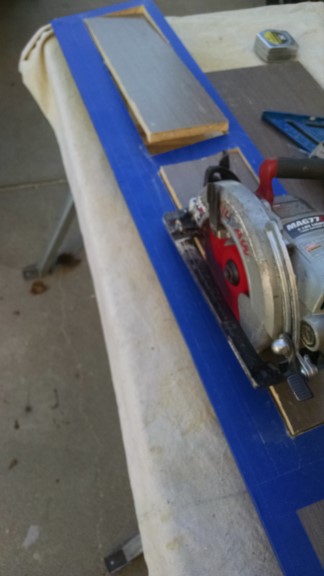 Answers to some questions people had. Trjeep, Hope this helps. 1. If I were to do it again I would only Make the drawers as deep as the space under the bed so the outside storage area in the front could be taller by 5". I think this makes the drawers 34" long by 18" wide. 2. I would remove the existing plywood under the drawers for better access to the water pump and water heater. the plywood under is unnecessary. and it could just used on top. 3. I Put a piece of 3/4 angle iron replacing the upper face frame under the bed. this will support the center drawer guide supports and let heat out better and open up the opening a little.  4. Here a picture of the drawer face frame. I used a 48" x 11" shelf piece and ripped it down to 9 1/4" and cut drawer holes into it. It does not go behind the seatback, and I had to add 4" to the refrigerator end because the shelf wasn't long enough to span the distance. 5. The angle iron screws down to the plywood to the drawer guide supports and then to the face frame. The face frame screws into the drawer box at the ends and in between the drawers. 6.I cut the drawer faces out of the 7 1/4 HD shelf material, One end of each is unfinished but hidden on the outside edge on each side. I set the Drawers out flush with the face frame and screwed the drawer face to them, this hides the unfinished cut out for the drawers.   If you need some more details, ask away! Rgds John
All my 180 mods |
|
|
|
|
Post Reply
|
Page <1 456 |
| Forum Jump | Forum Permissions You cannot post new topics in this forum You cannot reply to topics in this forum You cannot delete your posts in this forum You cannot edit your posts in this forum You cannot create polls in this forum You cannot vote in polls in this forum |


 2ND 180 podmod, drawers under mattress
