
|
|
Post Reply 
|
Page 12> |
| Author |
 Printable Version Printable Version Google Google Delicious Delicious Digg Digg StumbleUpon StumbleUpon Windows Live Windows Live Yahoo Bookmarks Yahoo Bookmarks reddit reddit Facebook Facebook MySpace MySpace Newsvine Newsvine Furl Furl Topic Search Topic Search  Topic Options Topic Options
|
Guests 
Guest Group 
|
 Topic: Stainless Sink Upgrade & Exterior Shower Install Topic: Stainless Sink Upgrade & Exterior Shower InstallPosted: 23 Aug 2015 at 7:01pm |
|
I decided to do the 2 installs simultaneously because it gave me more access to each areas. The only issue I had was having to more the store to the right 1/4". When I measured for the sink purchase I didn't look under the countertop closely enough to see if there was room to accommodate the sink. I had to shift the sink to the right some, that required the stove more. All in all I'm pleased. The exterior shower install went without any issues.
The process went as follows:
I cut a plywood template the size of the opening I needed for the shower and drilled holes in each corner for the saw blade making sure I was well below the countertop: 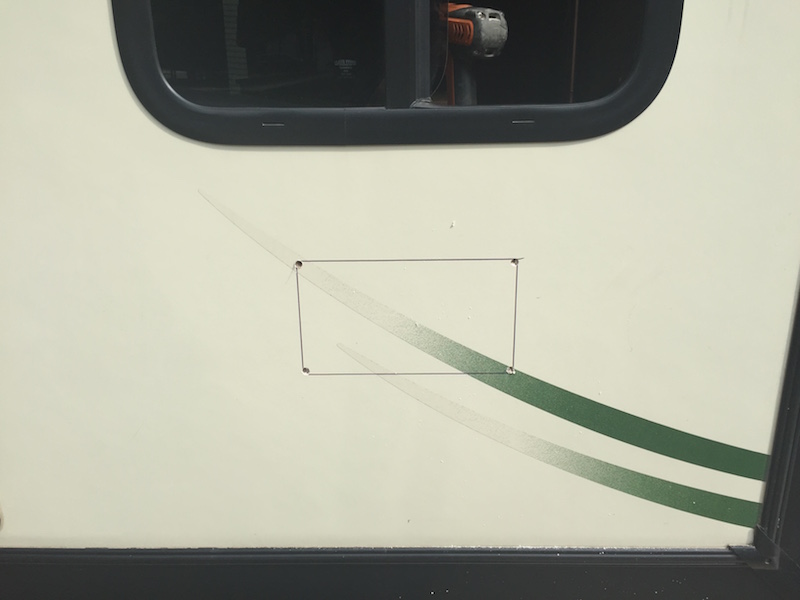 I cut the opening with a saber saw: 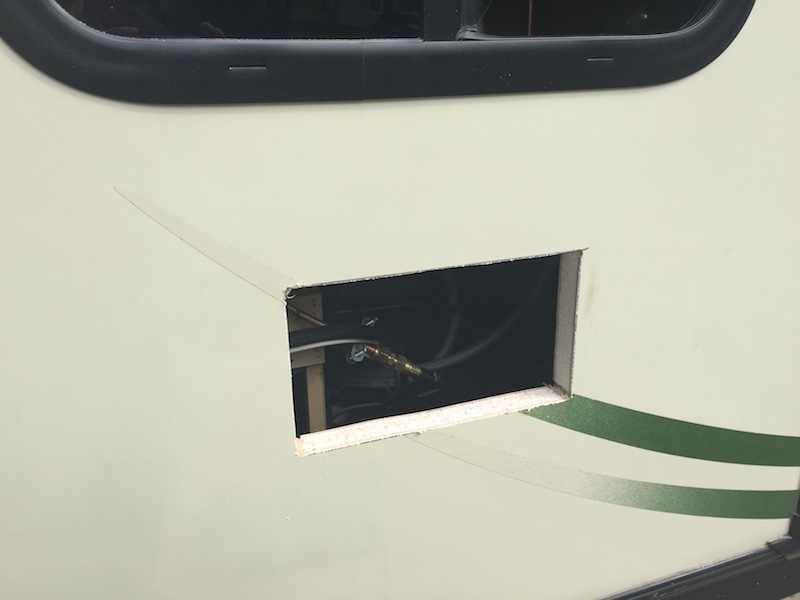 The original sink was a simple removal: 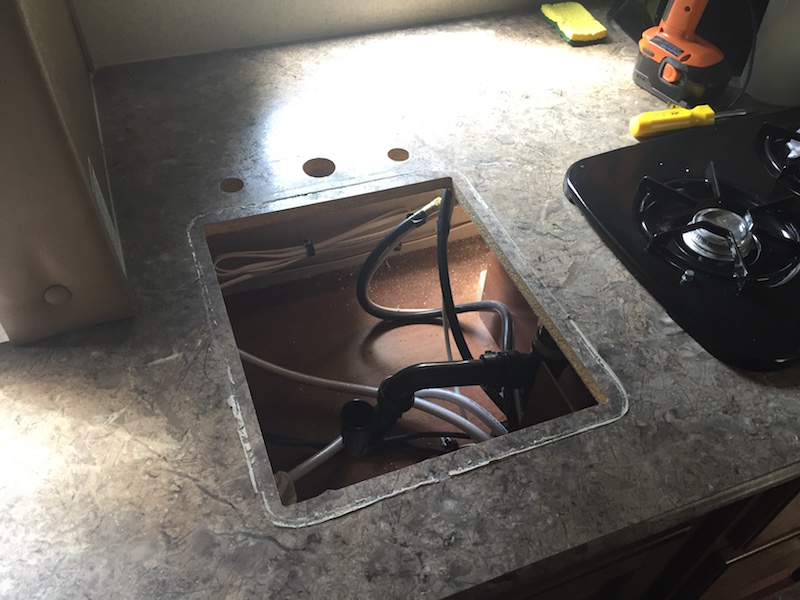 Carefully laying out the new sink opening, I used the saber saw again. I had to remove the stove to cut the countertop, plus I had to move the stove to the right 1/4" 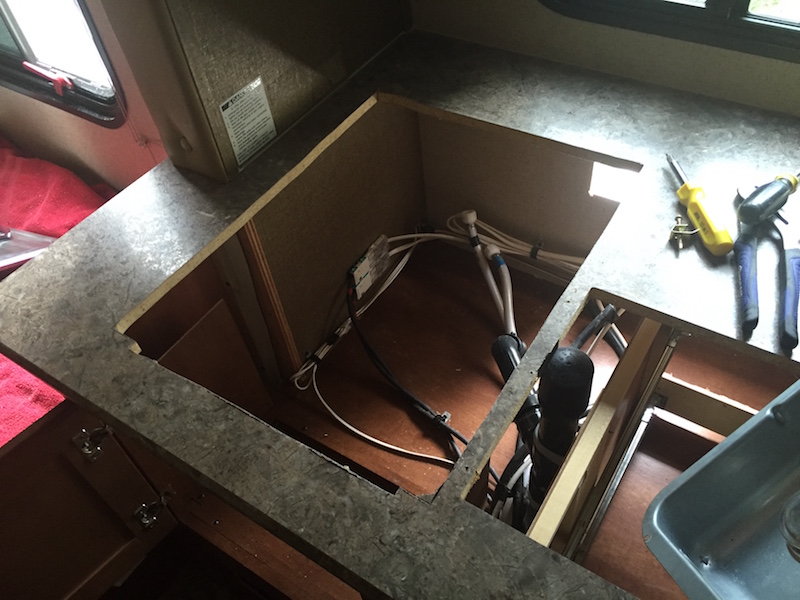 I got these 1/2" T - hose barbs at Lowes and spliced into the hot & cold going to the faucet:  I used a different hose connector than came with the shower for a more dependable connection: 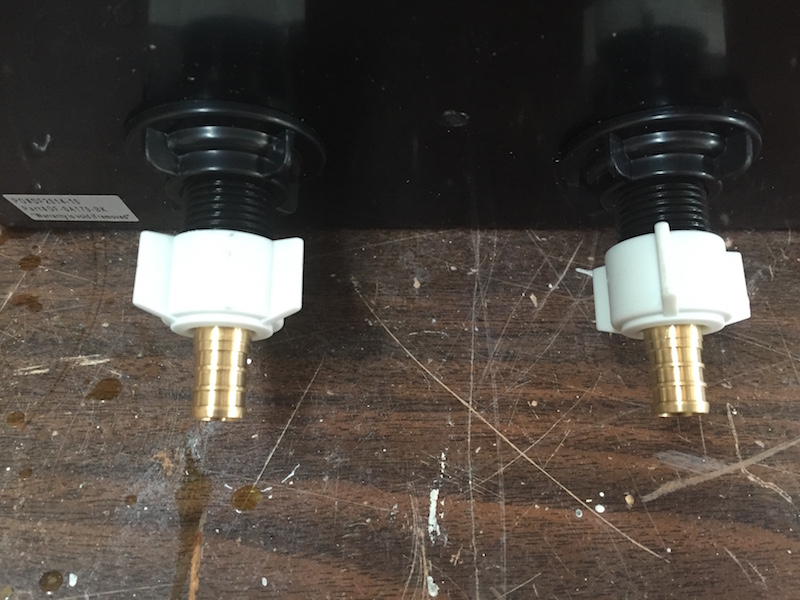 I got those at Lowes also: 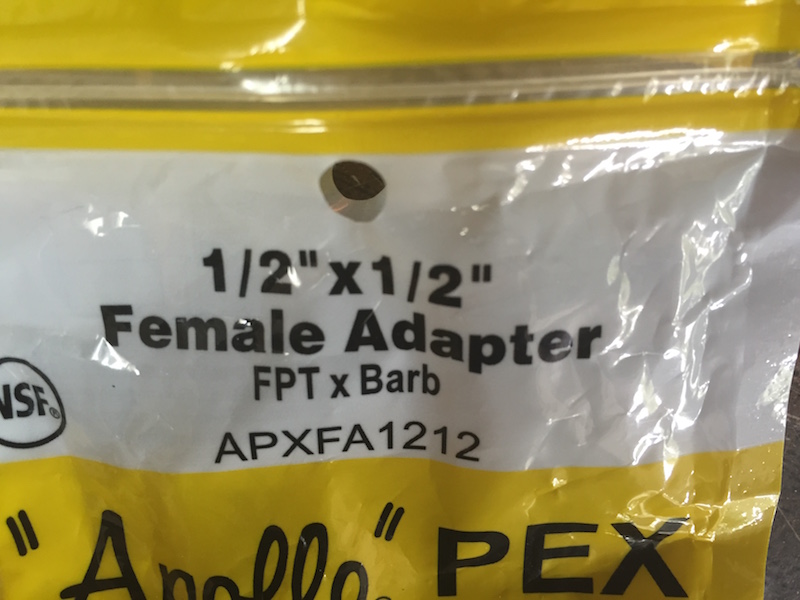 I glued 1/2" plywood backing inside behind the shower on the top and bottom of the opening to provide something for the screws to grab: 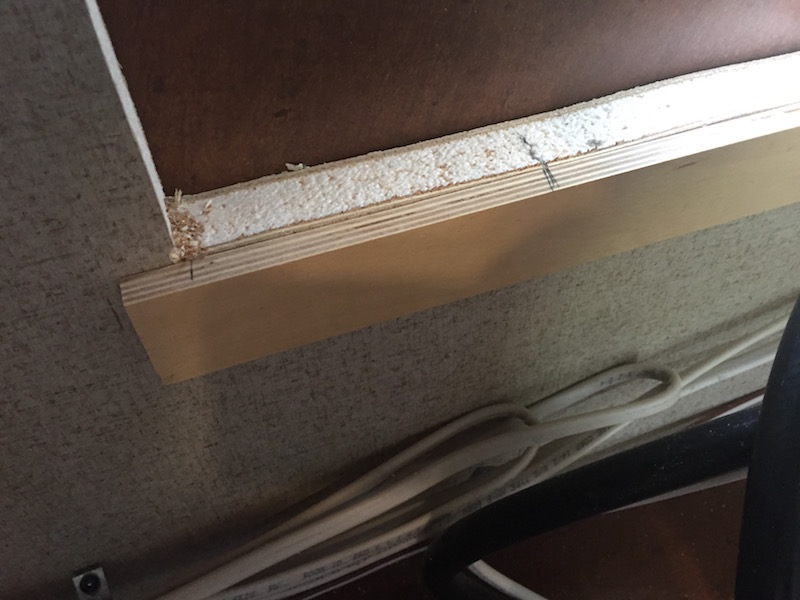 Here are the hot & cold lines going to the shower being careful to label them so not to be confused. I confuse easily: 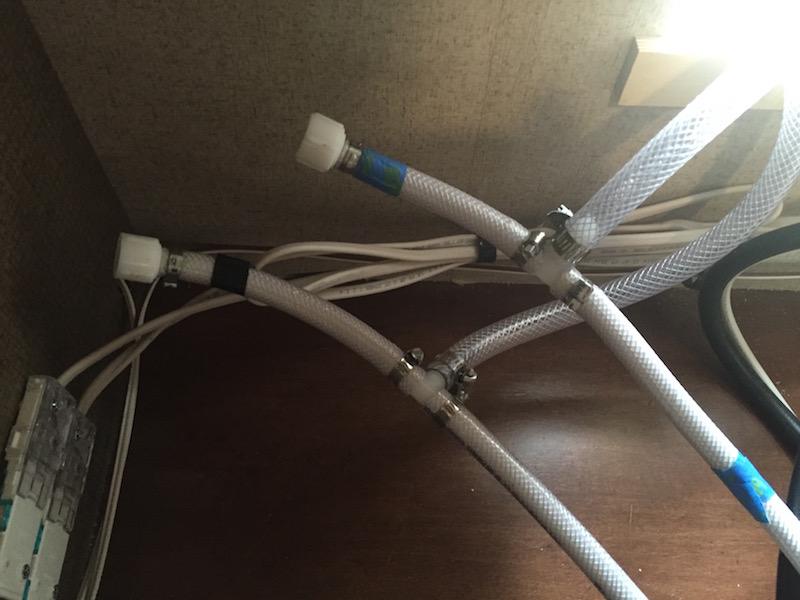 I bought the sink at Amazon: I opted for a single lever faucet because I was always concerned about hitting the hot or cold knob on the original with so little room. I bought the faucet at Lowes:  I bought the exterior shower at Amazon: 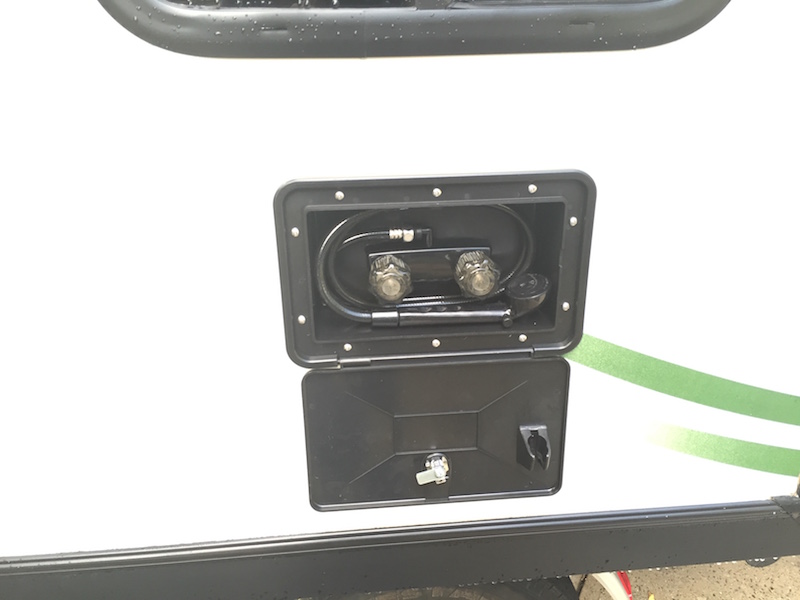 It will be interesting to see how much use it gets: 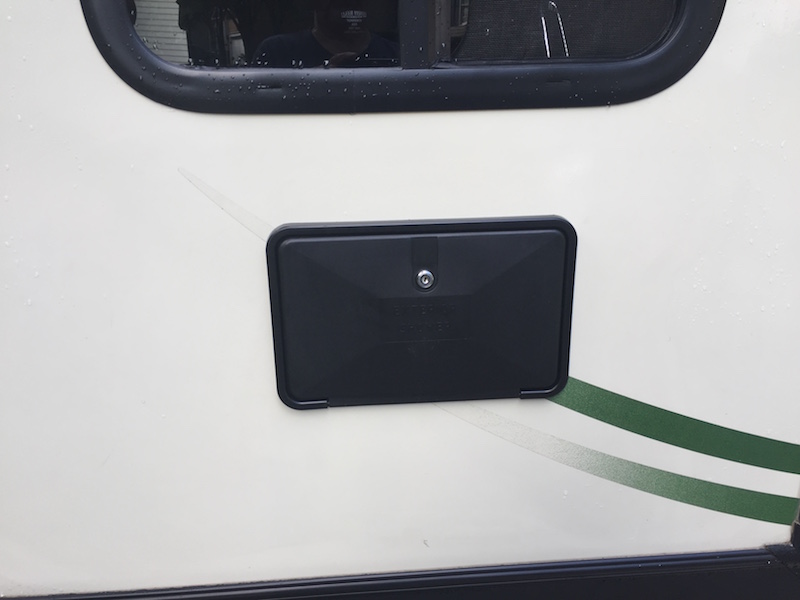 |
|
 |
|
|
Up the Pitt
Newbie 

Joined: 18 Jul 2015 Location: Pitt Meadows BC Online Status: Offline Posts: 22 |
Posted: 23 Aug 2015 at 7:36pm |
|
Wow - your new sink looks great! I am envious. Your kitchen layout looks quite a bit different than ours - which RPod did you modify?
|
|
|
Traveling with Len (the fella) and Ted (the cat)
2016 RP 179 - 2010 Nissan Frontier (6-cyl) http://www.upthepitt.com |
|
|
|
|
David and Danette
podders Helping podders - pHp 

Joined: 24 Nov 2009 Online Status: Offline Posts: 1218 |
Posted: 23 Aug 2015 at 7:48pm |
|
Good job! I did the same with our r-pod and Vibe replacing the factory sink with a larger stainless sink. Anything to make my wife happier when we go camping.

|
|
|
2018 Vista Cruiser 19BFD (2018-
2012 Vibe 6503 (2014-2019) 2009 r-pod 171 (2009-2014) Middle Tn 2014 Ram 1500 Quad cab |
|
|
|
|
Guests
Guest Group
|
Posted: 23 Aug 2015 at 8:03pm |
2015 178
|
|
|
|
|
Don Halas
Senior Member
Joined: 01 Jul 2015 Location: Connecticut Online Status: Offline Posts: 190 |
Posted: 23 Aug 2015 at 8:15pm |
|
Nice work!
|
|
|
|
|
techntrek
Admin Group - pHp 
Joined: 29 Jul 2009 Location: MD Online Status: Offline Posts: 9062 |
Posted: 23 Aug 2015 at 9:16pm |
|
nice
|
|
|
|
|
LongRanger
Newbie

Joined: 13 Jun 2019 Location: California Online Status: Offline Posts: 39 |
Posted: 30 Dec 2020 at 12:53pm |
|
Hi there, I came across your project post while looking for a way to upgrade my Rpod kitchen sink. I'm curious how you secured the top mounted sink to the cabinet. I have a 2018 RPod 190 with an under mount stainless sink. Unfortunately, the sink was not installed well and fell during a road trip. My plan is to replace it with a top mounted sink, but I'm not sure how to secure it. Love your project. Thanks. Doug
|
|
|
|
|
StephenH
podders Helping podders - pHp

Joined: 29 Nov 2015 Location: Wake Forest, NC Online Status: Offline Posts: 6326 |
Posted: 30 Dec 2020 at 5:02pm |
|
Top mount sinks are easy. They have brackets that hold the sink in place There is usually a flange into which one part of the bracket slides and a screw that tightens against the bottom of the counter. It does require access to the underside to be able to install and tighten the brackets. The sink in the picture above looks very similar, if not the same type as the one I installed in our 2016 RP-179.
|
|
|
StephenH
Happy is the man that findeth wisdom,... ouR escaPOD mods Former RPod 179 Current Cherokee Grey Wolf 24 JS |
|
|
|
|
JR
Senior Member
Joined: 31 Aug 2018 Location: Manistee, MI Online Status: Offline Posts: 364 |
Posted: 31 Dec 2020 at 8:04am |
|
Wanting to keep the undermount sink because of easy cleanup of the counter top, I elected to secure the sink from underneath to the cabinet walls and floor. I installed wood supports from the flooring up the cabinet walls (on either side of the sink) then mounted a cross member between the supports. This was done on the front and back ends of the sink. It's not going anywhere. Then I put a fresh bead of silicone where the sink meets the counter top, which has to be maintained to keep the water out. We can keep fruit in the sink when traveling with no problems. This works well for us and the above counter sink will be stable also but you would want to maintain a water tight seal where the sink meets the counter top. Water leaking underneath the edge of the sink would not be good for the counter top. Hope this helps
|
|
|
Jay
179/2019 |
|
|
|
|
StephenH
podders Helping podders - pHp
Joined: 29 Nov 2015 Location: Wake Forest, NC Online Status: Offline Posts: 6326 |
Posted: 31 Dec 2020 at 8:28am |
|
I second a good seal on the sink lip regardless of whether it is top or bottom mount. I used silicone with my top mount and it has not moved or deteriorated in the several years since I installed the sink. I did the same with the sink I installed at home.
|
|
|
StephenH
Happy is the man that findeth wisdom,... ouR escaPOD mods Former RPod 179 Current Cherokee Grey Wolf 24 JS |
|
|
|
|
Post Reply
|
Page 12> |
| Forum Jump | Forum Permissions You cannot post new topics in this forum You cannot reply to topics in this forum You cannot delete your posts in this forum You cannot edit your posts in this forum You cannot create polls in this forum You cannot vote in polls in this forum |


 Stainless Sink Upgrade & Exterior Shower Install