
|
|
Post Reply 
|
Page 123> |
| Author |
 Printable Version Printable Version Google Google Delicious Delicious Digg Digg StumbleUpon StumbleUpon Windows Live Windows Live Yahoo Bookmarks Yahoo Bookmarks reddit reddit Facebook Facebook MySpace MySpace Newsvine Newsvine Furl Furl Topic Search Topic Search  Topic Options Topic Options
|
Thinkcooper 
Groupie 
Joined: 24 Jan 2014 Location: Santa Cruz, CA Online Status: Offline Posts: 50 |
 Topic: Expedition worthy R-Pod? Topic: Expedition worthy R-Pod?Posted: 03 Feb 2014 at 3:18pm |
|
Now that we have a new-to-us 2012 177 HRE in the driveway, my mind starts to thinking about mods. I love the idea of putting in stuff like new stainless drawer pulls, or a tough marine grade sine wave inverter/charger/transfer switch, or a custom fabbed tongue rack for our two all mountain bicycles. But....
I want to able to tow to hard scrabble places like Toroweap. I'm curious if anyone here has gone about toughening up their R-Pod? Some things that come to mind would be leaf springs and shocks, bigger tires, maybe an upgraded hub to match the tow vehicle wheels, bolts/lock nuts to replace places where wood screws were used to fasten the slide, screwing and gluing the cabinet joinery, bracing heavy items like rooftop AC, fridge, etc. My "expedition" vehicle background pre-R-Pod was about Burning man. I still own a 1973 International Kurbmaster that has been converted to a livable adventure vehicle. It's too rough and tumble for comfortable day to day use. Too tight space wise as well. And too prone to 41 year old hard-to-find part failures to rely on these days for a multi-week long camping trip into the desert on washboard and rocky roads. Our sweet little 177  How we'll be towing it around. 2000 Toyota 4Runner SR5, 5 speed manual tranny. 100K miles. Owned since new. Still in need of airlift in rear springs and E2 weight distribution hitch. 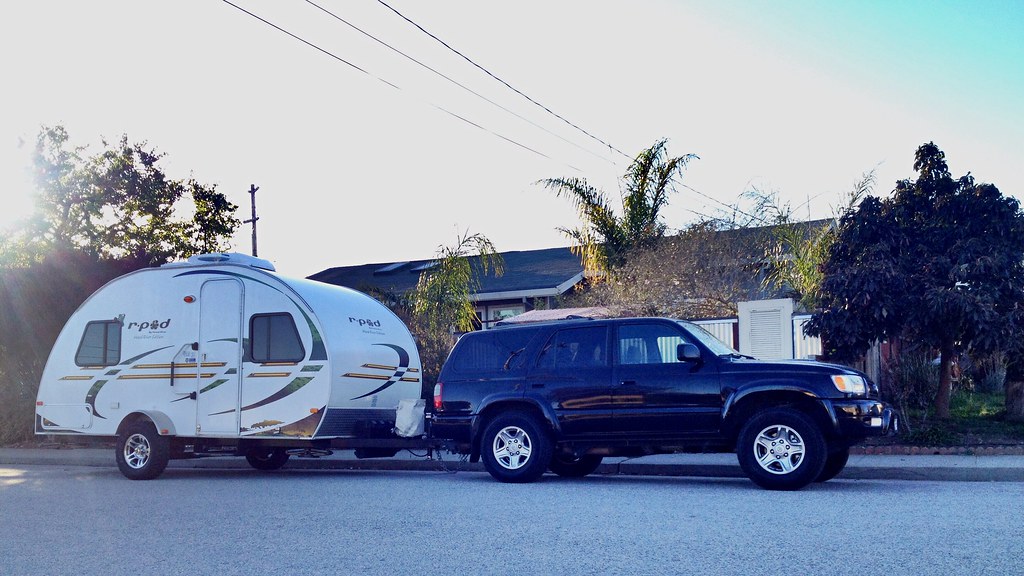 I want to make the R-Pod as tough as this bad boy below. By the beach in Santa Cruz. Early on. 1973 Kurbmaster. Formerly a bread truck for a school district in the LA desert. Aluminum body by Olson/Grumman. Steel 1.5 ton truck chassis by International. Custom paint.  Time to start welding.  Sierra gas stop en route to Burning Man.  About to set-up camp - a 6 hour ordeal, but when complete, we had a 30x30 bar space, with curtains and carpeting, hammocks and a dance-worthy floor space. The quadracycle was perfect for the flat playa surface, but not much else.  The finished camp, prior to the actual event opening up to the general public (one of the benefits of being mayor of a large village at Burningman) next step, insert friends for breakfast dancing and bloody marys  Detail of the shade space... If you can't bring along neon, well, you aren't doing it right. :)  Comfortable interior space that was dust free, well insulated, and hip to boot.  |
|
 |
|
|
Thinkcooper
Groupie
Joined: 24 Jan 2014 Location: Santa Cruz, CA Online Status: Offline Posts: 50 |
Posted: 03 Feb 2014 at 3:24pm |
|
I'll keep this thread updated with/if progress.
|
|
|
|
|
techntrek
Admin Group - pHp 
Joined: 29 Jul 2009 Location: MD Online Status: Offline Posts: 9062 |
Posted: 03 Feb 2014 at 4:21pm |
|
Tank pod. Looks good!
|
|
|
|
|
Thinkcooper
Groupie
Joined: 24 Jan 2014 Location: Santa Cruz, CA Online Status: Offline Posts: 50 |
Posted: 04 Feb 2014 at 3:09am |
|
Been digging in to researching the Lippert torsion axle on our 177. Interesting design. I need to crawl under tomorrow to see if there's any slotted brackets for adjusting preload height. It looks like a pretty simple rubber compression spring, but hard to tell if adding a leaf spring would help or hinder. I imagine adding more steel to HRE spacer could lift the chassis, as would bigger tires. The mind reels. :)
My wife is telling me to focus on the basics first. She's right. So I converted all the 5w5 bulbs to warm LEDs. Installed the new CW mattress with a memory foam topper as well. |
|
|
|
|
Thinkcooper
Groupie
Joined: 24 Jan 2014 Location: Santa Cruz, CA Online Status: Offline Posts: 50 |
Posted: 10 Feb 2014 at 7:16pm |
|
This is gonna be a long term project indeed. Especially since we're new to trailering, and have some basics to get right first. Thanks to techntrek for moving this thread to an area that makes more sense!
As for basics, I got the airbags installed and took these shots of the 4runner with the 177 in tow. We also towed the rig up to a local upholstery shop to get custom cushions made. We're using a charcoal gray Sunbrella fabric that will work with lots of color options. My wife is going to make some custom curtains for the pod as well. She's going to use curtain tracks top and bottom, with snaps for the curtains. The upper track will hide behind the valances (which will be recovered along with all other trim to match the cushions) and the lower track will be hidden by the curtains' length. So far we've changed out all the inner filament bulbs to LED, we've hung a bunch of IKEA stainless kitchen rods with hooks. We don't have a microwave/convection oven so we've put some stainless sliding drawers in the open hole. We've also replaced all draw pulls and the shower door with stainless too. Next up will be finding a new kitchen faucet is stainless. Not critical but desired would be the stainless version of the cooktop and a stainless sink as well. Sunbrella fabric swatches  The truck is looking way better with the airbags. E2 hitch is supped to arrive today.   |
|
|
|
|
techntrek
Admin Group - pHp
Joined: 29 Jul 2009 Location: MD Online Status: Offline Posts: 9062 |
Posted: 11 Feb 2014 at 8:07am |
|
Definitely need pics once the interior mods are done, sounds like it will look really nice.
|
|
|
|
|
Thinkcooper
Groupie
Joined: 24 Jan 2014 Location: Santa Cruz, CA Online Status: Offline Posts: 50 |
Posted: 11 Feb 2014 at 10:44am |
The cushions are about two weeks out. We've ordered stiffer foam than the stock cushions, an inch thicker too. We'll have the upholstery for recovering the valences and trim next week. I'll throw a wide angle on the camera to grab some in-process interior shots. A couple of other changes as well - we pulled the DVD/CD/screen. It's a head banger over the bed. I want to pull that whole media box. Later I guess. We also received the short Queen mattress from Camping World. It's much better than the stock mattress. |
|
|
|
|
bodie55
Senior Member 
Joined: 25 Mar 2013 Location: San Francisco Online Status: Offline Posts: 100 |
Posted: 13 Feb 2014 at 1:06am |
|
Love to know your source when you find a stainless sink/countertop. We would really like to upgrade - guessing a bar sink would work for now.
Like your desert set up! So what was behind the cardboard wall? My guess was some type of WC/bathing area...
|
|
|
Bay Area Crew
2013 178 Beach Pod F-150 SuperCrew ...sempre in viaggio sul mare... |
|
|
|
|
Thinkcooper
Groupie
Joined: 24 Jan 2014 Location: Santa Cruz, CA Online Status: Offline Posts: 50 |
Posted: 13 Feb 2014 at 2:04am |
Will do. As we find replacements in stainless, I'll post links. Sharp eyes on the cardboard under our shade structure. I designed a disposable/burn able temporary house structure for Burningman. It was based on 4x8 sheets of cardboard, glued to 1x1 wood frames (not unlike our R-Pods). The panels could be built off site, trucked to the event, then screwed together to make an 8'x8'x8' living space that was dust resistant, reasonably insulated, and then burned at the conclusion of the event. The village I camped with (illumination village) had whole rows of these, and they were awesome art walls as well. The slightly scaled down one under our shade was where my daughter stayed for the week. She had privacy but was under our wings, kinda. At the time I was mayor of our village, one of the oldest at BM, so we were quasi-VIPs in the BM caste. The box truck and our shade were the village HQ for the week.
|
|
|
|
|
furpod
Moderator Group - pHp 
Joined: 25 Jul 2011 Location: Central KY Online Status: Offline Posts: 6128 |
Posted: 13 Feb 2014 at 10:09am |
|
If you are a memebr of the FB group, a member over there just had her complete kitchen counter redone, all stainless, different flush mount burners, the works..
|
|
|
|
|
Post Reply
|
Page 123> |
| Forum Jump | Forum Permissions You cannot post new topics in this forum You cannot reply to topics in this forum You cannot delete your posts in this forum You cannot edit your posts in this forum You cannot create polls in this forum You cannot vote in polls in this forum |


 Expedition worthy R-Pod?