
|
|
Post Reply 
|
Page <1 345 |
| Author |
 Printable Version Printable Version Google Google Delicious Delicious Digg Digg StumbleUpon StumbleUpon Windows Live Windows Live Yahoo Bookmarks Yahoo Bookmarks reddit reddit Facebook Facebook MySpace MySpace Newsvine Newsvine Furl Furl Topic Search Topic Search  Topic Options Topic Options
|
Hodge-PODge 
Senior Member 

Joined: 11 Apr 2011 Location: Calhoun, GA Online Status: Offline Posts: 539 |
 Topic: New 177, here we go ! Topic: New 177, here we go !Posted: 02 May 2011 at 7:31pm |
|
Snowbound, as you noticed I had to put the mirror on the INSIDE of the door because I had the shoe storage pockets AND the towel rack on the OUTSIDE, so they would have covered up the mirror. And no, the door/towel bar setup does not impede walking through the Pod at all. (FYI, the towel rack was from WalMart.)
During my walkthrough, I was told the only thing inside the bathroom that was not waterproof was the door itself. So, I figured if the drawn shower curtain protected the door, then it would also protect the mirror, but we'll see won't we?
A Pod warming party --- how
Diane
|
|
|
2011 RP 177, the Hodge-PODge
2011 Mercedes ML350 "A man travels the world over in search of what he needs, and returns home to find it." |
|
 |
|
|
Snowbound
Senior Member

Joined: 17 Apr 2011 Location: Edmonton, AB Online Status: Offline Posts: 270 |
Posted: 03 May 2011 at 12:14pm |
|
Pod warming was fun. We sat eight inside; two on bed, two on folding bistro chairs at the table , four on bench. I could actually have cooked inside but not gotten into the fridge with that many inside.
I am thinking I will look at our Walmart (thanks) for that towel rack (sometimes they have different stock here in Canada). We will mount it on the inside though because I still think the mirror will do better on the outside and too much humidity to dry the towels in the shower stall will not be a problem here in Alberta. I think we will shower with the door open and just the curtain pulled most of the time. We are keeping our shoes in that cargo net area under the fridge so I don't see us needing the extra shoe pockets.
That organizer tacked to the outside of the shower beside the bed has become the 'desk'. It holds pens, notepads, and all the instructions that came with the pod for future reference. The little cupboard over the bed became the library as we did not feel a TV was important. We will have our laptop with us on long trips.
The oven liner on the wall idea fits well and the sticky stuff sticks to the liner (my worry) but it won't stcik to the wall! I will try the extra command strips there as they seem to stick everywhere else.
B
|
|
|
Tom and Bette
in our 177 "The Gastropod" |
|
|
|
|
Hodge-PODge
Senior Member
Joined: 11 Apr 2011 Location: Calhoun, GA Online Status: Offline Posts: 539 |
Posted: 03 May 2011 at 2:36pm |
|
Great ideas! FYI -- I'm not actually using the shoe pockets for shoes though (although I can if I need to). I've got all kinds of kitchen supplies in it, plastic trash bags, extra toilet tissue, etc., etc. I may use only the bottom pockets for shoes. My under fridge storage is holding my set of nesting pots & pans and bowls with lids.
I wonder if you could use one of those plastic/acrylic cutting mats as a splatter guard. You could attach it to the wall using the Scotch 3M adhesive strips, or maybe even the Velcro strips. I may try that because I have a set of 3 already. I bought the set from WalMart so I could use one of them as a cutting board (mat) on the top of my stovetop cover.
|
|
|
2011 RP 177, the Hodge-PODge
2011 Mercedes ML350 "A man travels the world over in search of what he needs, and returns home to find it." |
|
|
|
|
Farmers
Newbie 

Joined: 24 Apr 2011 Location: Connecticut Online Status: Offline Posts: 35 |
Posted: 08 May 2011 at 7:50pm |
|
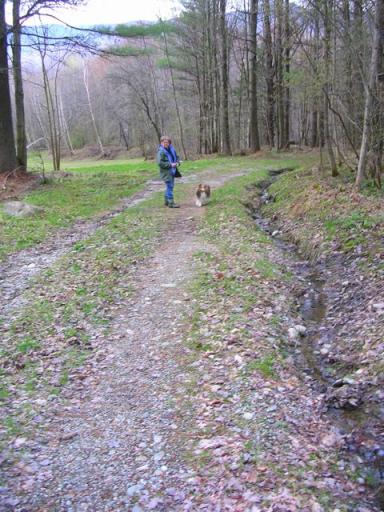
Just got a report on driveway conditions in Vt. Looking good! Hoping to get up there with the POD in a couple of weeks.
 |
|
|
"The world is big and I want to have a good look at it before it gets dark."
— John Muir RP-177, towed by Dodge 2500 2wd |
|
|
|
|
Farmers
Newbie
Joined: 24 Apr 2011 Location: Connecticut Online Status: Offline Posts: 35 |
Posted: 14 May 2011 at 7:31am |
|
Ready for the driveway in Vt. Got the risers on yesterday
|
|
|
"The world is big and I want to have a good look at it before it gets dark."
— John Muir RP-177, towed by Dodge 2500 2wd |
|
|
|
|
techntrek
Admin Group - pHp 
Joined: 29 Jul 2009 Location: MD Online Status: Offline Posts: 9059 |
Posted: 14 May 2011 at 8:51am |
|
How did the riser installation go for you? |
|
|
|
|
Farmers
Newbie
Joined: 24 Apr 2011 Location: Connecticut Online Status: Offline Posts: 35 |
Posted: 15 May 2011 at 7:13am |
|
RP 177 riser installation. I used a floor jack similar to this one, but rated four tons. Jacked up one side and placed wood blocks front and rear, did the same for the other side. Removed both wheels. Cut Ty-wraps on brake wires. Loosened all four bolts (two on each end) holding axel to frame. Placed jack under one end of the axel, removed the two bolts, lowered the axel with the jack just enough to insert the riser. Bolted the riser to the frame and axel, but left these bolts slightly loose. Placed jack under other end of axel, removed bolts, lowered the axel with the jack, inserted riser. Installed all four bolts for this end, but left them loose also until I brought the axel up tight to the frame with the jack, then tightened them. Back to the other end with the jack, jacked axel up to bring riser tight to frame and then tightened these bolts.
Ty-wraped brake wire back in place, jacked up camper enough to get one wheel on, ditto for other wheel. Done
All the nuts have distorted threads, so it makes it difficult to remove and install them. Good workout for the arms
|
|
|
"The world is big and I want to have a good look at it before it gets dark."
— John Muir RP-177, towed by Dodge 2500 2wd |
|
|
|
|
LunaPod
Newbie

Joined: 28 Feb 2011 Location: Canon City, CO Online Status: Offline Posts: 37 |
Posted: 15 May 2011 at 8:06pm |
|
Congratulations, my sister and her husband just built a house in Ludlow, VT and we hope to visit, looks like a beautiful state.
|
|
|
Mike & Barb, R Pod 173 - TV 2011Silverado
|
|
|
|
|
Farmers
Newbie
Joined: 24 Apr 2011 Location: Connecticut Online Status: Offline Posts: 35 |
Posted: 15 May 2011 at 10:59pm |
|
Thanks LunaPod!
We drive through Ludlow when we go up to our place. Okemo ski resort is a great place
Skied there many times.
Hope you make it East.....with the pod?
|
|
|
"The world is big and I want to have a good look at it before it gets dark."
— John Muir RP-177, towed by Dodge 2500 2wd |
|
|
|
|
LunaPod
Newbie
Joined: 28 Feb 2011 Location: Canon City, CO Online Status: Offline Posts: 37 |
Posted: 15 May 2011 at 11:17pm |
|
If it works out in Aug it will be in the LunaPod, what a beautiful piece of property
|
|
|
Mike & Barb, R Pod 173 - TV 2011Silverado
|
|
|
|
|
Post Reply
|
Page <1 345 |
| Forum Jump | Forum Permissions You cannot post new topics in this forum You cannot reply to topics in this forum You cannot delete your posts in this forum You cannot edit your posts in this forum You cannot create polls in this forum You cannot vote in polls in this forum |


 New 177, here we go !