
|
|
Post Reply 
|
Page 12> |
| Author |
 Printable Version Printable Version Google Google Delicious Delicious Digg Digg StumbleUpon StumbleUpon Windows Live Windows Live Yahoo Bookmarks Yahoo Bookmarks reddit reddit Facebook Facebook MySpace MySpace Newsvine Newsvine Furl Furl Topic Search Topic Search  Topic Options Topic Options
|
Paige 
podders Helping podders - pHp 
Joined: 23 Jul 2012 Location: Upstate NY Online Status: Offline Posts: 216 |
 Topic: RDome channel Topic: RDome channelPosted: 19 Sep 2012 at 7:57am |
|
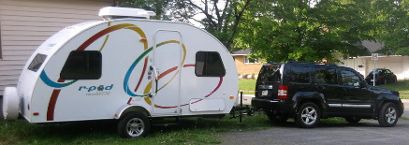
On our first outing this summer to test out our "new" rPod, I wanted to put the RDome up in the evening instead of waiting til the morning. It was such a struggle getting the dome through the channel. It kept getting snagged. We finally were able to do it. We are going to the NE RoundUp and so we have been fine tuning mods and adding some things as we plan to be out for about a week. I studied the dome channel and was stunned to see all the rough edges to it. FR put in large screws and the heads of these screws are bigger than the channel opening! So every screw they put in, gouged the channel! Then they had to paint over the gouge, leaving paint drips that were also an issue. So this week I took a Dremel and filed down the gouges as much as I could and carefully reprinted those areas. We located screws with smaller heads that won't cut the channel. We plan on replacing all the screws that FR put in because they are large and square and poke into the channel so they also impeded the dome from going through. I don't understand why FR chose to use screws that did so much damage to the channel and also poked into the channel afterwards, making it difficult to slide the Rdome through. It just seems like common sense to use smaller head screws.
We also added some strong tensil strength strips to each end of the RDome plastic channel thing so we can pull on them instead of the RDome fabric. |
|
|
Paige and Pete
2010 177 - RPug 2012 Rav (six cylinder) New York & Florida residents 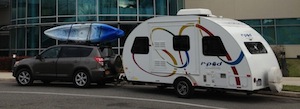
|
|
 |
|
|
Seanl
Senior Member

Joined: 19 Sep 2011 Location: Fredericton NB Online Status: Offline Posts: 633 |
Posted: 19 Sep 2012 at 8:23am |
|
The biggest issue I found with mine was not so much the size of the screws but the fact that the screws are Phillips head and and they were driven with a power screw driver so the heads of the screws were burred a little. I will never understand American fascination with Phillips head screws. In Canada the square drive or Robertson head screws are more popular. They go on a driver easier and don't burr. Even torx head screws would be better. It is my understanding that the newer Pods have a different track on them that the old ones maybe that is why Forest River went to the new track to solve these issues.
|
|
|
Sean, 2011 Rpod RP-173,2009 Jeep Liberty Rocky Mountain Edition
|
|
|
|
|
Paige
podders Helping podders - pHp
Joined: 23 Jul 2012 Location: Upstate NY Online Status: Offline Posts: 216 |
Posted: 19 Sep 2012 at 8:35am |
|
Ours were not Phillips, but square head, so there was no burring. But many of the screws were put in crooked so they would stick out and not be flush with the rPod. Just not quality work. Ours was built in 2010 but is considered a 2011. I really hope they have improved the channel with the newer ones!
|
|
|
Paige and Pete
2010 177 - RPug 2012 Rav (six cylinder) New York & Florida residents
|
|
|
|
|
techntrek
Admin Group - pHp 
Joined: 29 Jul 2009 Location: MD Online Status: Offline Posts: 9059 |
Posted: 19 Sep 2012 at 10:49am |
|
Unfortunately a common issue across all the models and years.
|
|
|
|
|
Podsible Dream
podders Helping podders - pHp

Joined: 03 Dec 2010 Location: Hightstown, NJ Online Status: Offline Posts: 571 |
Posted: 19 Sep 2012 at 9:13pm |
|
Ditto, Paige. Our 2010, manufacturer early 2010, late 2009, had square drive screws driven every which way in the track. I noted that the result of pushing the screw heads thru te Chanel edges was a burr that seemed to cause some paring of the dome plastic edging, but there I also damage due to the screw heads. I just replaced all 28 screws with brass flat head screws, and tried to get the heads flatter than the original screws. I will report later this weekend on the result. BTW the add of the alum pull bracket make a huge difference in installing the dome!
Walt |
|
|
Chris and Walt
'10 RP-171 'Free Spirit' '13 Dodge Durango Crew 5.7 L Hemi V8 |
|
|
|
|
Paige
podders Helping podders - pHp
Joined: 23 Jul 2012 Location: Upstate NY Online Status: Offline Posts: 216 |
Posted: 19 Sep 2012 at 9:16pm |
|
What is an alum pull bracket? Can you take a photo of it?
|
|
|
Paige and Pete
2010 177 - RPug 2012 Rav (six cylinder) New York & Florida residents
|
|
|
|
|
marwayne
Senior Member

Joined: 25 Oct 2011 Location: Edmonton AB Can Online Status: Offline Posts: 1002 |
Posted: 19 Sep 2012 at 9:31pm |
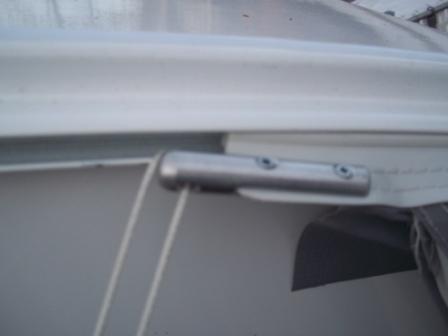 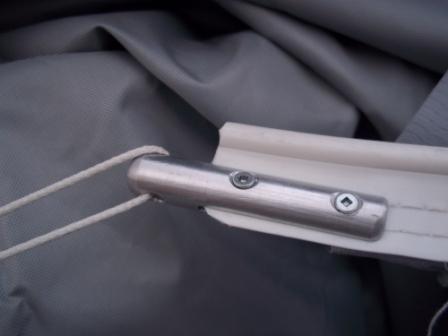 |
|
|
If you want something done right, do it yourself.
2011 RP172, 2016 Tundra 5.7 Litre, Ltd. |
|
|
|
|
Paige
podders Helping podders - pHp
Joined: 23 Jul 2012 Location: Upstate NY Online Status: Offline Posts: 216 |
Posted: 19 Sep 2012 at 10:49pm |
|
Thank you for posting the photo! Did you buy that from Forest River?
|
|
|
Paige and Pete
2010 177 - RPug 2012 Rav (six cylinder) New York & Florida residents
|
|
|
|
|
marwayne
Senior Member
Joined: 25 Oct 2011 Location: Edmonton AB Can Online Status: Offline Posts: 1002 |
Posted: 19 Sep 2012 at 11:03pm |
|
No: I made it myself.
|
|
|
If you want something done right, do it yourself.
2011 RP172, 2016 Tundra 5.7 Litre, Ltd. |
|
|
|
|
Podsible Dream
podders Helping podders - pHp
Joined: 03 Dec 2010 Location: Hightstown, NJ Online Status: Offline Posts: 571 |
Posted: 20 Sep 2012 at 7:03am |
|
I made a similar one, actually a set of two, using flat 3/4x1/8" aluminum bar (my Home Depot didn't have any large diameter rod).
I used afile to round the ends, drilled two holes for machine screws and nuts and counter sunk them for the screws, and a single hole at the end to run a line thru. Put them at both ends so we could pull from either end. |
|
|
Chris and Walt
'10 RP-171 'Free Spirit' '13 Dodge Durango Crew 5.7 L Hemi V8 |
|
|
|
|
Post Reply
|
Page 12> |
| Forum Jump | Forum Permissions You cannot post new topics in this forum You cannot reply to topics in this forum You cannot delete your posts in this forum You cannot edit your posts in this forum You cannot create polls in this forum You cannot vote in polls in this forum |


 RDome channel