
|
|
Post Reply 
|
| Author |
 Printable Version Printable Version Google Google Delicious Delicious Digg Digg StumbleUpon StumbleUpon Windows Live Windows Live Yahoo Bookmarks Yahoo Bookmarks reddit reddit Facebook Facebook MySpace MySpace Newsvine Newsvine Furl Furl Topic Search Topic Search  Topic Options Topic Options
|
Rustler 
Senior Member 

Joined: 07 May 2016 Location: S. Oregon Coast Online Status: Offline Posts: 100 |
 Topic: New Solar Power System for Rpod Topic: New Solar Power System for RpodPosted: 30 Aug 2016 at 12:44am |
|
I've finished installing the solar charging system on my Rpod. An extra 185-watt, 36-volt solar panel was employed along with a Morningstar SS-MPPT-15L charge controller. The solar panel will be deployed on the ground to enable placing it away from any shade on the Rpod.
While the panel produces 36 volts at maximum power point, it is what's called a 24-volt panel, since it can charge a 24-volt (or less) battery. The maximum power point tracking charge controller down-converts the 36 volts to a level appropriate for charging a 12-volt battery. Since power in (nearly equals power out (at 95% efficiency) when voltage is reduced, the current increases. The panel produces around 5 amps at 36 volts. In runs of 10 gauge cable up to 75 feet, it has less than 3% voltage loss due to wire resistance. Also since power dissipated in a wire varies with the square of current (power= current2 X resistance), the loss is considerably less. If I had used a 12-volt panel (which operates at 18-volts) the current would be at least double (185 watts ÷ 18 volts = 10 amps). With double the current, power loss with a 12-volt panel is quadrupled (22 = 4). While medium power 24-volt solar panels can be a bit difficult to find, the advantages are worth the search:
I have located a nice 24-volt, 120-watt panel (SLP120-24U) from Sunshineworks.com for $274, delivered. I will be ordering this panel soon. Its reduced weight compared with the 185-watt panel will be appreciated - 24 lbs. versus 37 lbs. And 120 watts should be sufficient for most usage. But for now I've been testing the 185-watt panel. Even on a cloudy day it puts out 4-5 amps. In full sun it can deliver around 14 amps at 12.5 volts. I have quite a few photos of my solar charging system that I'd like to share, but I've struggled to post them. Even when I downsize them to less than 1024K, they are still enormous, requiring scrolling left/right and up/down to see the entire photo. Here's an example of a photo that's only 897 KB: 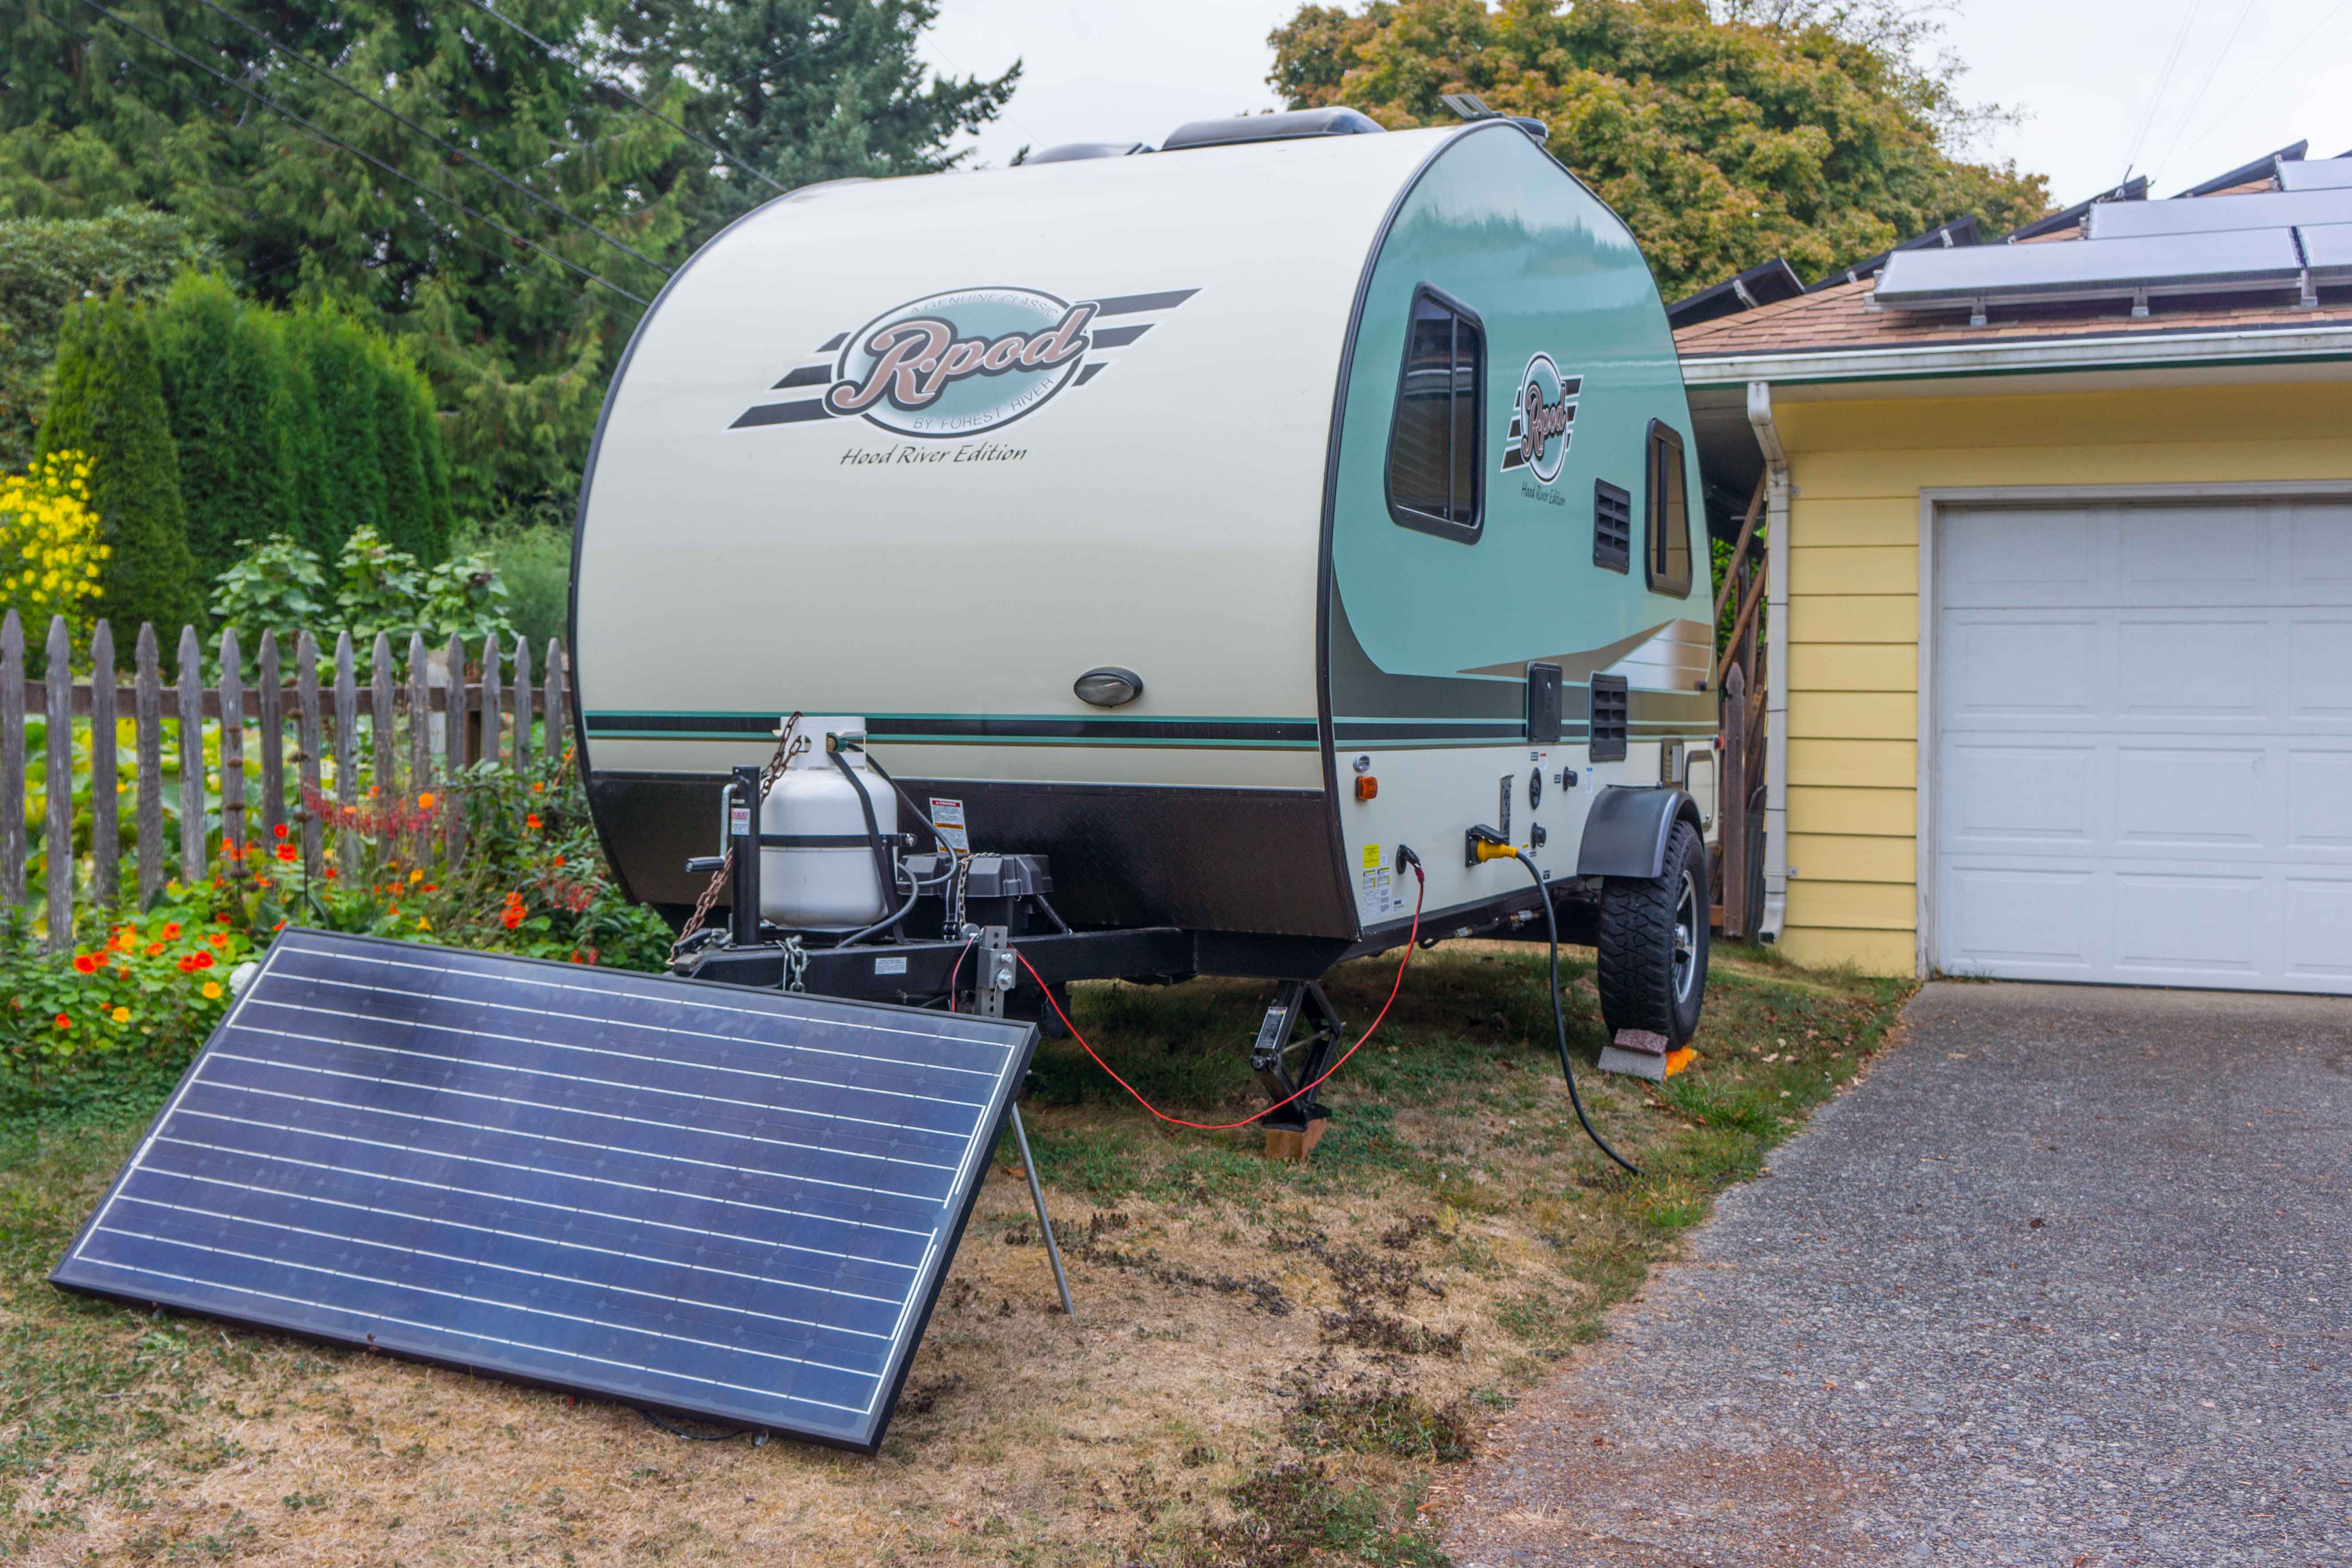 So how do I post a photo that can easily be viewed? |
|
|
Russ
2009 Toyota RAV4 V6 w/ tow package 2016 Rpod 171 HRE |
|
 |
|
|
johnmaci
Senior Member

Joined: 17 Jun 2014 Location: MD Online Status: Offline Posts: 202 |
Posted: 30 Aug 2016 at 7:45am |
|
If you open your photos in MSPaint, then go to resize, pixels, and choose something like 800x600 or 640x480 you should be good to go.
|
|
|
|
|
Podster
Senior Member

Joined: 16 Sep 2014 Location: San Antonio Online Status: Offline Posts: 1108 |
Posted: 30 Aug 2016 at 10:31am |
|
A super easy way to share photos on line anywhere is to store them on a google account or flicker or some other photo share and then just post a link.
|
|
|
Cliff & Raelynn
Ranger 4.0/178 (1/2 ton 5,800lb tow capacity) |
|
|
|
|
furpod
Moderator Group - pHp 
Joined: 25 Jul 2011 Location: Central KY Online Status: Offline Posts: 6128 |
Posted: 30 Aug 2016 at 12:16pm |
I like photobucket.. free, easy. upload there, open, select the link, copy and paste here.. Random photo from my bucket:  |
|
|
|
|
Rustler
Senior Member
Joined: 07 May 2016 Location: S. Oregon Coast Online Status: Offline Posts: 100 |
Posted: 30 Aug 2016 at 9:13pm |
|
Thanks johnmaci, Podster & furpod for the tips. I'll use the Mac's Preview App to resize my photos.
|
|
|
Russ
2009 Toyota RAV4 V6 w/ tow package 2016 Rpod 171 HRE |
|
|
|
|
Rustler
Senior Member
Joined: 07 May 2016 Location: S. Oregon Coast Online Status: Offline Posts: 100 |
Posted: 30 Aug 2016 at 11:19pm |
While waiting for my new 120-watt, 24-volt panel to show up I began wondering if I could hook up my two 24-volt panels in parallel:
My charge controller is a Morningstar Sunsaver MPPT-15L. So I sent a quick question to Morningstar Tech support, and got a prompt reply: As long as the max. power point voltages are within 10%, things should work OK. The controller will find the common voltage point to maximize the combined output. While the combined output of the two panels (305 watts) exceeds the capability of the controller (200 watts) it would not cause any harm. The output would always be limited to 15 amps into the battery, no matter what the combined output might be. But there are some advantages to hooking up both panels (or using a single panel with greater than 200 watt output):
The following text and graph from a Morningstar white-paper shows the benefit. 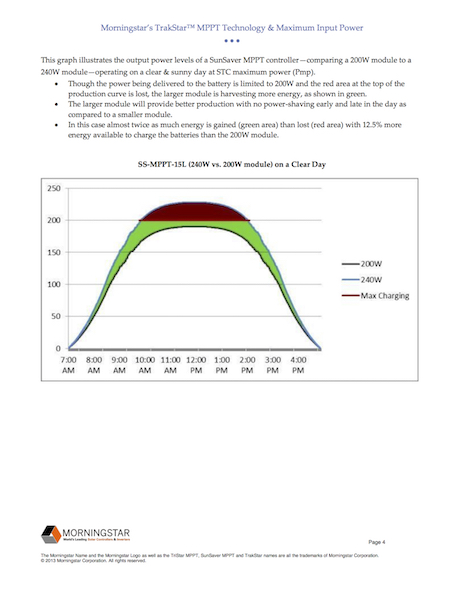 I've also been thinking about a better way to tilt the new panel up toward optimum angle. This will involve some aluminum L-channels attached to a hinge point near the top edge of the panel. These could be swung out from the panel bottom to contact the ground. A short length of stainless steel cable will prevent the brace from spreading back too far. This should be both lighter and more easily adjustable than the metal conduit I've used on the 185-watt panel. I'll post some photos when this is completed. |
|
|
Russ
2009 Toyota RAV4 V6 w/ tow package 2016 Rpod 171 HRE |
|
|
|
|
Rustler
Senior Member
Joined: 07 May 2016 Location: S. Oregon Coast Online Status: Offline Posts: 100 |
Posted: 31 Aug 2016 at 5:20pm |
I've decided not to install a switch to reset the meter. It's just easier to briefly disconnect the Powerpole connection as shown below. 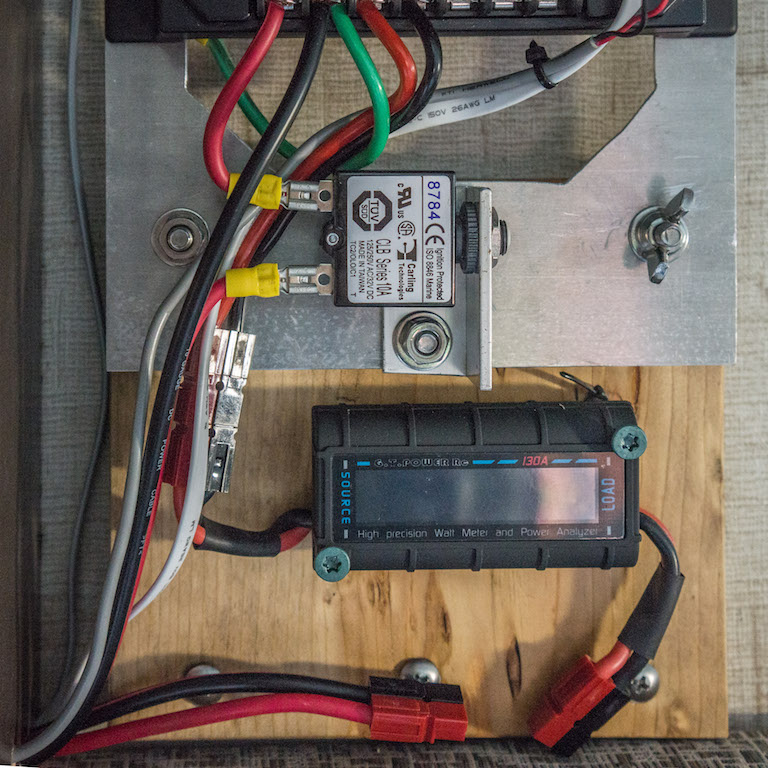 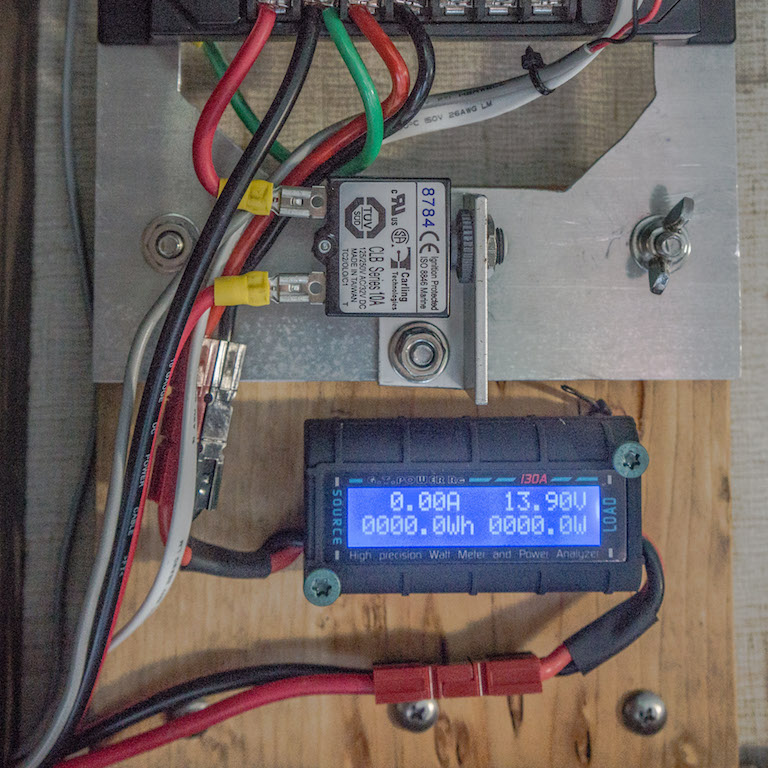 This should work as well as an inline switch with a lot less hassle.
|
|
|
Russ
2009 Toyota RAV4 V6 w/ tow package 2016 Rpod 171 HRE |
|
|
|
|
Post Reply
|
| Forum Jump | Forum Permissions You cannot post new topics in this forum You cannot reply to topics in this forum You cannot delete your posts in this forum You cannot edit your posts in this forum You cannot create polls in this forum You cannot vote in polls in this forum |


 New Solar Power System for Rpod