
|
|
Post Reply 
|
Page <1 567 |
| Author |
 Printable Version Printable Version Google Google Delicious Delicious Digg Digg StumbleUpon StumbleUpon Windows Live Windows Live Yahoo Bookmarks Yahoo Bookmarks reddit reddit Facebook Facebook MySpace MySpace Newsvine Newsvine Furl Furl Topic Search Topic Search  Topic Options Topic Options
|
voisj 
Senior Member 

Joined: 19 Jul 2016 Location: San Luis Obispo Online Status: Offline Posts: 471 |
 Topic: 3rd 180 mod - furnace heat deflector Topic: 3rd 180 mod - furnace heat deflectorPosted: 24 Nov 2016 at 2:45am |
|
After much noodling I think I came up with an answer to the furnace blowing hot air under the bed and then sucking it back in again while never heating the Pod evenly.
There is now a template on page 2 I built a 22 gauge sheet metal can with heat reflective shielding that seems to work really well. It lifts off and goes on in seconds. Total cost: $16. I've retained all the return air slots as they keep the unit cool by giving constant airflow down the sides of the furnace. And gave good flow to the small square vent in the bottom corner; which i can only call a very important cooling tunnel. When the furnace is running a good amount of air is pulled in here. I think the furnace actually runs better now only sucking in cool air and it heats the pod way more evenly. The original grill has 48.5 sq in. of opening, and this one has an opening of 5" X 10 1/2" for 52.5 sq in.
I have seen a few attempts at this in the forum and took a hard look at the unit and think I got it. Let me know if you think I missed anything. 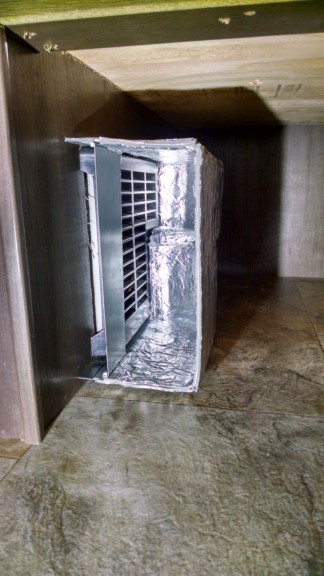 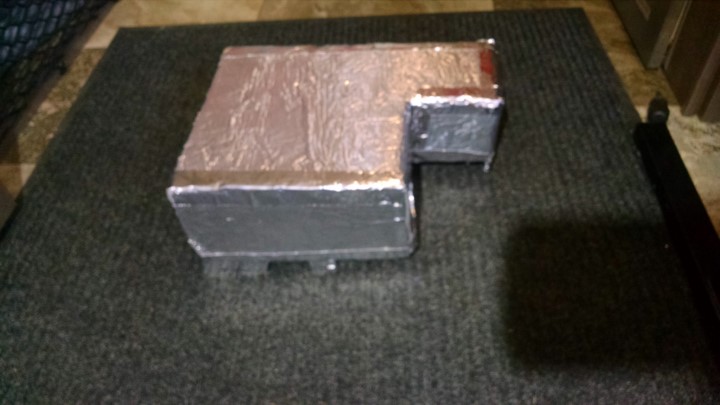 I actually ran the cardboard prototype for 10 minutes to see how it worked and it never caught fire! 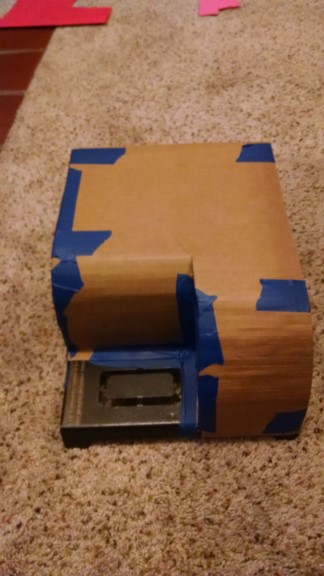 The template. This was a puzzle! (the 5 1/2" sides are acually 6") 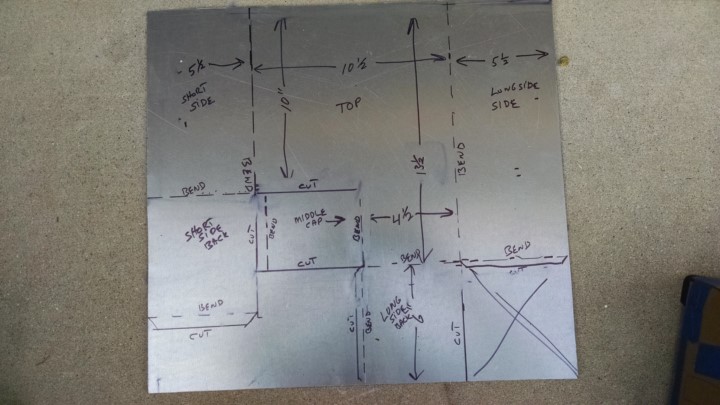 Cutting, I used tin snips and a cutting wheel. 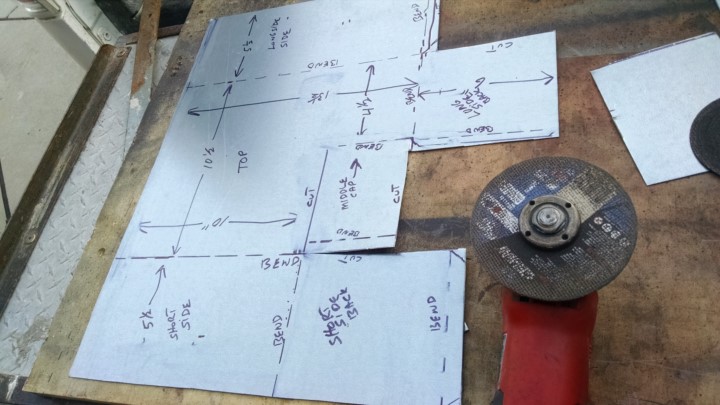 I don't have a pic of the 2 large bends, but I used a 1x6 screwed to the work bench with the metal sandwiched between it, and just bent it up. Smaller bends were done with a block of wood. 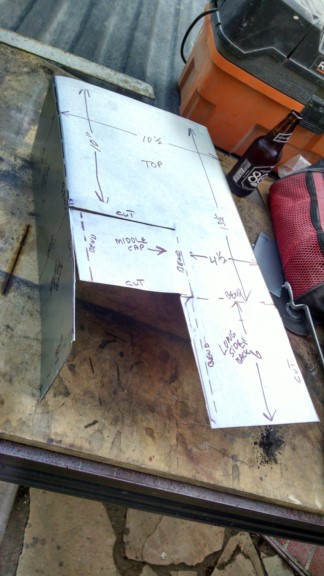 For small bends and seaming I used these: 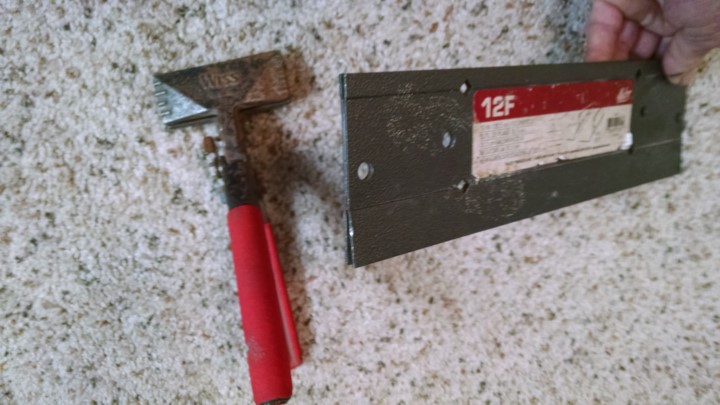 I used a pop rivet tool for all attachments. 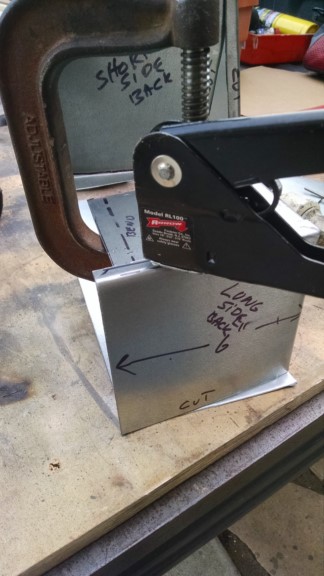 I added curved pieces for less turbulence. 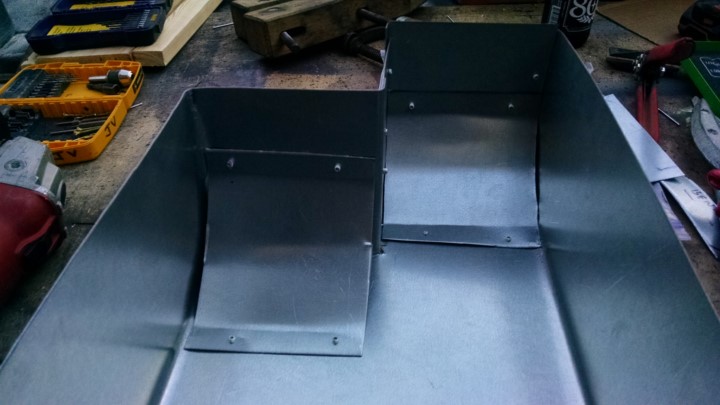 I then finished all the cuts that go around the furnace grill and covered it with heat sheild heat reflective tape. I just realized the bottom return air isn't needed as the furnace sits and mounts to the plywood cabinet. 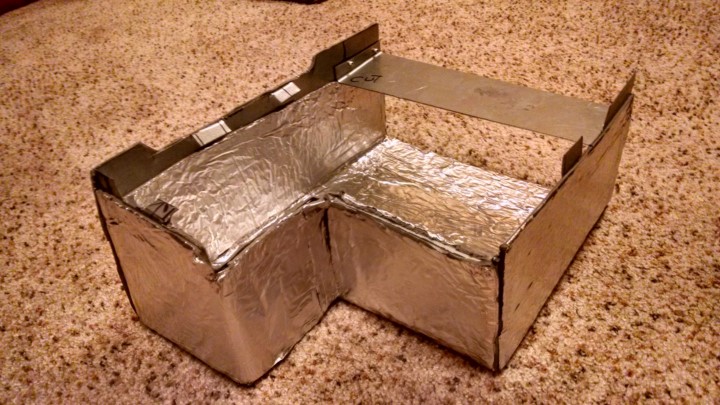 Did take 3 hours of playtime,(half of that was drawing the templet), I think a shop could do it 1. I'll ask my local guys what they would charge and let you know. Cheers! John
All my 180 mods |
|
 |
|
|
Post Reply
|
Page <1 567 |
| Forum Jump | Forum Permissions You cannot post new topics in this forum You cannot reply to topics in this forum You cannot delete your posts in this forum You cannot edit your posts in this forum You cannot create polls in this forum You cannot vote in polls in this forum |


 3rd 180 mod - furnace heat deflector
