
|
Rpod177 - Rebuild |
Post Reply 
|
| Author |
 Printable Version Printable Version Google Google Delicious Delicious Digg Digg StumbleUpon StumbleUpon Windows Live Windows Live Yahoo Bookmarks Yahoo Bookmarks reddit reddit Facebook Facebook MySpace MySpace Newsvine Newsvine Furl Furl Topic Search Topic Search  Topic Options Topic Options
|
ERS1977 
Newbie 
Joined: 30 Jun 2021 Location: ON Online Status: Offline Posts: 7 |
 Post Options Post Options
 Quote Reply Quote Reply
 Topic: Rpod177 - Rebuild Topic: Rpod177 - RebuildPosted: 19 Jun 2022 at 9:52am |
|
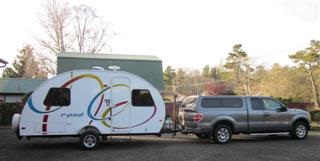
Hello Excellent Forum Folks, I bought a 2012 Rpod 177 in 2021 - the first pic is from the ad the seller had posted so you can see the model. After having it a few months I noticed a small soft bubble on the inside wall at the back. So I started to peel it back thinking I'd have a patch to do. Ya, right. Extensive mold, delamination, damage: even the floor was wet all the way thru although there was no evidence of mold below. The final pics make things look better than reality but the keen eye will be able to discern my complete lack of experience at this type of project, LOL. Basically I'm a hack, and have a tendency to bite off more than I can chew. This was a "driveway job" done under a tarp last Oct/Nov, everything but the taping and painting as it was too cold. I've just now finished up the outside with priming and painting. I then removed the rest of the roof trim (from the front half) and overlapped the entire roof to the sides with 2" Eternabond tape and reinstalled the trim with fresh butyl tape. I used 4" Eternabond to cover some of the side-to-side seams as well as the spoiler but chose to use the Eternabond web seal tape for a couple of the seams in the middle so I could paint them. This forum as been of help to me in the past so here's my contribution. Let me know if there is/was a better way to post this, or if any additional info/pics would be of benefit. -Mike                |
|
 |
|
|
Craneman
Senior Member 
Joined: 12 May 2013 Location: Tokeland,wa Online Status: Offline Posts: 387 |
Post Options
Quote Reply
Posted: 19 Jun 2022 at 11:33am |
|
All I can say is. WOW!!!,,!!!!!!
|
|
|
Jo and Gary, 2010-174,2011 F150
Jo and Gary 2010 174 2011 Ford 150 |
|
|
|
|
jato
Senior Member

Joined: 23 Feb 2012 Location: Kewadin, MI Online Status: Offline Posts: 3227 |
Post Options
Quote Reply
Posted: 20 Jun 2022 at 4:46am |
|
+2 Looks like a major makeover. It appears you used luan on the exterior. What did you cover that with? Did you use a thin layer of epoxy or fiberglass or what as it looks really good. What did you use for primer and type of paint? Thanks for posting!
|
|
|
God's pod
'11 model 177 '17 Ford F-150 4WD 3.5 Ecoboost Jim and Diane by beautiful Torch Lake "...and you will know the Truth and the Truth will set you free." |
|
|
|
|
ERS1977
Newbie
Joined: 30 Jun 2021 Location: ON Online Status: Offline Posts: 7 |
Post Options
Quote Reply
Posted: 20 Jun 2022 at 8:37am |
|
Thanks both :-)
I relied on well established specialty businesses for the paint and plywood (as opposed to the big box stores) and what they sold me was 1/8" Mahogany (not sure if this is luan?...) for the inside wall and 1/4" BCX Fir Ultra Core plywood for the outside. I had initially considered 3/8" but felt it wasn't bendable enough for the arc I needed.... The paint shop recommended Aqua Lock primer and a high quality exterior paint (Benjamin Moore) - both are latex products but recommended nonetheless. I anticipate (and don't really mind) if a fresh coat needs to be applied every year. If that doesn't suffice, I'll look into an epoxy coat...I hope this doesn't become necessary as the one time I worked with fibreglass and epoxy was, I hoped, to be my last time.
|
|
|
|
|
listeur
Newbie

Joined: 08 May 2023 Location: colorado Online Status: Offline Posts: 7 |
Post Options
Quote Reply
Posted: 11 May 2023 at 3:09pm |
|
going through the unenviable task of rebuilding the entire rear section due to water ingress at the plastic thingy with the lights. any tips for the bonded wood curve replacement?
|
|
|
listeur@gmail.com
|
|
|
|
|
listeur
Newbie
Joined: 08 May 2023 Location: colorado Online Status: Offline Posts: 7 |
Post Options
Quote Reply
Posted: 11 May 2023 at 3:15pm |
|
going through the unenviable task of rebuilding the entire rear section due to water ingress at the plastic thingy with the lights. any tips for the bonded wood curve replacement?

|
|
|
listeur@gmail.com
|
|
|
|
|
ERS1977
Newbie
Joined: 30 Jun 2021 Location: ON Online Status: Offline Posts: 7 |
Post Options
Quote Reply
Posted: 11 May 2023 at 8:15pm |
|
Hey There Listeur,
Based on the fact that my pod is a 2012 and the best I figured I could get would be 5-7 years out of it (10 if I was *really* lucky), I decided not to get anything professional done to the bonded wood curve. So, no exterior fiberglass coating or anything. I simply finished the wood surface with top quality primer & paint and will just keep it painted - hopefully it lasts ok. I'm happy with the plywood thicknesses I used (see prev entry) so I wouldn't chg those. Some other points I can think of: - I did not reinstall the "head-banger box". Good riddance to that. - I used a chisel to sever the rotted section of the 1 1/4" plywood arced strips from the good section. For my unit, it was about a foot down from the top of the open space in your pic. - After unscrewing the severed & rotted plywood strips, I used them as a template to cut two arcs of 3/4" plywood which I already had. I then glued and screwed them together. This saved me from buying 1 1/4" plywood just to make two strips. - I then cross cut the 1/8" plywood sheet to a length that allows it to overlap the aluminum side frames and then mounted my new 1 1/2" plywood arc strip to each side and screwed them into the aluminum side frames. The inside wall is now sandwiched between the plywood strips and the aluminum frame. - I installed an extra cross member in the places where the wall seams would be. - After making sure the wiring was run for the exterior spoiler and internal dome lights, I installed the insulation and screwed down the 3/8" exterior grade plywood wall to the plywood arc strips and cross members. - I cut the plywood sheets so that the rear window would not be at a seam. Don't forget to keep the four black plastic corner pieces used to secure the corners of the rear window. - I replaced as much of the floor as I could get at, prior to installing the curved walls. That's all that comes to mind at the moment (for the curved walls). If anything else pops into my head, I'll post it. If you were within driving distance, I'd be of more use. But I will help you remotely as much as I can so don't hesitate to reach out again. I have close to 200 pics so if you'd like any of them, lemme know and I'll email directly to you. Let me know how it goes, dude Best of luck! Mike |
|
|
|
|
listeur
Newbie
Joined: 08 May 2023 Location: colorado Online Status: Offline Posts: 7 |
Post Options
Quote Reply
Posted: 11 May 2023 at 9:09pm |
|
ah that makes sense. I will have a look for the plywood and sandwich them together. I beliebe I have enough of the rotted arc to create a template but will do some testing before building the frame. I appreciate your help and will send pics as I build this thing back.
The wife wants to use a thin aluminum sheet instead of the plywood on the outside and we will take or time to test different ideas. This should be much sturdier than the cheap materials rpod used and should help keep the weight down. In addition i will be using stainless screws and quality components such as marine grade wood and plywood for this- probably will outlast the rest of the unit but i'd rather overengineer it just because I can. |
|
|
listeur@gmail.com
|
|
|
|
|
Post Reply
|
| Forum Jump | Forum Permissions You cannot post new topics in this forum You cannot reply to topics in this forum You cannot delete your posts in this forum You cannot edit your posts in this forum You cannot create polls in this forum You cannot vote in polls in this forum |


