|
|
Post Reply 
|
| Author |
 Printable Version Printable Version Google Google Delicious Delicious Digg Digg StumbleUpon StumbleUpon Windows Live Windows Live Yahoo Bookmarks Yahoo Bookmarks reddit reddit Facebook Facebook MySpace MySpace Newsvine Newsvine Furl Furl Topic Search Topic Search  Topic Options Topic Options
|
fionasol 
Newbie 

Joined: 15 Oct 2014 Location: United States Online Status: Offline Posts: 13 |
 Topic: 177 Overhead Bed Cabinet (Headbanger) Mod Topic: 177 Overhead Bed Cabinet (Headbanger) ModPosted: 09 Apr 2015 at 10:41am |
|
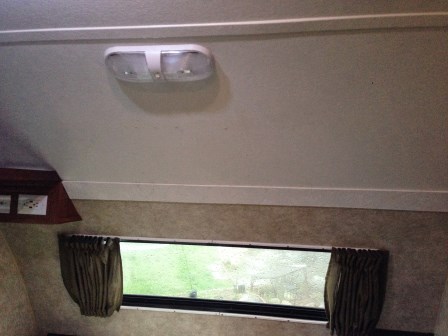
Now that the last of the trim is cut, the headbanger cabinet mod is mostly done! Still need to caulk and hide the nail heads, but close enough for posting. It's very possible that I forgot some steps in this recap, since I did this slowly over the course of a few weeks. Here's the original cabinet, over the queen bed in the 177.
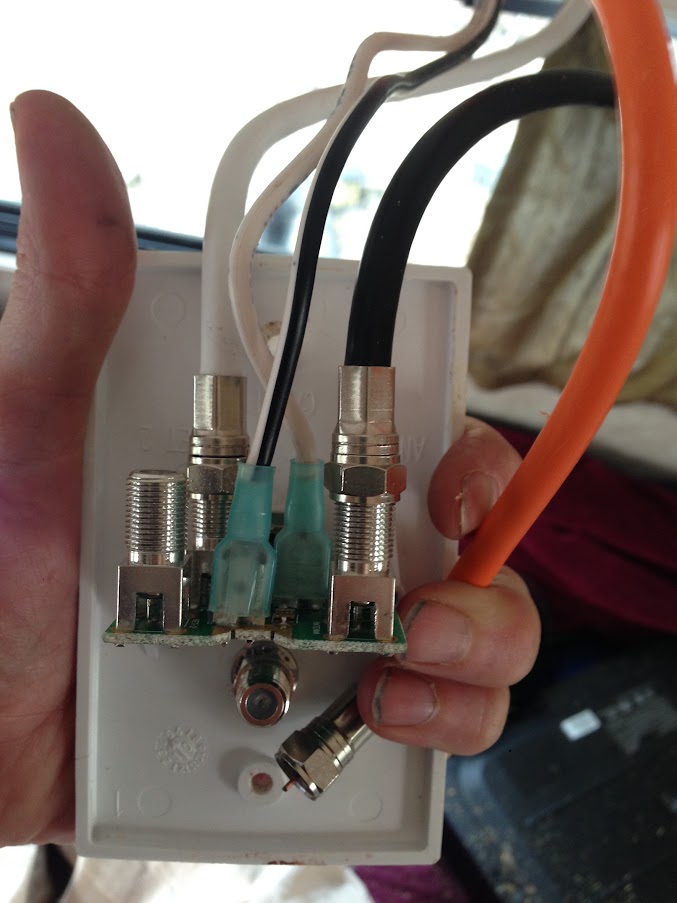
Folks with the overhead entertainment cabinet know that the stock TV screen will turn to be viewed in bed, but doesn't tilt, so can't comfortably be watched from the bed. And the 9 inch screen is so small that watching it from the dinette seats is kinda pointless. We're not big TV watchers to begin with, so we didn't care to upgrade the screen, especially in its original location. It was really the placement of the cabinet over the bed that was bothersome, in the way of ease for sitting in the bed, or for the inside person to have any chance of stepping over the outside sleeping person in the middle of the night. So, I decided to remove it, and relocate the wiring to the foot of the bed--which for us is at the bathroom end of the bed. And, thanks to Jarpod, who posted about moving his headbanger, and answered some questions I had! His post is at http://www.rpod-owners.com/forum_posts.asp?TID=5164&PID=58015#58015 What I did: Shut down shore power and disconnected battery power to the pod, then disconnected the electrical and cable outlets in the cabinet. Miraculously, I remembered to snap a pic of the back of the cable outlet with all the wires still plugged in, for future reference.
Removed the cabinet **important note! Before unscrewing those screws, remove the trim and bottom piece of wood from under the cabinet! There are some more screws hiding there which will cause great angst if you've removed all the other screws first!!* Shifted the wires & cables Wow, there were buckets of sawdust and wood chunks under there! There was enough wire/cable to reach to the bathroom end of the bed. Jarpod's mod moved the wires to the other end of the bed, and he needed to add extra wire. So I was lucky!
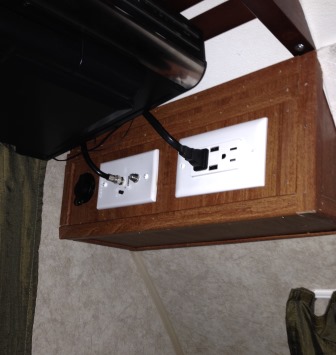
--trimmed out a new hole at the edge of the ceiling panel to all the wires to get through, then nailed the edge of the paneling back down. New electrical box:
I managed to get it all solidly attached back to the wall, and reused the trim to hide all the screw holes attaching it to the wall. Oh! And before fully closing up this box, I added a 12v plug by tapping into the antennae booster wiring. Th3 12v plug fit very nicely into the existing round hole that was already cut in the section of cabinet I was reusing. Please note, that we will only be using that new 12v plug for changing small electronics, nothing with an inverter. I also upgraded the electrical receptacle to one that had USB sockets. I had a piece of 1/8" thick wood cut wide enough to hide the holes from the old wire location (4") and long enough to reach from the new box to the head of the bed (58"). I found some paintable wallpaper with a similar texture to the ceiling, covered the trim, and nailed it to the wall.
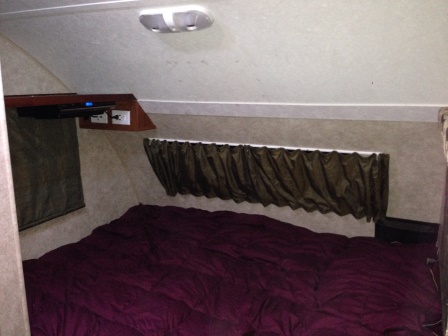
To finish this mod off, I added the infamous Lowes shelf over the window at the foot of the bed. I used hollow door anchors to attach the shelf to the walls where I didn't find other support. Then I hung the old tv from the shelf. It's unlikely we'll use the tv much, but it's way less obnoxious in this new location. And, it is more comfortable to sit in bed and view the screen in the new location.
The new wider trim hid the biggest holes from the old cabinet location, but you can still see the screw holes in the ceiling panel. I did clean up the edges and caulk the holes, but they're still visible. Also, the brown caulking from the old cabinet was a beast to get off the white paneling. it's still faintly stained. I may decide to trim those holes better, fill and repaint that whole panel. Or find some fun art to hide that section of the wall/ceiling. |
|
 |
|
|
West Virginia Girls
Newbie
Joined: 15 Sep 2013 Online Status: Offline Posts: 30 |
Posted: 10 Apr 2015 at 6:15pm |
|
We'd love to do this too!!!
|
|
|
Billie & Debbie
Furry friends: Jake & Mollie 2013 RPOD 177 2015 Toyota Tacoma TRD |
|
|
|
|
Leo B
podders Helping podders - pHp 

Joined: 13 Jan 2012 Location: Lyndonville, VT Online Status: Offline Posts: 4517 |
Posted: 10 Apr 2015 at 7:27pm |
|
Nice job!
|
|
|
Leo & Melissa Bachand
2017 Ford F150 2021 Vista Cruiser 19 csk Previously owned 2015 Rpod 179 2010 Rpod 171 |
|
|
|
|
fionasol
Newbie
Joined: 15 Oct 2014 Location: United States Online Status: Offline Posts: 13 |
Posted: 09 Oct 2015 at 1:21pm |
|
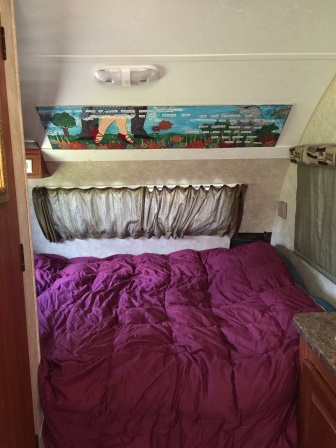
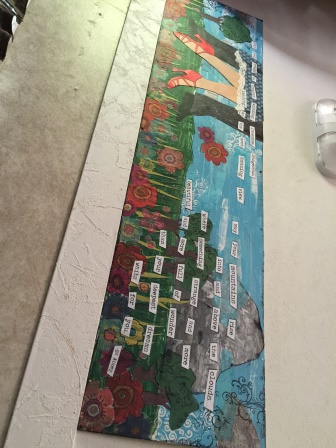
One last update on this mod. Whenever I looked at the ceiling from the bed in the Pod, I was still bothered by the patching job I did from the old head-banger. So I bartered some of my handmade pottery for this custom piece from an artist friend. She did a fantastic job.
Our friend also knows us as swing dancers, so she created our feet dancing through nature. There are also bits of maps hiding throughout the background of the painting. "May your trails be crooked, winding, lonesome, dangerous, leading to the most amazing view. May your mountains rise into and above the clouds...where something strange and more beautiful and more full of wonder than your deepest dreams waits for you. "
So happy to have this lovely bit of art traveling along with us. I think it's going to inspire me to reread some of my favorites by Abbey. If you haven't read any of his books...you should!
The full quote that we clipped to fit the space on the art piece is even better in its entirety: "May your trails be crooked, winding, lonesome, dangerous, leading to the most amazing view. May your mountains rise into and above the clouds. May your rivers flow without end, meandering through pastoral valleys tinkling with bells, past temples and castles and poets' towers into a dark primeval forest where tigers belch and monkeys howl, through miasmal and mysterious swamps and down into a desert of red rock, blue mesas, domes and pinnacles and grottos of endless stone, and down again into a deep vast ancient unknown chasm where bars of sunlight blaze on profiled cliffs, where deer walk across the white sand beaches, where storms come and go as lightning clangs upon the high crags, where something strange and more beautiful and more full of wonder than your deepest dreams waits for you --- beyond that next turning of the canyon walls." |
|
|
|
|
CpLp95
Newbie

Joined: 05 May 2021 Location: NH Online Status: Offline Posts: 1 |
Posted: 06 May 2021 at 7:00am |
|
Where did you find the wallpaper to match the ceiling texture?
|
|
|
2014 178
2021 Honda Ridgeline |
|
|
|
|
Post Reply
|
| Forum Jump | Forum Permissions You cannot post new topics in this forum You cannot reply to topics in this forum You cannot delete your posts in this forum You cannot edit your posts in this forum You cannot create polls in this forum You cannot vote in polls in this forum |


 Mod")


 177 Overhead Bed Cabinet (Headbanger) Mod