ouR escaPOD mods
Printed From: R-pod Owners Forum
Category: R-pod Discussion Forums
Forum Name: Podmods, Maintenance, Tips and Tricks
Forum Discription: Ask maintenance questions, share your podmods (modifications) and helpful tips
URL: http://www.rpod-owners.com/forum_posts.asp?TID=7712
Printed Date: 23 Apr 2024 at 10:36pm
Software Version: Web Wiz Forums 9.64 - http://www.webwizforums.com
Topic: ouR escaPOD mods
Posted By: StephenH
Subject: ouR escaPOD mods
Date Posted: 07 Apr 2016 at 10:15pm
Rather than post my mods all over the place, I decided to start a topic so I could list all my mods. I think it will be easier to keep track of which ones I posted this way.  We purchased our R-Pod 179 in December. One of the first modifications I did was to install a shelf above the queen bed. Since I use a CPAP (Continuous Positive Air Pressure) machine for sleep apnea, I needed a place to put the machine. Since we were going to be dry camping for a good part of the trip, I also wanted to be able to run it on 12 Volt power, which meant that I also needed to install a 12 Volt outlet. These are some pictures of those modifications.  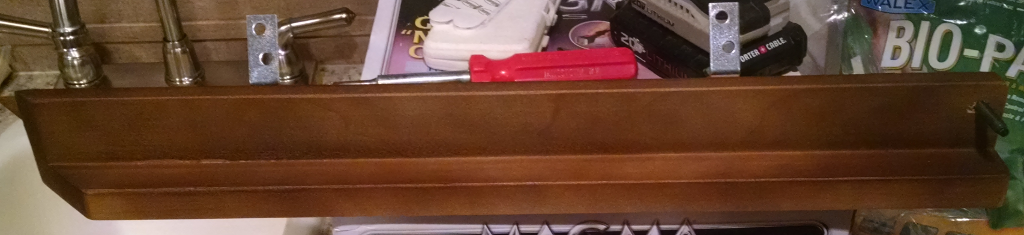 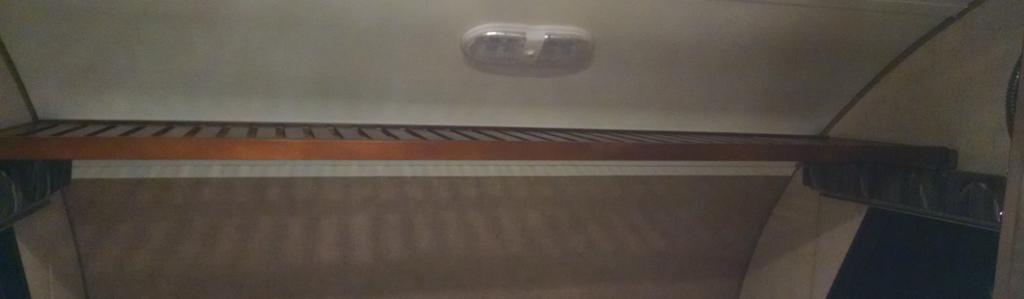 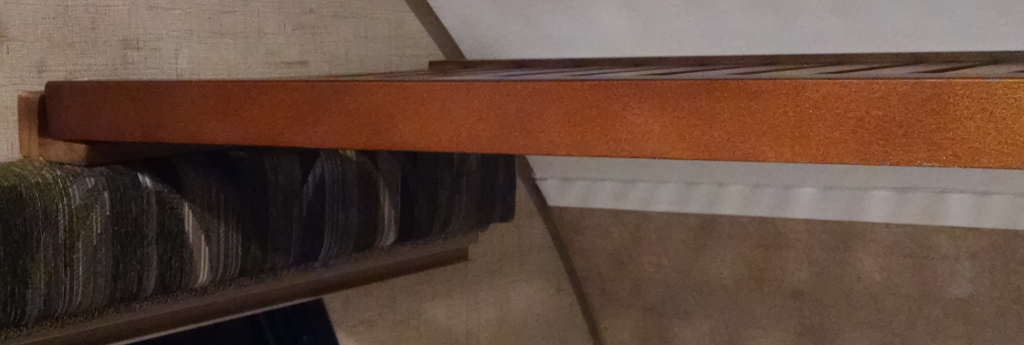 What does not show are the "L" brackets, one leg of which slips down behind the valence. They are held in place with Command strips. That is probably not needed as the shelf itself helps keep them in place also. Also, there is bolt going up through the bottom of the brackets and a hole in the front end of each shelf that slips over that bolt. This keep the shelf from shifting while we are on the road. Now for the 12 Volt outlet: 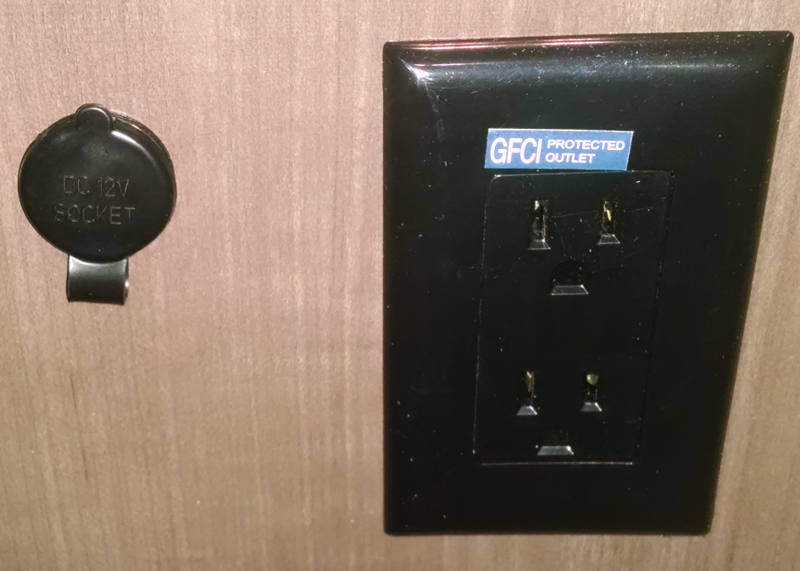 This is version one. Stay tuned for version two. ------------- StephenH Happy is the man that findeth wisdom,... http://www.rpod-owners.com/forum_posts.asp?TID=7712 - ouR escaPOD mods Former RPod 179 Current Cherokee Grey Wolf 24 JS |
Replies:
Posted By: jato
Date Posted: 08 Apr 2016 at 6:30am
|
Very nice, you may find yourself being hired by FR on a consultation basis.
------------- God's pod '11 model 177 '17 Ford F-150 4WD 3.5 Ecoboost Jim and Diane by beautiful Torch Lake "...and you will know the Truth and the Truth will set you free." |
Posted By: StephenH
Date Posted: 08 Apr 2016 at 9:47am
|
Time for the next mod. On our first major trip, we stayed at the Desert Eagle RV park on Nellis AFB in Nevada. There was an RV owner selling a collapsible ladder. It was a good price so we bought it. That led to the question of how to store it. We put up with it being in the way until we got home. That gave me time to think about how to do this modification. First step was to get a 5x5" post section from Lowe's Home Improvement. That was big enough to hold the collapsed ladder. The problem was the length. Since the R-Pod 179 does not have a full-width storage compartment, there was no way for the ladder to fit--or was there? 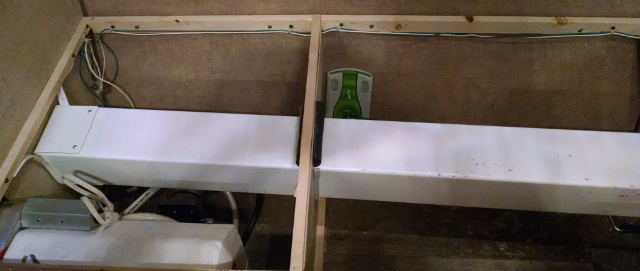 The answer was to make a hole through the partition so the tube could be installed full width. This one shows how I capped off the one end so that the ladder would not shift and hit the inside wall. I took a section from the excess length and cut it, then used a heat gun to heat it so I could bend it around the end. Finally, I attached it with screws. I used plastic strapping material to hang the tube as close to the top as I could get it so I could still use the space underneath for storage. 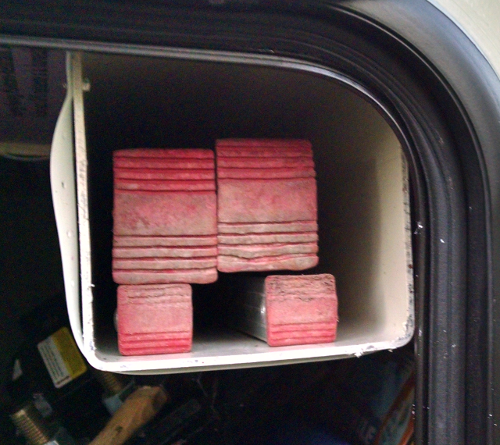 This shot is from before I fabricated a cover for the hatch end. The ladder rides quite well there. I can now get to the top of the slide-out to make sure it is clean before retracting it. While I had things apart, I also made this modification:  The insulation is 1" foam, which I found at the local Home Depot. It is simply cut to shape, slightly large and pushed into place. It fits tightly enough by friction to stay there. We had the opportunity to test it last weekend. I did notice a difference from when it was just the plywood. Well, to finish the job, I hinged the two platform boards. The back one is screwed down, but the front one got a finishing touch on the edge to keep me from getting more splinters. It lifts up to access the next modifications. 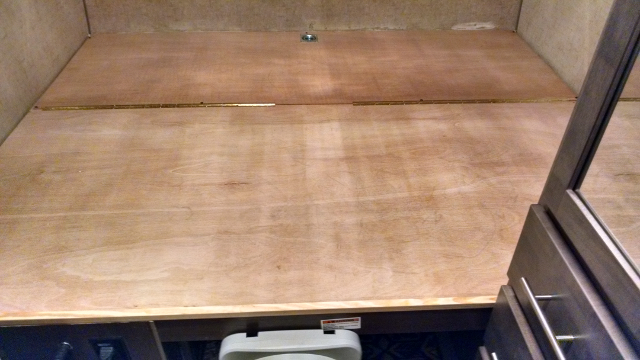 ------------- StephenH Happy is the man that findeth wisdom,... http://www.rpod-owners.com/forum_posts.asp?TID=7712 - ouR escaPOD mods Former RPod 179 Current Cherokee Grey Wolf 24 JS |
Posted By: Retroactive
Date Posted: 08 Apr 2016 at 9:52am
|
So the foam insulation sits in between the joists shown in the first pic? Putting insulation in that area is a really good idea, in my 171 the bed compartment takes a lot longer to heat up. ------------- |
Posted By: StephenH
Date Posted: 08 Apr 2016 at 10:12am
|
While I had the bed platform apart for the above modifications, I thought that there was a lot of wasted space. The framework for the bed was obviously the same as what would be used if there were a dinette in that space. However, what was useful for a dinette meant that there was wasted space when it is used for a bed. Because the furnace is also located there, the whole space is unusable when the furnace is running. I thought, why not divide the space and make a compartment? That would at least give me some usable space which would not be overheated by the furnace. In addition, there was space on the wardrobe side which was not usable due to wiring being run in that area. However, there was also the potential to add storage there also. 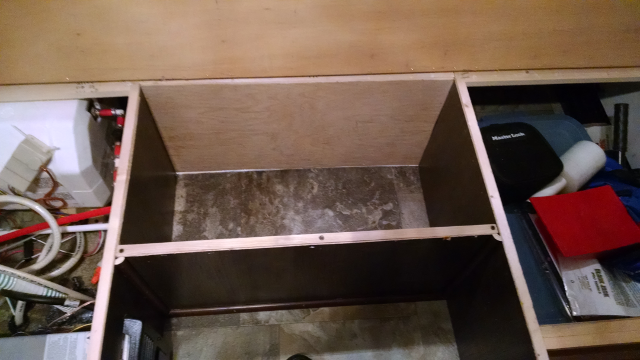 I removed the panel at the back as carefully as I could as I wanted to reuse it. It was glued as well as stapled, so it did splinter a little. I replaced the panel with plywood and used stock to build a framework onto which I remounted the original panel. To finish, I got some quarter-round molding which did not quite match the finish, but which was not going to be easily seen anyway, so the color difference is not noticed. I now have usable space where there was none. The furnace still operates properly as I made sure there was clearance for air circulation. Speaking of that, I adjusted the position of the furnace as the person who installed it had it slid in too far, which meant that the cover was not in the best position. The installer had drilled extra holes instead of using the factory holes to fasten it. It now uses the factory mounting holes and the cover fits better. I am sure it also works more efficiently when installed as designed. The other space had wiring. I constructed both a frame for the end and a frame for a new floor which covered the wiring. The wiring could have been routed differently, which would have made this usable from the factory, but it wasn't. I now have a small compartment here also. 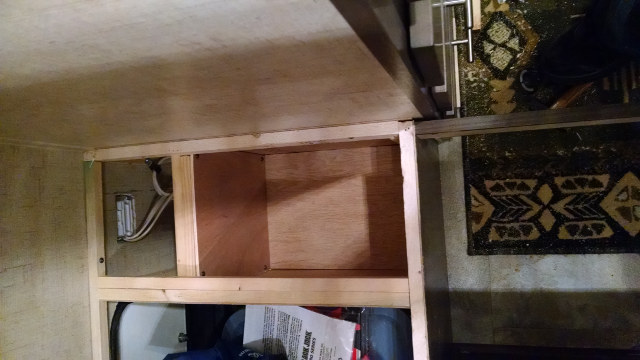 While I was at it, there was the dinette. The right side had a storage compartment already. However, the cover on the left side was screwed down. When I remove the screw to see why, I saw plumbing and wires. However, I also though there was some space that could be used here also. I boxed in the plumbing and wires and made a usable space large enough to hold my towing mirrors and some other small items. 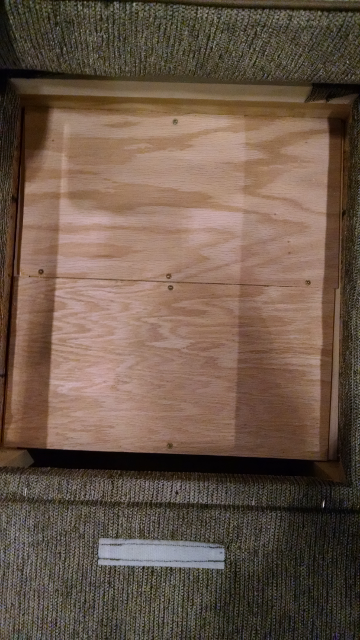 The plywood covers can be easily removed to provide access to the plumbing and wiring. ------------- StephenH Happy is the man that findeth wisdom,... http://www.rpod-owners.com/forum_posts.asp?TID=7712 - ouR escaPOD mods Former RPod 179 Current Cherokee Grey Wolf 24 JS |
Posted By: StephenH
Date Posted: 08 Apr 2016 at 10:16am
Yes. It does. One last step I did when done was to take some insulating foam and apply it along the end of the platform which is at the front of the R-Pod. After putting the handle on that side, I realized that the insulation would get in the way of opening that up to get to the fresh water pump. I can open it if needed, but as long as I can do what I need to without opening it, I will do so. ------------- StephenH Happy is the man that findeth wisdom,... http://www.rpod-owners.com/forum_posts.asp?TID=7712 - ouR escaPOD mods Former RPod 179 Current Cherokee Grey Wolf 24 JS |
Posted By: Retroactive
Date Posted: 08 Apr 2016 at 10:38am
|
Thanks. Insulation is key up in our area, weather is too unpredictable in MA as it has a mind of it own. We either get the warm weather pushing up from your way, or we get the frigid weather from Montreal. Having a shift from 72F to 32F can happen in less than 24 hours in MA, during the Spring and Fall seasons. It's why a lot of the "Pilgrims" who landed in MA didn't survive the first winter, they all starved or froze to death. I can only imagine them heading out to hunt on a 60F day in March, after the first spring thaw, only to be met with a 20F night while they were 5 miles from the village... ------------- |
Posted By: StephenH
Date Posted: 09 Apr 2016 at 7:11pm
This is a simple one. The panels in the kitchen cabinet closest to the door of the 179 hide wasted space. There is an outlet and the gas line for the stove. However, the panels cover much more space than needed. For the top shelf, simply trimming the length of the panel allowed me to move it closer to the cabinet wall. I needed to strap up the wires and gas line better, but once having done so, I recovered usable space.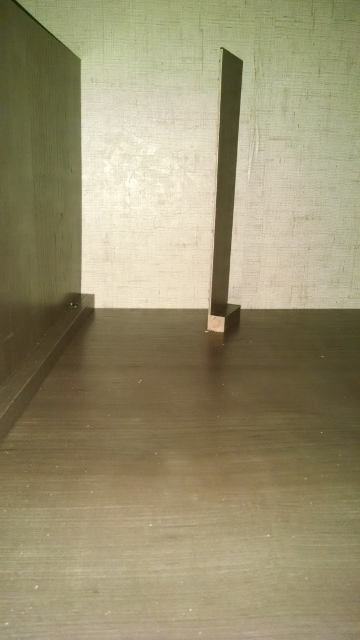 The partial piece is at the original location. The bottom shelf was trickier. I could not really gain much there until I thought to split the panel cut a reinforcing piece to hold the two parts at an angle, and then install it. After doing so, I also gained space on the bottom. 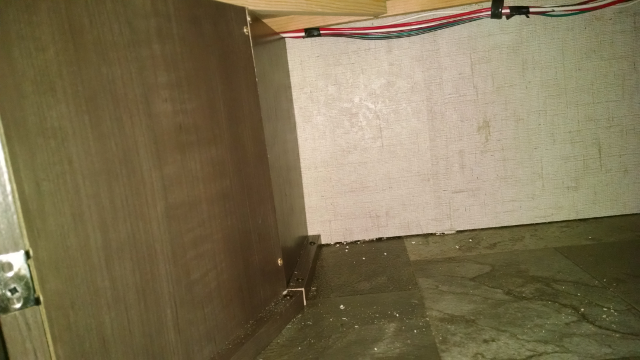 Another modification was to fabricate locking brackets for my batteries. I have dual six Volt batteries. The material is anodized strap aluminum purchased from Lowe's. Since I don't have a proper bending brake, I used a vice and a rubber mallet to bend them. They go around the case and under the welded-on battery cross-members. I probably could have figured out a way to lock it with one lock on each one, but I was working fast to get this done before our first big trip. After I returned, I redid the starboard battery because it had a tendency to rub against the trailer. That is why you will see a rubber bumper. On the port side, it was not needed. That was the second one I made with the experience from making the first one.  A shot of the underside:  ------------- StephenH Happy is the man that findeth wisdom,... http://www.rpod-owners.com/forum_posts.asp?TID=7712 - ouR escaPOD mods Former RPod 179 Current Cherokee Grey Wolf 24 JS |
Posted By: StephenH
Date Posted: 09 Apr 2016 at 7:26pm
|
This one is the door window. It is this one: http://www.amazon.com/R-pod-Teardrop-Trailer-Camper-Windows/dp/B013TFWWW6?ie=UTF8&psc=1&redirect=true&ref_=oh_aui_detailpage_o06_s00 - http://www.amazon.com/R-pod-Teardrop-Trailer-Camper-Windows/dp/B013TFWWW6?ie=UTF8&psc=1&redirect=true&ref_=oh_aui_detailpage_o06_s00 - Door Window  It took a lot of measuring and re-measuring before I got up the nerve to cut the opening. I still had to file out a bit more as I was trying not to make the opening too big. Before cutting, I covered the area to be cut with masking tape. The marks were made on the tape so I would not have to try to remove marks from the door when finished. I cut from the inside, figuring that the jigsaw blade would be less likely to chip the outside if the cut were made from the inside. I was right. The hardest part was getting the screws that fasten the trim ring to the window started. A power driver helped greatly. I am still glad that extra screws were provided as I did have problems with a few of them. Given that the window had a rubber gasket all the way around, I did not use additional sealant. So far, it seems to be working quite well. I have not noticed any leakage. I did remove an aluminum clip that held the seam of the trim ring. The plain aluminum color did not look good against the black trim ring. I had to touch up the trim ring with some black paint. I also used black silicone sealant to fill the small gap at the trim ring seam. The clip was thick enough that it would have prevented the trim ring from sitting flat against the door at that point. I did not like that. My review of the product addressed that issue. If there had to be a clip, at least it could have matched the trim ring. ------------- StephenH Happy is the man that findeth wisdom,... http://www.rpod-owners.com/forum_posts.asp?TID=7712 - ouR escaPOD mods Former RPod 179 Current Cherokee Grey Wolf 24 JS |
Posted By: StephenH
Date Posted: 10 Apr 2016 at 8:39pm
|
This is one that I just finished. I was looking at commercial slide-out covers, and decided I did not want to pay that much. Since my wife has a lot of sewing equipment, including an industrial strength Juki, I thought I would try my hand at making one. The first step was to figure out what I could use for the rail to attach it. I remembered how my parents' trailer had an awning that used a rope. I looked at what I had on hand, and after a couple of attempts, I found some that was of a good quality and the correct diameter to slide into the rail. The next step was to find some suitable fabric. We have a store called "Mill Outlet Village" near us. I found some urethane coated rip-stop fabric that seemed heavy-duty enough for the task. I purchased enough of it for the length of the slide-out plus a little extra. Third was to cut the fabric. I found a place to lay it out and used a rotary cutter to cut the length I wanted and cut the width wide enough to allow for both the rope to be sewn in and to allow for a double-folded seam on the outer edge, wide enough for grommets to be installed plus a little extra. It was good that I did, as I later needed that extra space. The fabric was cut and the rope sewn in to the distance between the rain gutter ends. The cut allowed the installation, but extra fabric was left for folding the side seams. It turns out I had left a little too much, so I later had to undo some stitching and re-cut and re-fold one end to get the length right. After installing grommets, I used rope and bungee cords to attach the cover to the slide-out. Initally, the outer edge was not stiff enough. I solved that by getting some fiberglass marker poles and copper tubing. The poles were cut so that end-to-end, they are a little wider than the cover. The copper tube was cut and glued to the middle segment on both ends. The two outer pieces slide into the other end of the tube to make one long, strong, flexible pole that fits in the folded fabric with the grommets. Now for a couple of pictures. 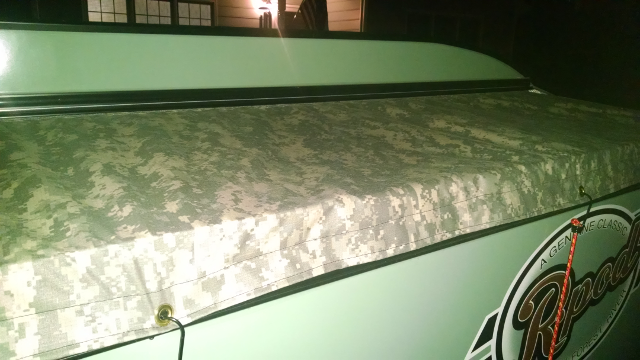 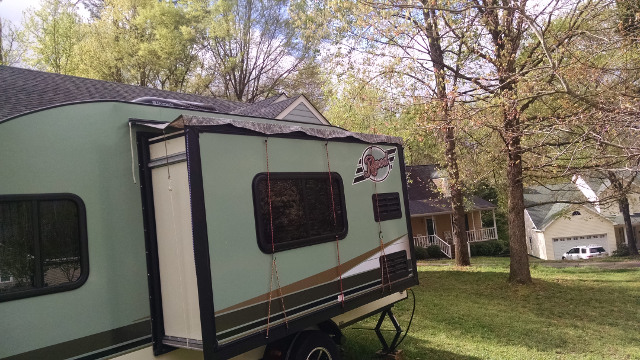 The fiberglass pole was added after this picture was taken. I will have to get a good shot of it to post later. I also realized with this short a slide-out, the bungee cords and rope on the two ends was not needed, as this isn't wide enough for wind to be a problem. Edit: Here is a shot with the poles inserted. The poles are 3 solid fiberglass marking stakes like those used for driveways, etc. I got them at Lowes. The end two are full-length. The center one is cut to a suitable length. Copper tubing is glued to both ends of the center rod. The two end rods slide into this ferrule to make one longer stiff rod which was fed through an opening in each end. It really makes a difference, keeping the cover tight and allowing any water to drain better. 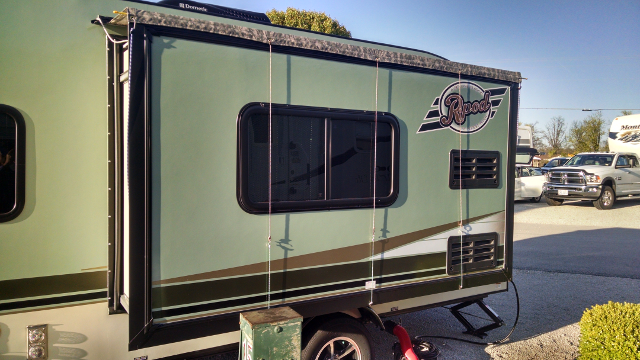 ------------- StephenH Happy is the man that findeth wisdom,... http://www.rpod-owners.com/forum_posts.asp?TID=7712 - ouR escaPOD mods Former RPod 179 Current Cherokee Grey Wolf 24 JS |
Posted By: Appocalexx
Date Posted: 11 Apr 2016 at 5:08am
|
I really like that slide out cover.
Are you planning on having to install and remove each time you set up and pack up or are you going to make a storage above the railing to fold it into? Also do you plan on securing it to the slide out a different way than the bungee cords? It looks great but those bungee cords are an eye sore and may even rub some nasty marks into your slide out on a windy camp trip over time. Subdidid keep up the good work. ------------- |
Posted By: StephenH
Date Posted: 11 Apr 2016 at 11:37pm
For now, I am having to remove each time. Eventually, as soon as I can figure out a way to do so, I will make a way to stow in place. I switched the three middle ones from straight bungee cords to parachute cord for most of the length and small bungees at the bottom. It looks much better. I will post updated pictures as soon as I can. I did not have time to do so as I had to get ready to leave on a trip. ------------- StephenH Happy is the man that findeth wisdom,... http://www.rpod-owners.com/forum_posts.asp?TID=7712 - ouR escaPOD mods Former RPod 179 Current Cherokee Grey Wolf 24 JS |
Posted By: StephenH
Date Posted: 16 Apr 2016 at 2:27pm
|
Here is the promised picture of the improved slide-out cover which shows how adding the fiberglass rod stiffens the end and makes the cover lie flatter and more secure. It also shows the parachute cord and short bungee cords used to secure it by the three center grommets. The two ends are still secured by long bungee cords. ------------- StephenH Happy is the man that findeth wisdom,... http://www.rpod-owners.com/forum_posts.asp?TID=7712 - ouR escaPOD mods Former RPod 179 Current Cherokee Grey Wolf 24 JS |
Posted By: Leo B
Date Posted: 16 Apr 2016 at 2:45pm
|
Really nice work!
------------- Leo & Melissa Bachand 2017 Ford F150 2021 Vista Cruiser 19 csk Previously owned 2015 Rpod 179 2010 Rpod 171 |
Posted By: Retroactive
Date Posted: 16 Apr 2016 at 5:06pm
|
I like the touch o' camo. The one you picked fits in nice with those current gen colors you and I have on the out pods. ------------- |
Posted By: StephenH
Date Posted: 16 Apr 2016 at 9:45pm
|
Thank you. When I saw the camo fabric, I thought it would complement the colors of the Rpod. I have enough fabric to try to make a small awning for the other side. I'm not looking to make an R-Dome or a Visor clone. I just want something big enough to allow me to open the door when it is raining and not get soaked. I have not yet decided if I am going to try to make it full-length or just have a short one that goes from the back to just in front of the wheel well. Then again, I may go to Mill Outlet Village again and see if they still have the roll. If so, I may get enough to construct a wider, full-length awning. Edit: Mill Outlet Village still had the fabric and it was still $3.95/yard.  I bought 6 yards, which will be more than enough for the awning. I had forgotten to take a measurement before we went, so I wanted to be sure to have enough. I should have enough left over for a couple of other projects. I bought 6 yards, which will be more than enough for the awning. I had forgotten to take a measurement before we went, so I wanted to be sure to have enough. I should have enough left over for a couple of other projects.I'm glad we got the industrial type Juki sewing machine. I don't think my wife would take too kindly to me using her Pfaff for projects like this.  ------------- StephenH Happy is the man that findeth wisdom,... http://www.rpod-owners.com/forum_posts.asp?TID=7712 - ouR escaPOD mods Former RPod 179 Current Cherokee Grey Wolf 24 JS |
Posted By: StephenH
Date Posted: 20 Apr 2016 at 9:45pm
|
The latest mod is a very simple and inexpensive one. Parts needed: 1 cable that has a stereo 1/8" plug on one end and separate RCA connectors (red and white) on the other end. The cable needs to be long enough to reach from the television's headphone outlet to the cover plate for the antenna switch and then to the back of the stereo. In my case, a 6 foot cable is long enough for the 179. 1 grommet (Lowe's part # 423487), split on one side to slide over cable. 1 drill bit, 1/2" 1 file (as needed). Instructions: Remove stereo from the wall. Check behind the antenna plate to ensure no wires are where you will be drilling. Drill a 1/2" hole between the bottom connector and the bottom screw. Continue on to drill through the partition. Remove the cover plate and use the file if needed to ensure the hole behind is smooth. In my case, it was more like a semicircular depression in on the botttom of the previous opening for the cover plate. There is a thick backing at that point. Place the rubber grommet on the cable. Feed the plug for the television end through the hole in the faceplate and squeeze the grommet through until it is seated and even on both sides of the faceplate. Fasten the faceplate to the wall with the screws you removed earlier. Plug the RCA connectors into the input terminals on the back of the stereo unit. As you look at it from the back, they are the ones on the left. Connect red to red (right channel) and white to white (left channel). Make sure you have enough cable to reach the television's headphone outlet. Plug the cable in there. Turn the television and stereo on. Push the AUX button once. You will now have sound through the stereo system. Adjust the cable and fasten it to run with the other cables. I loosened the zip ties and ran it through there. I then used a velcro tie for the middle. Fasten the stereo unit back in place. You are done, and you will enjoy the sound output so much better. It will have a richer sound instead of the tinny sound the TV speakers have. 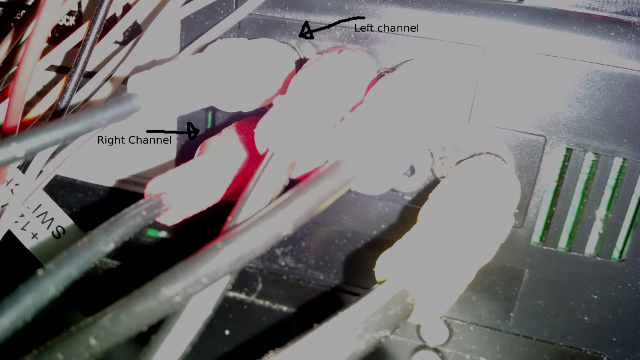 Sorry about the bleached-out picture. It was hard getting my hand in there and trying to see what I was doing. 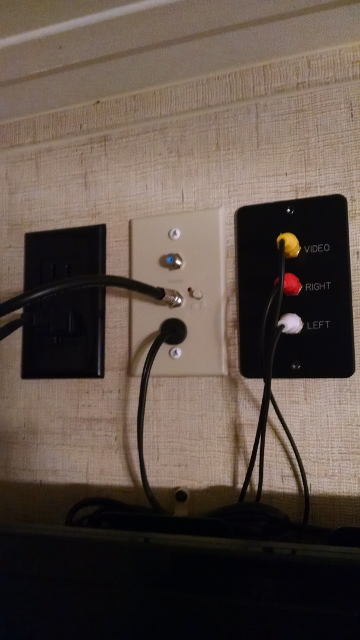 As you can see, this modification ends up looking quite nice. I originally wanted to put a socket there for a wire and then run a separate wire to the back of the stereo. However, this one works well, and was really inexpensive.  ------------- StephenH Happy is the man that findeth wisdom,... http://www.rpod-owners.com/forum_posts.asp?TID=7712 - ouR escaPOD mods Former RPod 179 Current Cherokee Grey Wolf 24 JS |
Posted By: Retroactive
Date Posted: 21 Apr 2016 at 12:36pm
|
Nice audio mod, the tv speakers are terrible. The grommet seems to let the wire sit flatter against the wall, so it doesn't add any extra clutter to the eye. I have to run my cable outside of the pod to accomplish the mod, so it will be a while until I have the time for it. ------------- |
Posted By: StephenH
Date Posted: 21 Apr 2016 at 2:23pm
|
I agree that the tv speakers are terrible. That is why I wanted to do this mod. While it works for the 179 and, I presume, the 180, I guess it does not necessarily work as easily for other models. Hopefully, you will find a way to do this easily. The improvement in sound is tremendous, even with the stock speakers in the Rpod.
------------- StephenH Happy is the man that findeth wisdom,... http://www.rpod-owners.com/forum_posts.asp?TID=7712 - ouR escaPOD mods Former RPod 179 Current Cherokee Grey Wolf 24 JS |
Posted By: StephenH
Date Posted: 22 Apr 2016 at 12:15pm
|
Here is another one that my wife and I really like. Our 2016 Rpod 179 had the older, top mount plastic sink. This is one of the reasons I term it more of a 2015 1/2 model. We both disliked the plastic, both for the size and in my case, because it was flexible and not flat, which meant that water collected in the bottom and did not properly drain. The solution was to replace the sink and, while I was at it, replace the cheap faucet with one that is much better. Parts: VAPSINT faucet. The exact one I purchased does not seem to be available currently. This one is similar: http://www.amazon.com/dp/B015MT6YDU?psc=1 - Faucet Stainless steel sink: http://www.amazon.com/Elkay-D117193-17-Inch-Stainless-Three-Hole/dp/B0012C2R4W?ie=UTF8&psc=1&redirect=true&ref_=oh_aui_detailpage_o04_s00 - http://www.amazon.com/Elkay-D117193-17-Inch-Stainless-Three-Hole/dp/B0012C2R4W?ie=UTF8&psc=1&redirect=true&ref_=oh_aui_detailpage_o04_s00 - Sink Sink strainer: http://www.amazon.com/Franke-4010856-Stainless-Strainer-Nickel/dp/B00FQ59W8U?ie=UTF8&psc=1&redirect=true&ref_=oh_aui_detailpage_o04_s01 - http://www.amazon.com/Franke-4010856-Stainless-Strainer-Nickel/dp/B00FQ59W8U?ie=UTF8&psc=1&redirect=true&ref_=oh_aui_detailpage_o04_s01 - Strainer Flexible tailpiece: http://www.lowes.com/pd_24605-143-9121K_0__?productId=1070063 - http://www.lowes.com/pd_24605-143-9121K_0__?productId=1070063 - Tailpiece Silicone sealant. Tools were a jigsaw and an %20http://www.harborfreight.com/power-tools/oscillating-tools/variable-speed-oscillating-multi-tool-61219.html - oscillating tool . Also needed if large tubes of sealant are used is a caulking gun. Masking tape is needed to protect the countertop. Remove the drawers both to keep them clean and to make more working room available. It will also help with fastening the sink and hooking up the components. First step is to remove both the original faucet and the original sink. I put bags over the ends of the water lines to keep trash out. I disconnected the drain also. Once the sink was removed, I cleaned off the old sealant. Then I used masking tape (wider is better) to tape over the whole sink area. Lay the sink upside-down on the counter to mark the location. The actual cut line will be inside the outline of the sink. There is just enough room between the cleat which is at the face of the cabinet and the one on the back wall of the Rpod to fit the sink. When cutting, ensure the cut line is parallel to the outline and that the corners are rounded to match the outline. You should be able to verify the location since you will be able to see the cleats through the opening. Use a jigsaw with a clean-cut blade to cut on your cutting line. I needed to use the oscillating tool with a semicircular blade to get the cut along the back wall since there was insufficient room for the jigsaw there. I also used the oscillating tool to trim the hole as I cut a little small along the front and back, figuring it was better to do this than to cut too big at first. Test fit the sink. Once you are happy with the fit, then it is time to move on to the next step. Install the sink strainer. I used silicone instead of plumber's putty for this. I have had good success with silicone, figuring it would not harden or fall out like I have seen plumber's putty do. Allow some time for the silicone to cure. Install the faucet. Since this sink has three holes, I used the middle one for the faucet, the left one for a soap dispenser, and plugged the right hole with a cover plate. I could have used a cover plate which would have covered the extra holes also. This is optional. Once the faucet is installed, lay down a bed of sealant and place the sink into position. Use the clamps to fasten the sink to the countertop. Clean off any excess sealant. It is easiest to do so before it cures. Connect the hot and cold water connections. You will need adapters since the existing connectors will not be the same size as the new faucet's connectors. Pick these up at your local hardware store. The P trap will not line up with the new drain. This is where the flexible tailpiece comes in. Use it to connect the drain to the trap and move it around to allow room for the drawers to open and close. I needed to saw an arc in the back of the top drawer to allow it to close as the new drain is centered, and not at the back like the old sink had. Test your connections, clean up the mess, reinstall the drawers, and it is done. Enjoy the new sink. 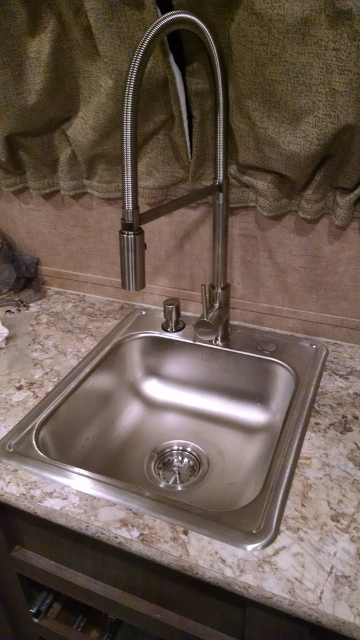 The one thing we do when traveling is to move the head of the hose down and just let the spring part be held by the bracket. This keeps the spring from banging into the window. There is not much clearance between them, but it is so much better than the original, cheap faucet. ------------- StephenH Happy is the man that findeth wisdom,... http://www.rpod-owners.com/forum_posts.asp?TID=7712 - ouR escaPOD mods Former RPod 179 Current Cherokee Grey Wolf 24 JS |
Posted By: LuvPod
Date Posted: 26 Apr 2016 at 9:13am
|
Hi StephenH,
What does your collapsible ladder look like and where did you purchase it? |
Posted By: StephenH
Date Posted: 26 Apr 2016 at 11:47am
|
It is like this one: http://www.campingworld.com/browse/skus/index.cfm?skunum=20318&rewrote&affiliateid=5193&gclid=CM_IuLjSrMwCFc9ahgod0cUFOA - http://www.campingworld.com/browse/skus/index.cfm?skunum=20318&rewrote&affiliateid=5193&gclid=CM_IuLjSrMwCFc9ahgod0cUFOA - Folding Ladder I didn't pay that price for it. When we were on a trip, someone in a larger motor home had it for sale. They needed a larger ladder, so were getting rid of the one I purchased. It looked like a great deal, so I picked it up. Then I had to figure out a way to carry it. ------------- StephenH Happy is the man that findeth wisdom,... http://www.rpod-owners.com/forum_posts.asp?TID=7712 - ouR escaPOD mods Former RPod 179 Current Cherokee Grey Wolf 24 JS |
Posted By: Retroactive
Date Posted: 26 Apr 2016 at 12:29pm
|
My 171 has a full passthrough, so I am going to use your fencepost idea to make multiple elevated storage bays. That would be absolutely perfect for our XC-Skis if we can find a TT friendly year round park, unfortunately most year round parks up this way only cater to motorized RVs (no hookups of any kind, and the snow removal is questionable). ------------- |
Posted By: StephenH
Date Posted: 26 Apr 2016 at 1:14pm
|
I'm glad my idea gave you one of your own. I used to own a pair of XC-skis, but we donated them when we move to an area which does not regularly have enough snow to use them. Plus, as I get older, the cold appeals to me less and less.
------------- StephenH Happy is the man that findeth wisdom,... http://www.rpod-owners.com/forum_posts.asp?TID=7712 - ouR escaPOD mods Former RPod 179 Current Cherokee Grey Wolf 24 JS |
Posted By: LuvPod
Date Posted: 26 Apr 2016 at 2:02pm
| Thanks, StephenH! :) |
Posted By: techntrek
Date Posted: 26 Apr 2016 at 6:56pm
|
This is the ladder I bought, it collapses so it is only about 2 feet high. http://www.amazon.com/Giantex-Aluminum-Telescoping-Telescopic-Extension/dp/B00Q9PLP3G/ref=sr_1_5?s=hi&ie=UTF8&qid=1461711322&sr=1-5&keywords=collapsible+ladder - http://www.amazon.com/Giantex-Aluminum-Telescoping-Telescopic-Extension/dp/B00Q9PLP3G/ref=sr_1_5?s=hi&ie=UTF8&qid=1461711322&sr=1-5&keywords=collapsible+ladder ------------- Doug ~ '10 171 (2009-2015) ~ 2008 Salem ~ http://www.rpod-owners.com/forum_posts.asp?TID=1723 - Pod instruction manual 
|
Posted By: StephenH
Date Posted: 29 Apr 2016 at 10:29pm
|
For all of you 179 owners (and possibly other models as well) who are frustrated with the bathroom sink, this one is for you. This modification is to move the faucet to reduce the splashing of water by making the water stream hit a wider part of the sink. Why the factory installed the faucet in the location it did is beyond me. The water stream hits right at the edge of the sink. Moving the faucet, even a small amount, allows the water stream to hit in a wider area. Remove screws holding faucet surround and carefully use a putty knife to cut putty holding the surround to the wall. Remove it. Disconnect faucet lines. Remove faucet from surround. Check the opening. Check to see if you can move the surround closer to the wall away from the door. You may be able to move it 1/4 to 1/3 of an inch while still leaving the hole covered when it is replaced. Carefully measure just how far you can move the faucet toward the wall side, away from the door. Enlarge holes to shift faucet over, being careful not to move too far, or you will have a hole. Use some silicone sealant and reinstall faucet to the surround. Reinstall surround, moving it as close to the wall as possible without leaving an uncovered hole in the wall. Use silicone sealant to seal around the plastic to prevent water from going behind it. Result should be that the water from the faucet now hits more toward the drain in a wider part of the sink instead of at the edge. This will not totally eliminate water splashing, but it does reduce it. The putty knife marks the original location of the faucet surround. The faucet was moved as far as possible also. 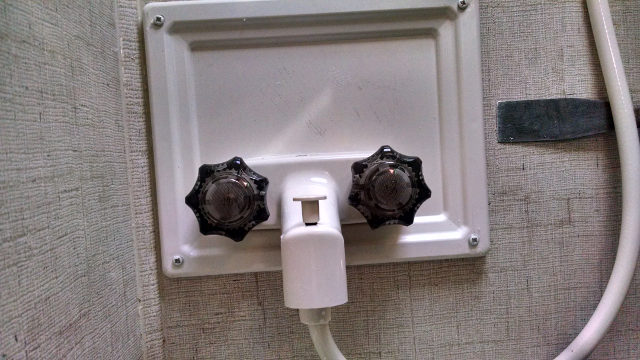 ------------- StephenH Happy is the man that findeth wisdom,... http://www.rpod-owners.com/forum_posts.asp?TID=7712 - ouR escaPOD mods Former RPod 179 Current Cherokee Grey Wolf 24 JS |
Posted By: larrys39426
Date Posted: 30 Apr 2016 at 12:54pm
Thanks -- it may come to that, but I'm likely to mess up something worse when I get tools in my hands.
|
Posted By: StephenH
Date Posted: 30 Apr 2016 at 1:35pm
|
I'm no expert by any means. I am just not afraid to try. The faucet's original location was unacceptable. I really would like to find one that would fit even tighter into the corner, even if I have to fabricate the surrounding cover plate.
------------- StephenH Happy is the man that findeth wisdom,... http://www.rpod-owners.com/forum_posts.asp?TID=7712 - ouR escaPOD mods Former RPod 179 Current Cherokee Grey Wolf 24 JS |
Posted By: StephenH
Date Posted: 03 May 2016 at 8:38pm
|
Okay, here's another one for those of us frustrated by the plastic track and sliders for the curtains. In our 179, it was the curtains behind the kitchen counter. After seeing that Forest River has finally addressed this in the newest R-Pods, I decided to do something about it. I purchased Cafe Curtain Rods. If you do this, make sure you get ones long enough to cover the window. They are really inexpensive at Wal-Mart. First, remove the end clip on the plastic tracks and remove the curtains. Second, remove the tracks. Third, using 1" molding, cover the screw holes. In my case, I decided to place the molding all the way across. Fourth, Attach the mounting clips for the curtains. For the center clip, I slipped one end behind the window frame and only used one screw. The others used two screws. Fifth, remove the plastic slider material from the back of the curtains. Fold and sew a casing on top and bottom. This will need to be just big enough to fit the rod. Sixth, slide the curtains onto the rods. Seventh, snap the rods into the mounting clips and adjust the curtains to cover the window evenly. Enjoy being able to move the curtains without them catching on the screw heads. Note: This made for very tight curtains. We will be making new curtains in the near future which will have a little more ease in them so they will fit better.  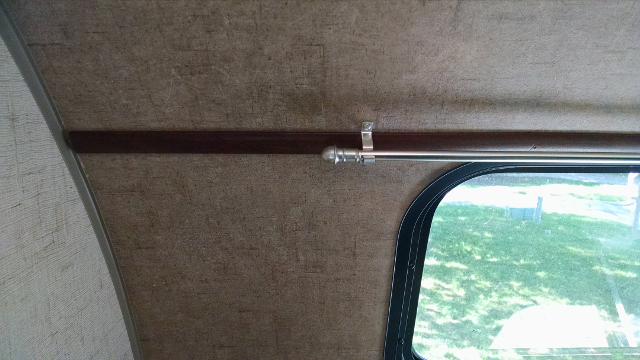 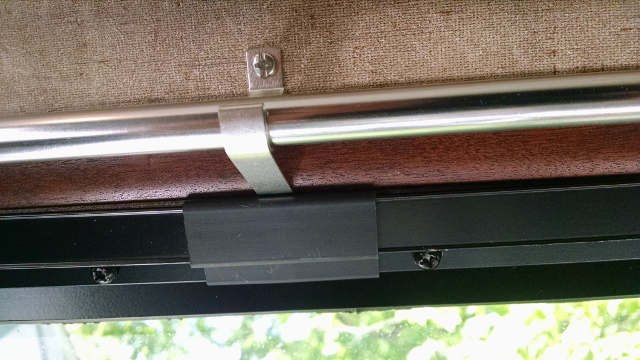 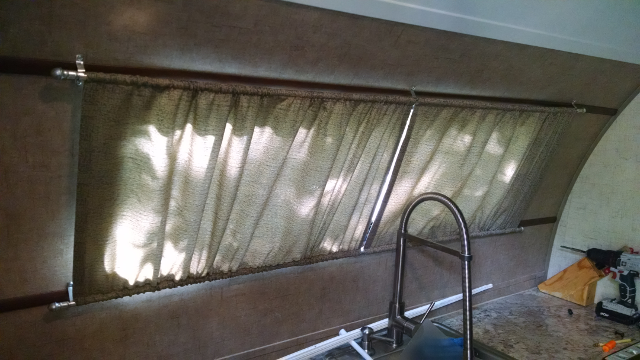 ------------- StephenH Happy is the man that findeth wisdom,... http://www.rpod-owners.com/forum_posts.asp?TID=7712 - ouR escaPOD mods Former RPod 179 Current Cherokee Grey Wolf 24 JS |
Posted By: Patriot Dave
Date Posted: 04 May 2016 at 7:49am
------------- Dave & Joyce Never Forget, In God We Trust; This Our National Motto. Member; Patriot Guard Riders, Michigan Chapter Retired; So Every Day is Saturday.... Except Sunday |
Posted By: StephenH
Date Posted: 04 May 2016 at 10:53am
|
I used Arrow 18 GA Brad Nails, 5/8" #BN1810 and a Black & Decker PowerShot stapler to attach the strips. I did not use glue on them.
------------- StephenH Happy is the man that findeth wisdom,... http://www.rpod-owners.com/forum_posts.asp?TID=7712 - ouR escaPOD mods Former RPod 179 Current Cherokee Grey Wolf 24 JS |
Posted By: Patriot Dave
Date Posted: 04 May 2016 at 11:10am
------------- Dave & Joyce Never Forget, In God We Trust; This Our National Motto. Member; Patriot Guard Riders, Michigan Chapter Retired; So Every Day is Saturday.... Except Sunday |
Posted By: StephenH
Date Posted: 06 May 2016 at 8:42am
|
This one is not for the trailer, but is quite useful. What do you do with the hitch when you are not towing? That was the problem I had. in my 179, I was beating up the bottom of the storage area opening trying to get it in and out. the bars were not a problem. It was the shank and head. I did not want to leave the hitch attached to the car. That would not be good for it. I did not want to leave it outside, and I certainly did not want to put it in the trailer. I decided to do something about it. First, I was having a problem with the bottom of the shank scraping on our driveway when we pulled in or out of our driveway. The Ford Escape is low enough that the shank did not need to be so long. I used an http://www.harborfreight.com/power-tools/grinders-buffers/4-inch-angle-grinder-91222.html - angle grinder with a cut-off wheel to cut 2" off the bottom of the shank. Then i smoothed and painted the cut area to prevent rust. This served two purposes. The first is to eliminate the scraping of our driveway. The second was to make it possible to finish this mod. I purchased a http://www.homedepot.com/p/RIDGID-22-in-Pro-Tool-Box-Black-222570/205440481 - Ridgid 22" tool box from Home Depot. I used some scrap wood to build a cradle for the hitch. Then i put a plastic bag in and filled it with http://www.homedepot.com/p/GREAT-STUFF-16-oz-Gaps-and-Cracks-Insulating-Foam-Sealant-162848/100003351 - Great Stuff insulating foam. I sprayed it with some water to speed the curing. I had previously found that if I did not spray it with water that it would not cure, probably because the plastic bag kept moisture from the air out. After it expanded and cured, I had a custom-formed cushioning cradle for the hitch. There is room inside for me to keep my http://www.amazon.com/HitchGrip-HG712-Orange-Hitch-Coupling/dp/B00HSO37B0?ie=UTF8&psc=1&redirect=true&ref_=oh_aui_detailpage_o00_s00 - Hitch Grip (which I highly recommend) and the hitch locks, pins, and covers. The end result is a place where I can keep my hitch head that is clean, watertight, and which I can keep in the back of our Escape while traveling and in the R-Pod when at home. Since it is watertight, I could also keep it outside, under the R-Pod, but I would want a good cable lock if I were to do so. Now for some pictures: 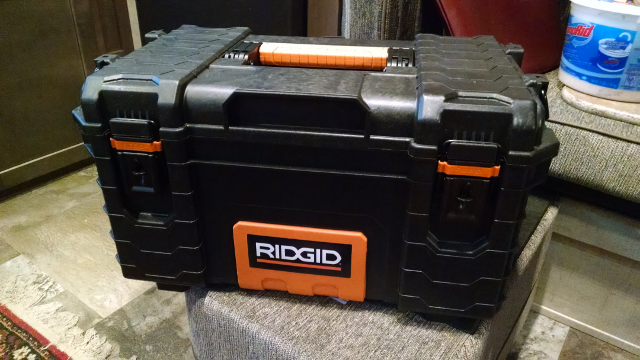 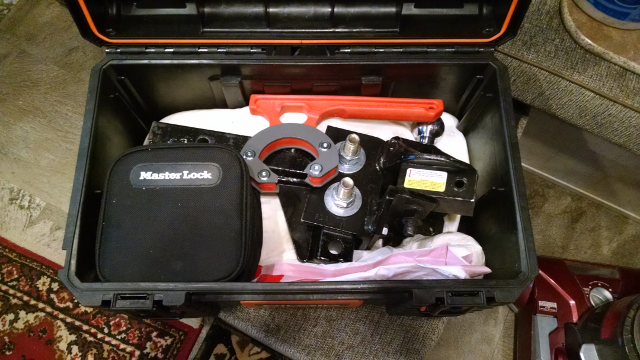 ------------- StephenH Happy is the man that findeth wisdom,... http://www.rpod-owners.com/forum_posts.asp?TID=7712 - ouR escaPOD mods Former RPod 179 Current Cherokee Grey Wolf 24 JS |
Posted By: StephenH
Date Posted: 15 May 2016 at 5:02pm
|
The top shelf in the R-Pod 179's pantry is not very well thought out. There is no shelf in it. Well, I thought to remedy that. removed the panel that is covers the side of the pantry that is on the inside, covering the thermostat and indicator gauge wiring. I found a framework behind the panel. This was screwed into the bathroom wall and the face of the cabinet. I removed that and, after figuring out where I wanted the shelf, I added a cleat about midway on that bracket to support the end of a new shelf. I also added cleat stock around the bathroom wall, outside wall, and inside the face on the outside wall end of the cabinet. The new shelf was cut to shape to sit on top of this new supporting cleats. I had a piece of oak stock. I used my table saw to cut a notch for the shelf and attached it to the shelf. This strengthens the front of the shelf at the opening so that it won't sag. The shelf was finished with stain and polyurethane finish, then installed. 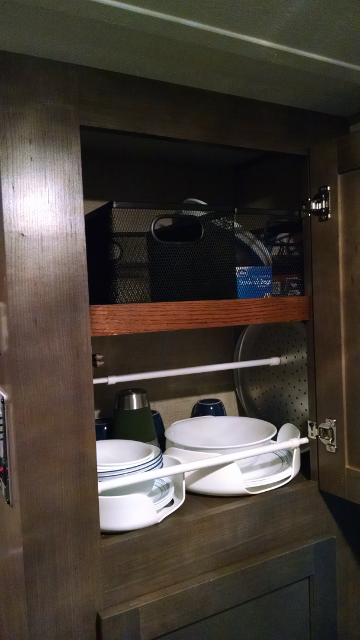  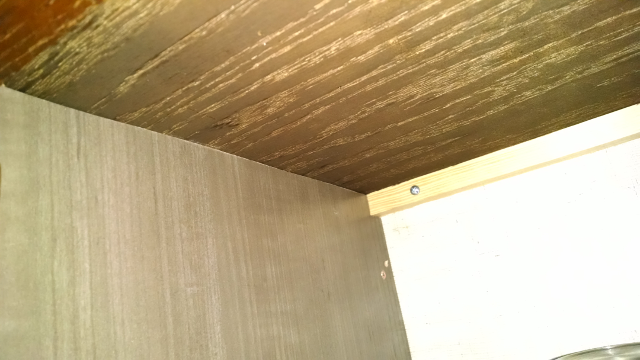 I cut the panel which I had removed roughly in half to fit both below and above to cover the wiring again. It is good to have another shelf in the pantry. The baskets were purchased at our local Aldi store. They were part of a set of a larger and smaller basket. The smaller ones fit the pantry perfectly. The larger ones are on the shelf above the bed and in the cupboard below the stove. One goof I did was to purchase the "short" moly bolts at my local Lowe's store. These were too long. I needed extra short. I ended up putting a hole in the side of my R-Pod before I realized that it would do that. The second moly bolt, I was able to cut down before I tightened it down, so it did not make a second hole. Any hints on how to repair a hole? I filled it with a dab of silicone to keep water out until I could find out how to fix it properly. ------------- StephenH Happy is the man that findeth wisdom,... http://www.rpod-owners.com/forum_posts.asp?TID=7712 - ouR escaPOD mods Former RPod 179 Current Cherokee Grey Wolf 24 JS |
Posted By: StephenH
Date Posted: 20 May 2016 at 10:44pm
|
Who wants to go out and spend several hundred dollars for an awning? I certainly did not. After completing my slide-out cover, I thought, "Why not make an awning using the same fabric?" So I did. The fabric is a camouflage, carbon fiber reinforced, rip-stop coated, waterproof fabric. Like the slide-out cover, I decided to use rope to fit the rail. It was, of course, a larger one than used for the slide-out. The first thing I did was do a rough cut for length. I used a "hot knife," which in actuality was a smoothing tool for a wood burning iron. When turned on edge, it worked great for cutting the fabric, sealing it so that it will not unravel. I folded the fabric, stitched it, and then folded it over the rope and sewed it using a zipper foot so that the seam could be as close as possible to the rope. The outside edge just got a double 1/2" fold. The two ends are the cut ends since they are sealed. After looking online for ideas, I had decided to use PVC pipe for the supports. I changed my mind in the middle of things so I need to get some 3-way connectors in 1" size to replace the 4-way connectors which I currently have. I had originally thought to have a free-standing frame, but that ended up being too cumbersome. I now have two sections of 1" PVC pipe stretching the front of the awning with short stubs to reach the ends and make the curve to follow the gutter. For legs, I have three 1" PVC pipes with holes spaced every 6" for adjustments. These slide into 1-1/4" PVC pipes and 1/4" x 2" wire locking pins (rounded) are used to secure them in place. The foot end of the supports got a cap, drilled to go over a pin which slides into the lower track. I still have some final fitting to do so that they will slide in smoothly over the screw heads. These were made of 1/2" round welding steel rods and 5/16" round welding steel rods. The part that slides in the track was cut to 6" and the other part was cut to 8", welded into a hole drilled in the 1/2" rod pieces, and bent to make a suitable angle for the awning when it is set up. Now for some pictures:       To do yet: make tie-down ropes to use either with weights or stakes to help hold the outer edge. Also, re-sew one of the seams where it isn't holding properly. This is on one of the end rod pockets. Perhaps it is time to change the name of our R-Pod to CamoPod. Edit: I am adding a picture of the awning in use at the Whispering Winds RV park in Newark, NY recently. It shows how I add tension to the awning without stakes. 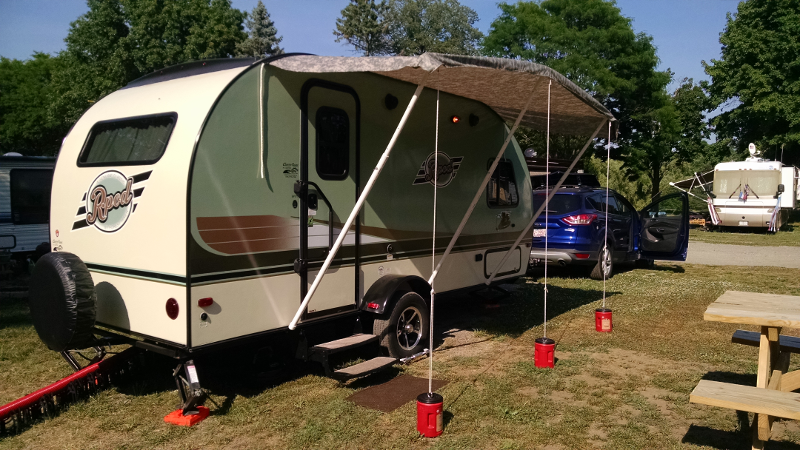 The red cans are plastic Folgers cans from a local restaurant. I made four of them. Each has a quarter-bag of ready-mix and an eye bolt with two nuts holding a fender washer. The fender washer was sunk into the wet concrete and the lid held it in place while the concrete was curing. I made ropes sufficient in length to be able to adjust the poles. I use a http://www.netknots.com/rope_knots/tautline-hitch - tautline hitch to tighten the ropes so I can easily adjust them as needed. ------------- StephenH Happy is the man that findeth wisdom,... http://www.rpod-owners.com/forum_posts.asp?TID=7712 - ouR escaPOD mods Former RPod 179 Current Cherokee Grey Wolf 24 JS |
Posted By: StephenH
Date Posted: 24 May 2016 at 6:52pm
|
The latest mod: Making replacement curtains for the kitchen window and making a curtain for the door window. The original curtains were a bit too tight to fit the curtain rods I used to replace the plastic track. The door did not have one since it was a mod (listed above). Forest River did not have fabric available. However, one of the things that came with the R-Pod was a bedspread/quilt that had one panel with the same fabric as the window and another fabric that harmonized. Since we had purchased a replacement quilt that we liked better, I went ahead and deconstructed the bedspread. The matching fabric was on insufficient quantity to be useful. However, the harmonizing fabric had plenty. The rest was measuring, cutting, serging, and sewing the new curtains. My wife has multiple machines and tools that make it easier. For the door, I purchased small curtain rods. Anyway, here are the pictures: 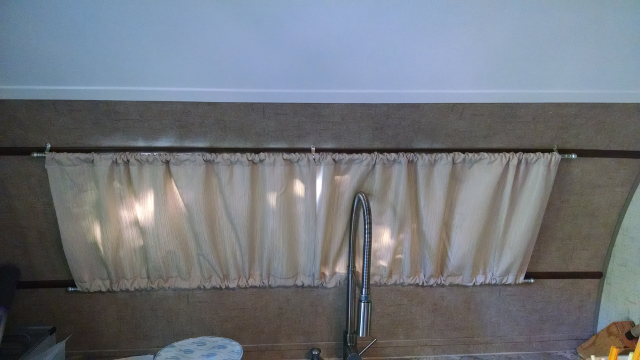 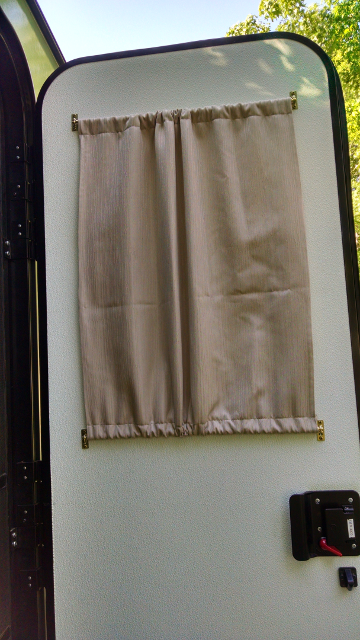 ------------- StephenH Happy is the man that findeth wisdom,... http://www.rpod-owners.com/forum_posts.asp?TID=7712 - ouR escaPOD mods Former RPod 179 Current Cherokee Grey Wolf 24 JS |
Posted By: StephenH
Date Posted: 26 May 2016 at 10:11pm
|
This one is a simple one. I noticed that the spare tire cover was collecting water since there was no real way for it to drain. I did not want to just cut a hole in the cover. I remembered that I had a grommet kit. I installed two grommets (one would probably have been sufficient) in the bottom of the cover where the overlap is. This should drain out any water that gets in there. It has the added advantage of eliminating a mosquito breeding pond. Why the cover was made in such a way as to almost guarantee water accumulation is beyond me. Adding a grommet (or some other way to keep a drain hole from tearing) to the bottom of the cover would seem to be a simple, inexpensive, common-sense thing to do. However, the bean counters probably thought that if it went out the door, it would be a while before people figured it out, and by that time, it would be an SEP (Somebody Else's Problem) situation. ------------- StephenH Happy is the man that findeth wisdom,... http://www.rpod-owners.com/forum_posts.asp?TID=7712 - ouR escaPOD mods Former RPod 179 Current Cherokee Grey Wolf 24 JS |
Posted By: StephenH
Date Posted: 08 Jun 2016 at 10:58pm
|
The last time I took our R-Pod out, I realized that even with a pretty good mattress topper, the original mattress that came with our R-Pod was not going to be something that either my wife or I would want to use much longer. I ordered a new mattress from Amazon. It is this one:
http://www.amazon.com/Master-Ultima-Comfort-Mattress-Short-Queen/dp/B01BW7H5ZW?ie=UTF8&psc=1&redirect=true&ref_=oh_aui_detailpage_o00_s00 - Sleep Master Ultima Comfort Memory Foam 10 Inch Mattress, Short Queen. The difference is amazing, even though I have not had the opportunity to sleep on it yet. Just lying down on it is enough to know it is a world of difference. The new mattress: 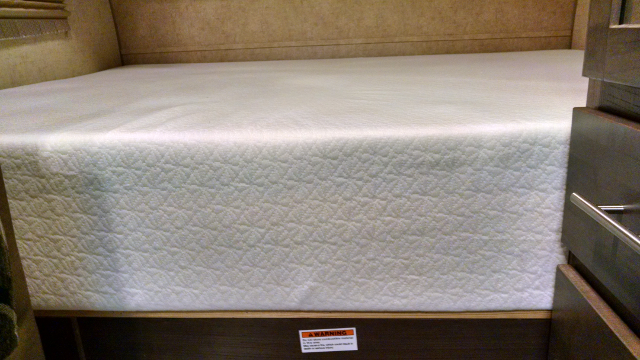 The old mattress was three layers of polyester fiber-foam. There was a thick, denser middle layer and two thin outer layers of a fiber/foam that was a little softer. These three layers were held together with short straps and the cover seems to be a polypropylene, non-woven material. It is no wonder that this just does not hold up very long. I expect the new one to provide long and satisfying service. 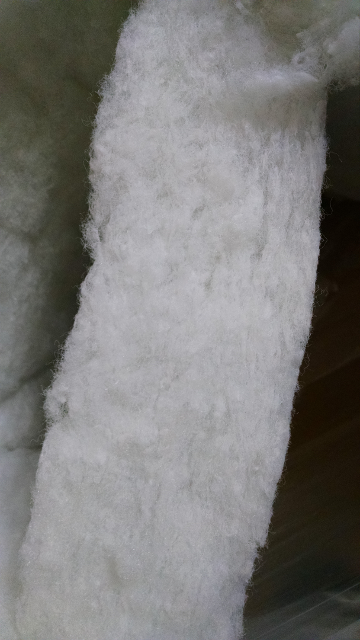 This is a shot of the middle layer. I figured out a use for it and the thinner layers. I was never pleased with the two end cushions for the dinette. The foam there was too soft. When we sat on it, we sank way too much. When I saw how the old mattress was constructed, I had the idea to replace the foam in those two cushions with material from the mattress. I used one thick layer and three thin layers. One thin layer is on bottom, next the thick layer and another thin layer. These got put into a plastic bag. The last thin layer got placed inside the cushion to be the top. I used our vacuum to remove the air and compress the foam sandwich so that I could slide it in to the cushion. Once it was in, I removed the vacuum and let the foam return to full size. I repeated that for the other cushion. The improved cushions provide much more support, and yet should still be comfortable if someone should need to sleep on them. I need to check the other dinette cushions to see if they could be similarly improved. I have enough fiber-foam to do so if I think it is worthwhile. http://www.amazon.com/Master-Ultima-Comfort-Mattress-Short-Queen/dp/B01BW7H5ZW?ie=UTF8&psc=1&redirect=true&ref_=oh_aui_detailpage_o00_s00 - ------------- StephenH Happy is the man that findeth wisdom,... http://www.rpod-owners.com/forum_posts.asp?TID=7712 - ouR escaPOD mods Former RPod 179 Current Cherokee Grey Wolf 24 JS |
Posted By: StephenH
Date Posted: 08 Jun 2016 at 11:24pm
|
Another one recently completed was to replace the single step with a double step. The new step is the 74960 Manual Double Step ordered from Camping World. Installation was a little tricky as the original step was stretched to fit brackets that were about 1/2" too wide for the new steps. The solution: Make a couple of shims out of 1/4" x 1-1/2" steel welding stock. These were cut, drilled, and then painted black. The bracket for the new steps was wider. This meant that in order for it to fit properly, I needed to notch the back to fit around the frame. I did so by cutting, then scoring and bending the excess into a tab that rests against the bottom of the frame which should provide a little more resistance to twisting. You can see one of the notches at the top-left corner where the steps fasten to the bracket. The new steps should make life a bit easier for me and my wife. We should not need to carry a step-stool now. 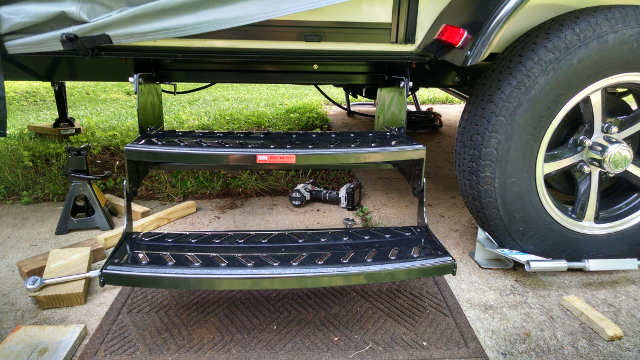 ------------- StephenH Happy is the man that findeth wisdom,... http://www.rpod-owners.com/forum_posts.asp?TID=7712 - ouR escaPOD mods Former RPod 179 Current Cherokee Grey Wolf 24 JS |
Posted By: larrys39426
Date Posted: 08 Jun 2016 at 11:35pm
|
I envy you your energy and creativity! Enjoy reading your posts, and maybe I'll be inspired to actually do some modifications -- like replacing the overly soft seat cushions and modifying the bathroom lavatory -- one of these days.
|
Posted By: sailor323
Date Posted: 09 Jun 2016 at 12:14am
| Very nice awning! I may steal this |
Posted By: StephenH
Date Posted: 09 Jun 2016 at 9:37am
No need to steal. I posted it in the hopes that it would be useful to others. If you do use the idea, please let me know and post pictures. I have benefited from what others have done before me. I am just trying to contribute something that will be useful to others also. The awning material part is based on memories of an awning my parents had when I was young. The support system is my idea though, especially the idea of using the bottom rail and the pins I made to hold the support poles. I'll be giving it a good test this summer so I will be able to see how it works during our planned trips. Edit: My wife said that part of it is "creative recycling." Examples are turning the material of the bedspread into new curtains and using the fiber/foam from the original mattress to replace the soft foam in the cushions. ------------- StephenH Happy is the man that findeth wisdom,... http://www.rpod-owners.com/forum_posts.asp?TID=7712 - ouR escaPOD mods Former RPod 179 Current Cherokee Grey Wolf 24 JS |
Posted By: StephenH
Date Posted: 17 Jun 2016 at 4:14pm
|
Here is one I just completed. I wondered why Forest River left so much room behind the drawers beneath the sink in our 179. It did not seem to make sense to have so much wasted space. I decided to do something about it. I really could not do much with the top drawer as the sink drain would interfere with making the top drawer any larger. I modified the middle and bottom drawer, adding 3 inches in depth to both of them. I disassembled them and reused the front and back of the drawer pieces. I could not find 3/8" plywood, so I got 1/2" plywood and notched it so that the total width of the drawer would remain the same. My table saw came in handy for this project as well as a pneumatic nail gun. Since I could not reuse the drawer bottoms, I used 1/4" Lauan plywood. I used carpenter's glue in addition to the nails on the corners. Since I reused the front and back, I did not have to worry about placement of the screw holes for the faceplate. For the slides, I realized that the original holes would place the mounting screws near the faceplate and in the middle of the drawer, leaving the back end unsupported. I drilled a hole in the slide parts that attach to the drawers near the back. I used some extra screws to place one in the middle where the original screws would have been. This should provide better support for the drawer and increased strength. Here's a picture of the bottom drawer. The middle drawer is the same. Both are 3" longer than the original drawers. 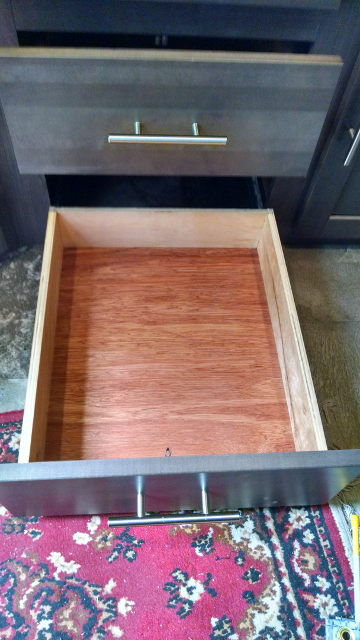 The drawers were finished with 3 coats of Minwax semi-gloss clear polyurethane spray. They are getting their 24 hours of rest now before loading them up. ------------- StephenH Happy is the man that findeth wisdom,... http://www.rpod-owners.com/forum_posts.asp?TID=7712 - ouR escaPOD mods Former RPod 179 Current Cherokee Grey Wolf 24 JS |
Posted By: WillG
Date Posted: 04 Jul 2016 at 7:09pm
|
Why do you need a slide out cover? I'm a new owner and assume it is water proof.... is it to keep leaves and debris out?
------------- R-Podder by process of elimination 2014 RP179 2011 GMC CrewCab Short Bed |
Posted By: StephenH
Date Posted: 04 Jul 2016 at 11:09pm
|
Bingo! It isn't because of leaks, but partly to keep leaves and debris off the top and partly to shade the top of the slide-out which should reduce the amount of heat gained. The same applies to the awning on the door side. It should shade the side of the R-Pod some, plus when it rains, we stay dry when we go out or come in. We've had a chance to test it as it has rained on our current trip. It works well. I did have to adjust the supports so the center is one notch above the two ends. That helps keep water from pooling on the awning. ------------- StephenH Happy is the man that findeth wisdom,... http://www.rpod-owners.com/forum_posts.asp?TID=7712 - ouR escaPOD mods Former RPod 179 Current Cherokee Grey Wolf 24 JS |
Posted By: nsl
Date Posted: 07 Jul 2016 at 6:07pm
|
Good afternoon. After trying different step stools,etc. with our r-pod, I knew we needed a double step. Jayco's pod style camper comes with a double step. (Smart) After doing some research, I found the pod forum and was really glad to see that other people wanted to double step too! I ordered one from Camping World and it should be here early next week. I do not have the capability to fabricate the metal things you did but there are 3 metal fabricators in my area. That should do the trick. Also, I use a CPAP machine too. After looking at the shelf you built above the bed (I have a model 180) is there any problem with hitting your head as you get into/out of the bed? Just wondered. Thanks for you ideas!! NSL
|
Posted By: StephenH
Date Posted: 08 Jul 2016 at 1:07am
|
Some people use washers instead of the shims I made. I just wanted something more solid. I really don't have a problem hitting my head on the shelf. It sits high enough and back far enough so that it has not been a problem. The bigger problem is crawling over my wife if she gets into bed first or if I have to get up during the night. I hope my ideas have been useful for you. ------------- StephenH Happy is the man that findeth wisdom,... http://www.rpod-owners.com/forum_posts.asp?TID=7712 - ouR escaPOD mods Former RPod 179 Current Cherokee Grey Wolf 24 JS |
Posted By: sailor323
Date Posted: 08 Jul 2016 at 9:20am
Yeah, that is a problem. We sleep with our heads on the closet side in order to make it easier to get in and out of bed easier. |
Posted By: StephenH
Date Posted: 08 Jul 2016 at 6:06pm
|
I'll suggest that to my wife. It might work better for us also.
------------- StephenH Happy is the man that findeth wisdom,... http://www.rpod-owners.com/forum_posts.asp?TID=7712 - ouR escaPOD mods Former RPod 179 Current Cherokee Grey Wolf 24 JS |
Posted By: StephenH
Date Posted: 18 Jul 2016 at 6:52pm
Well, I need to remedy an oversight. I thought I had posted a picture of the battery cut-off switch here. I had posted it elsewhere instead. Here it is: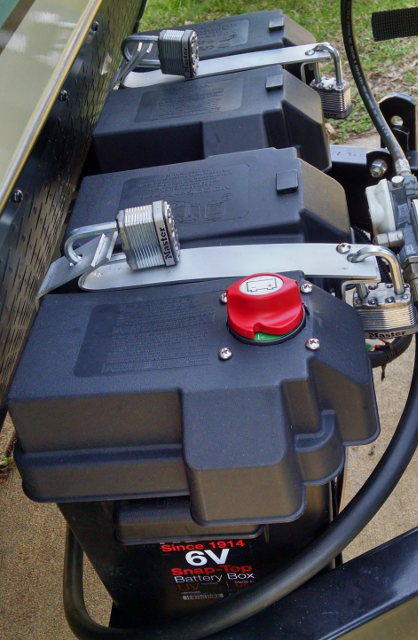 ------------- StephenH Happy is the man that findeth wisdom,... http://www.rpod-owners.com/forum_posts.asp?TID=7712 - ouR escaPOD mods Former RPod 179 Current Cherokee Grey Wolf 24 JS |
Posted By: StephenH
Date Posted: 18 Jul 2016 at 9:56pm
|
This is one I just did. I got tired of cranking the jack for hitching and unhitching the R-Pod. My wife was watching me do it last time, and agreed to let me do something about it. After a lot of searching and reading reviews, I decided to give http://www.amazon.com/gp/product/B00B9IVRCW/ref=oh_aui_detailpage_o02_s00?ie=UTF8&psc=1 - Jack Quick model JQ-3500B a try. It was easy to mount, only requiring the removal of three bolts (after suitably bracing the tongue on a jack stand) to remove the manual jack. Installation was easy as the R-Pod already has a bottom plate which is required. The same bolts and washers are used with the addition of a star washer between the tongue and flat washer to ensure good electrical contact. The wire was run to the battery box and wired to the positive terminal through the included breaker. The connection terminals were not included, which is the only irritant since the only way I could get the one ring terminal I needed in the correct size was to purchase a kit. Hopefully, I'll find use for more of the terminals in the future. Anyway, here's a picture of the installed jack With the Husky foot I had been using on the manual jack. I did not even have to drill any holes for it as the jack already had the proper size hole for the bolt needed in the correct location. 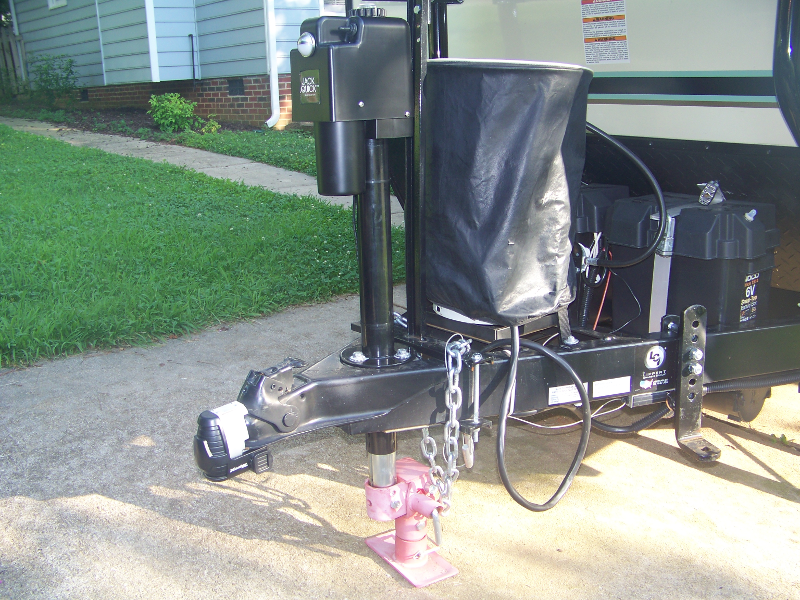 Edit: I ended up removing the Husky Brute foot and installing the adjustable foot that came with the jack. It has a round foot and adjusts by removing a pin. Since I would have to get down and adjust it or get down and swivel the Husky foot (plus install or remove it if I did not want to leave it on while traveling), I was not saving much time. The stock adjustable foot should save a couple of pounds also. ------------- StephenH Happy is the man that findeth wisdom,... http://www.rpod-owners.com/forum_posts.asp?TID=7712 - ouR escaPOD mods Former RPod 179 Current Cherokee Grey Wolf 24 JS |
Posted By: StephenH
Date Posted: 18 Jul 2016 at 10:14pm
I had previously mounted a Stromberg-Carlson cargo carrier with the view toward carrying a generator. I purchased a Generac iX2000, which is sufficient to run most of what I need on the R-Pod, including the AC. It is rated at 2000 running Watts and 2200 surge Watts. So far, I have only tested it, and it ran the AC. Unfortunately, the convection microwave must pull one huge surge of power when the microwave part tries to start. The Generac can't run it.
 However, I still want to carry it, so I had to figure out how to tie it down and then how to protect it. For tie-downs, I got some cargo tie-down brackets and attached them to the platform. For one of them, I could use one of the existing bolts for the front leg. For the rest, I drilled and used stainless steel bolts with washers and nylock nuts. This will not make it impossible to steal, just inconvenient. A ratcheting strap and a bicycle lock complete the mount.  Of course, I did not want to leave my nice, shiny generator out in the sun and rain. I also wanted to protect it while traveling from road dirt and rain. Enter a plastic bin from Wal-Mart. It got inverted with a few holes drilled in the rim to drain water (got to keep from creating a mosquito breeding pond). Some bungee cords keep it in place.  We tested this on our most recent trip from North Carolina to western New York State and return. It rode well with no issues and the generator stayed clean and dry. My next project will be to move the spare tire so I can mount a small platform in order to carry my spare propane tank and a gasoline container outside of the R-Pod and TV. ------------- StephenH Happy is the man that findeth wisdom,... http://www.rpod-owners.com/forum_posts.asp?TID=7712 - ouR escaPOD mods Former RPod 179 Current Cherokee Grey Wolf 24 JS |
Posted By: TheLoneRanger
Date Posted: 18 Jul 2016 at 11:17pm
|
Hello SH, I am new to this forum. I have enjoyed seeing all the mods you have designed. It is evident you are a "problem solver". I have been trying to find a solution to carry a generator. Your solution is perfect! Would you mind sharing the model/part # for the gen tray and Walmart cover? How much did this add to the tongue weight of your 179? I have a 2016 HRE 177. Your mods are very creative and the details you provide are great! Thanks, Dana - an all American male |
Posted By: StephenH
Date Posted: 19 Jul 2016 at 10:27am
|
Dana, The http://www.etrailer.com/Trailer-Cargo-Control/Stromberg-Carlson/CC-255.html?feed=npn&gclid=CI6S_-nY_80CFY89gQod_qAPbQ - Stromberg-Carlson Trailer Tray specifications are on the eTrailer web site. The weight of the tray is 65 lbs. The generator would be additional, but that would vary by what generator you purchase. The cover was simply a household plastic bin (Sterilite) with a separate lid. I don't have a part number for it. I simply chose one that would have sufficient length, width, and depth to cover the generator. I do not use the lid that came with it. I do need to modify it a little since it has an indentation in the bottom (now top) that holds water. I will take a heat gun and carefully heat and mold it to create a couple of drain channels. I don't want to make holes to drain it as it would defeat the purpose of keeping the generator dry. ------------- StephenH Happy is the man that findeth wisdom,... http://www.rpod-owners.com/forum_posts.asp?TID=7712 - ouR escaPOD mods Former RPod 179 Current Cherokee Grey Wolf 24 JS |
Posted By: StephenH
Date Posted: 30 Aug 2016 at 8:54pm
|
Time for another mod posting. I wanted to be able to use the hitch on the back for something other than the spare tire, but with the generator rack and generator on the front already, I did not want to add yet more weight. The question became one of if I can't put it three, where can I put it? BAL has the answer in their https://www.amazon.com/BAL-28215-Hide---Spare-Storage/dp/B00KPRBBRO/ref=sr_1_3?ie=UTF8&qid=1472604146&sr=8-3&keywords=BAL+hide+a+spare - Hide-A-Spare . This device lets one move the tire to mount beneath the R-Pod. In the case of the 179, the space between the steps and the rear stabilizer is the perfect spot to mount the spare. I was able to find the 28210 model, which is a little shorter than the 28215 model in the link. However, I still ended up having to cut the bars and drill new holes, so it isn't worth the hassle of trying to locate the 28210 model. In addidtion, the people from whom I ordered it sent it without some of the necessary hardware. BAL did make good, but not before I had to spend the money for the bolts, nuts, and washers needed anyway since the parts did not arrive until after we left on our most recent trip. I also didn't save much over what I would have paid Amazon. Here are a couple of pictures:   ------------- StephenH Happy is the man that findeth wisdom,... http://www.rpod-owners.com/forum_posts.asp?TID=7712 - ouR escaPOD mods Former RPod 179 Current Cherokee Grey Wolf 24 JS |
Posted By: StephenH
Date Posted: 30 Aug 2016 at 9:17pm
|
With the tire and old tire carrier out of the way, I now could mount a https://www.amazon.com/18145-Basket-Style-Cargo-Carrier/dp/B004QEKGA0/ref=sr_1_10?ie=UTF8&qid=1472604968&sr=8-10&keywords=Curt+cargo+carrier - Curt Cargo Carrier . The virtue of this model is that the shank is the right size for the hitch receiver on the rear of the R-Pod. It also comes with an adapter so it can be used on 2" receivers, so if I want to use it with my Escape, I can do so without having to purchase additional adapters. It arrived in pieces. The instructions were straight-forward, so I assembled it. The only part that could be tricky is in making sure that the two base pieces are installed so that the tops of them are flush with the shank. There were complaints in the reviews about holes in the wrong places. I can only assume that those people had the base pieces upside-down. For me, everything lined up and assembly was pretty quick. This model comes with a threaded hole in the shank. The "pin" that goes into the shank is a threaded bolt for part and a longer unthreaded section, presumably to help line up the holes. The threads tighten the shank into the receiver so that it cannot shift. There is a spring clip for the hole on the end, but with the bolt tightened, it really does not do much. A lock could be put through through for security. The last step was to tighten the bolt that was already there to lock the spare carrier so that it would not shift. This, however, went into a second hole. While it would help ensure that the shank could not come out of the hitch, since there was a hole there, it really did not do much good for stabilizing the carrier. The Curt supplied pin/bolt did a good job of making the carrier so that it did not rattle or shift. The carrier, once installed got a part sheet of polyurethane sealed Lauan plywood to help hold a propane tank and a small bin in which was a gasoline container along with a bottle of Stabil to be used as needed. On the part of the rack without the plywood was a larger bin (Rubbermaid Action Packer) in which was the BBQ grill, awning and slide-out cover fabric and track pins, and our 30A electrical cord along with the Camco circuit analyzer/surge protector. A bicycle lock secured the propane tank and Action Packer. The gasoline bin was not locked, but everything was cinched down with ratcheting straps or other cinch straps. The pictures will show these. 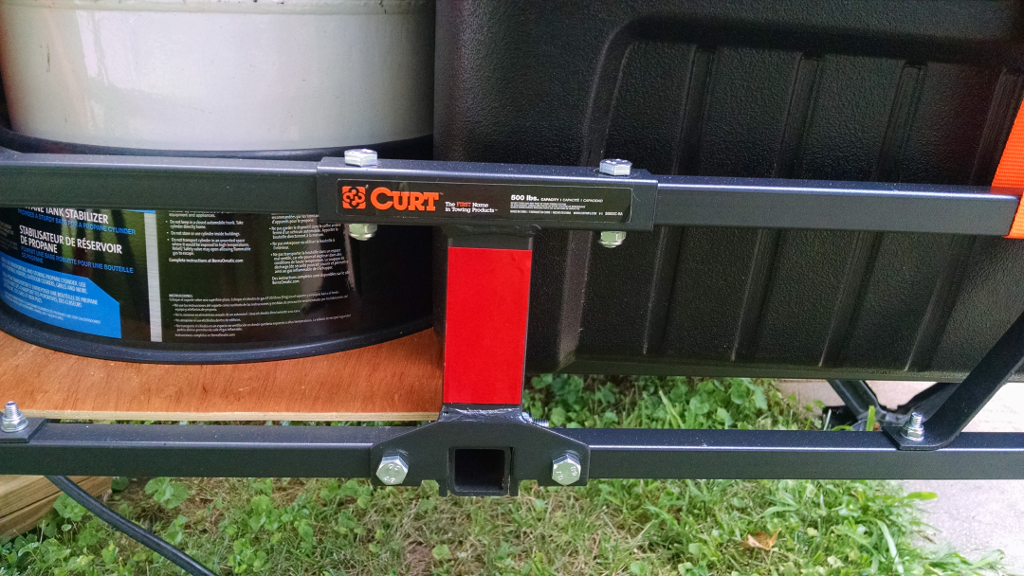 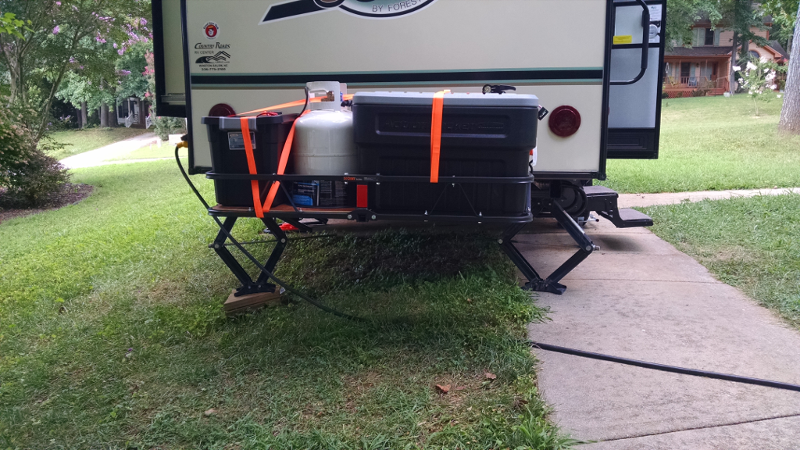 The purpose of the rack is primarily so that I don't have to carry either Propane or Gasoline inside either the R-Pod or our Escape. The total weight on the back is well under FR's stated 150 lb limit. The spare tire rode well in its new location, and the luggage rack on the back was a great addition. Unfortunately, it is a little too short to carry the poles for our awning. We still carry those inside the R-Pod in a bag my wife had made years ago to carry a tent and poles. It is a little short, so she has promised to make one more suited for the length of the awning poles. Edit: To anticipate what some may be thinking, even though we hit some serious bumps on our trip, the luggage carrier did not sag or shift. The contents rode securely. and the whole arrangement proved to be quite useful. ------------- StephenH Happy is the man that findeth wisdom,... http://www.rpod-owners.com/forum_posts.asp?TID=7712 - ouR escaPOD mods Former RPod 179 Current Cherokee Grey Wolf 24 JS |
Posted By: JGMM_BC
Date Posted: 02 Sep 2016 at 7:45am
How do you attach it to the pod above the slide-out? Could you take a close-up picture of this area? Thanks ------------- Jean-Guy & Jennifer 2017 RP-180 "Lilly" 2010 Mitsubishi Outlander |
Posted By: StephenH
Date Posted: 02 Sep 2016 at 11:16am
|
The rope I sewed into the top side and the fabric with it slide into the keder rail. I have to work it around the rain gutter spout on the end and into the "C" shaped section. Once I get it started, my wife pulls on the rope while I continue to feed the fabric into the track until it is in place. Then I adjust the other end to get it around the spout. This is done before extending the slide-out. I'll try to get a close-up picture, but I won't be putting the cover on for a while since we don't have any trips planned. The rail is essentially the same as that on the other side, except it is smaller. In the meantime, if you right-click one of the pictures, you should be able to save it to your computer. Then use your image viewing program to open the picture and zoom in on it. You should be able to get a pretty clear view of the end. ------------- StephenH Happy is the man that findeth wisdom,... http://www.rpod-owners.com/forum_posts.asp?TID=7712 - ouR escaPOD mods Former RPod 179 Current Cherokee Grey Wolf 24 JS |
Posted By: jglynn55
Date Posted: 06 Sep 2016 at 1:37pm
| Has anyone checked under the long dinette bench seat. What is under there? Is there any room for storage? rpod 179. |
Posted By: MoPod
Date Posted: 06 Sep 2016 at 1:51pm
The dinette seat sits on the bottom of the slide out, so nothing below it. ------------- Bill & Nancy 2015 RPod 179 Previously 2010 RPod 176 2014 Explorer Sport |
Posted By: jglynn55
Date Posted: 06 Sep 2016 at 2:53pm
| ok thxs |
Posted By: StephenH
Date Posted: 18 Sep 2016 at 10:27pm
|
Time for something that isn't so much a mod as a repair. After reading examples of leakage from the rear spoiler, I thought it was time to take a closer look at mine. This was reinforced when finally, after our trip and some events that kept me tied up, I got around to washing the EscaPOD in preparation for waxing and putting the cover on. When I was washing, I noticed water flowing out from under the spoiler at one of the rippled-up sections. If water was coming out, I figured water had to be getting in. I first visited Camping World and got some sealant. I got both non-self-leveling/non-drip lap sealant. The only Dicor brand one was a single tube of tan. It was in the close-out area. The other I got was self-leveling Dicor white. Apparently, Camping World is closing out the tan in favor of white. This is too bad as tan was what was used on the Pod initially. In another mod post, I'll explain why I wanted the self-leveling sealant also. The first step was to make sure I could safely reach the spoiler's screws. These I removed. It was as Is suspected. A lot of the screws showed significant rust. While I had not noticed any evidence of leakage inside, rusty screws meant that at least some water was getting in by that route. So I also visited my local Lowe's Home Improvement to purchase stainless steel screws. I could not find them with the square drive of the originals but I got the right size to replace the original, rusted screws. 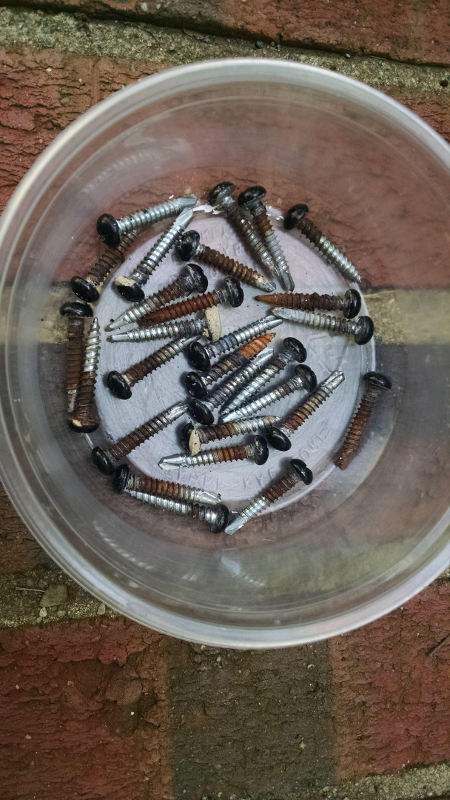 Using a putty knife, I carefully removed the spoiler. I found further confirmation that, while the factory sealed around the edges of the spoiler, no sealant had been applied to the screws or screw holes. 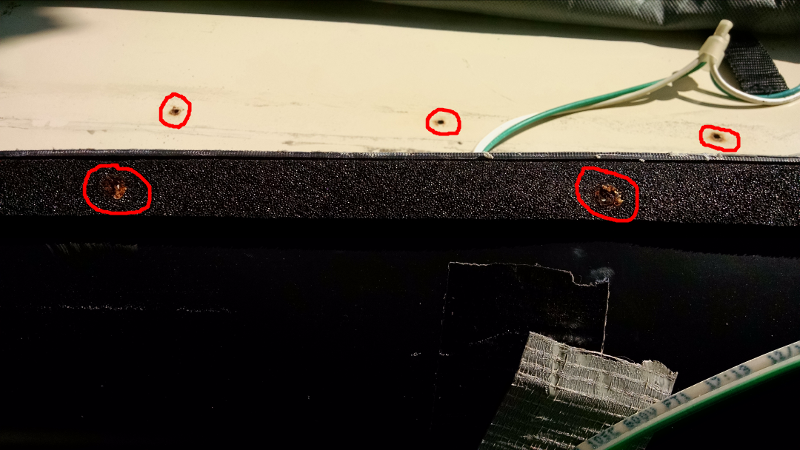 One of the things I was concerned about turned out to not be a problem. I had read that the hole for the wires was not sealed for some Pods. It turns out mine was sealed with a large amount of black RTV sealant. 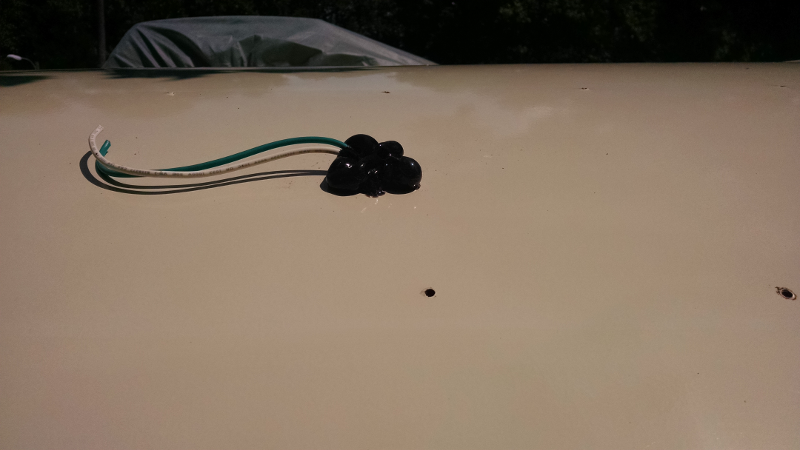 I used a razor scraper and mineral spirits to remove all of the old lap sealant from the roof of the R-Pod. I also removed as much as I could from the spoiler. I then used Denatured Alcohol to wipe both the Pod roof and the spoiler to prepare it for reattaching. I first spliced the wires since I had cut them to remove the spoiler. Then I laid down a bead of the non-self-leveling/non-run lap sealant, making sure I ran it where the screw holes were. I used a couple of short pieces of heavy wire, one at each corner to help me line up the spoiler. Even so, it was difficult as it wanted to keep shifting until I finally got a couple of screws in. The wires definitely helped but second person would have been more helpful. After getting the screws in, I went back and caulked and smoothed around the perimeter of the spoiler, making sure to leave one small gap uncaulked as a weep hole just in case any water did get under the spoiler again. I cleaned up the areas around where the lap sealant had gotten where it should not have been using mineral spirits or denatured alcohol. Why mineral spirits? It does an excellent job of cleaning and does not damage either the fiberglass or the plastic. Denatured alcohol does not do as good a job dissolving and removing the sealant, but it is what Dicor recommends for cleaning old lap sealant before applying new sealant. For that purpose, it works great. I did not get a picture of the finished job as I wanted to get the cover on due to the threat of rain. However, it really is not any different in appearance than it did before. The above pictures tell the important part. ------------- StephenH Happy is the man that findeth wisdom,... http://www.rpod-owners.com/forum_posts.asp?TID=7712 - ouR escaPOD mods Former RPod 179 Current Cherokee Grey Wolf 24 JS |
Posted By: Patriot Dave
Date Posted: 19 Sep 2016 at 5:01am
|
Excellent ------------- Dave & Joyce Never Forget, In God We Trust; This Our National Motto. Member; Patriot Guard Riders, Michigan Chapter Retired; So Every Day is Saturday.... Except Sunday |
Posted By: StephenH
Date Posted: 22 Sep 2016 at 10:04pm
Time for an upgrade. Between trips this summer, I noticed that the tire on the door side had picked up a screw right in the middle of the tread. It had not yet gone flat, so I took it to Discount Tire and it was repaired for free even though I had not purchased the tire from them. That is one thing I like about DT. After our second trip, even though the tires were inflated to the proper pressure, I noticed that the outside parts of the tread were quite worn.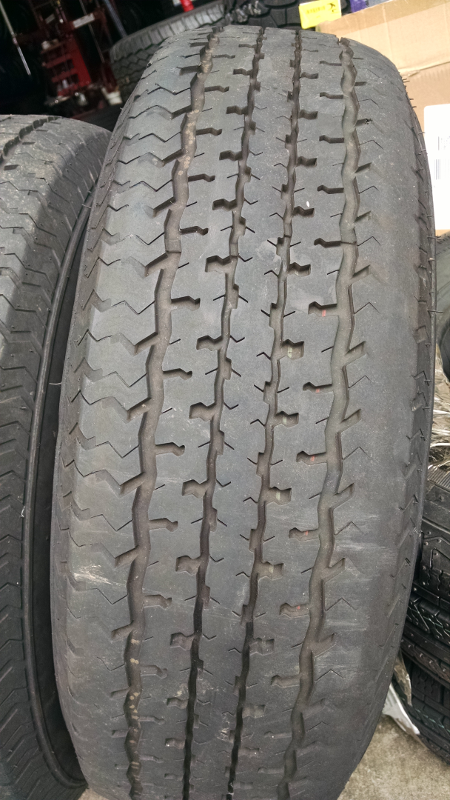 The picture does not really show the wear as well as it can be seen in person. In addition, the other tire, while not showing the same extent of wear, also showed some and had one place which looked like the brake had locked and dragged on one spot, which it hadn't. I did not get a good picture of it, so my description will have to do. In addition, when we were on our last trip, another person commented that the tires looked a bit flat. They had the proper pressure, but Forest River elected to install load range C tires. The problem with load range C is that the RP-179 is by itself not too far away from the maximum rated load for the tires. Once it is loaded, it is really pushing the limit. As I understand it, load range C tires can carry 1,821 lbs or 3,640 lbs for the pair. I expect we are too close to that limit. I wanted something with more capacity. After much searching of different sites, I ended up back at Discount Tire, where I purchased a pair of Carlisle Radial Trail HD ST205/75R14 105M D1 BSB tires. These are load range D and are rated for 2,040 lbs each or 4,080 for the pair. They are mounted and we will be ready for our next long trip. 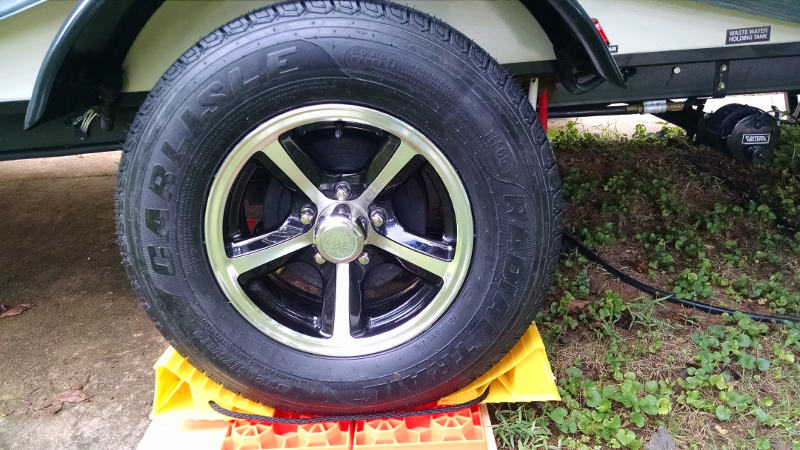 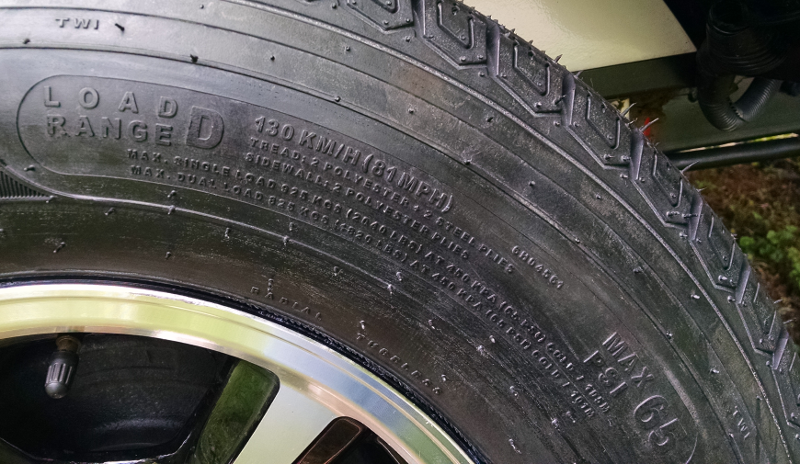 This leads to a question of how to jack up an R-Pod safely. One is not supposed to use the axle for a jack, but the frame has no good place either. I looked at my setup and saw that the axle-to-riser connection was sturdy enough to hold the weight of the trailer. I just needed to figure out a way to use it while avoiding the axle itself. My solution was to make a block which will go around the axle to let the jack lift at the mount without putting pressure on the axle. It is two pieces of 2x6 pressure treated lumber which was left over from another project. These, I glued and screwed together and notched to allow it to go around the axle and the wires that run to the hub that I could not move out of the way easily. I have used this several times now, and it works well with a small floor jack. 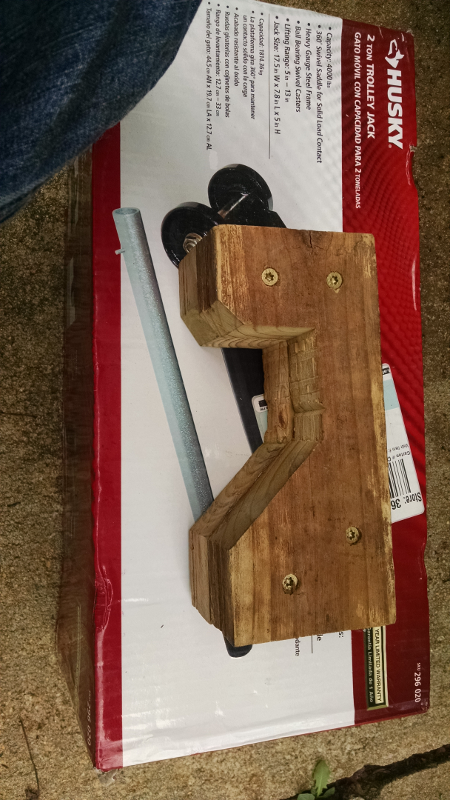 Edit: The sidewall label states the speed capability of these tires as 81 mph (130 km/h), but I will still limit my speed to 60 mph. I'll just feel safer as it also is a higher speed rating than the stock tires. ------------- StephenH Happy is the man that findeth wisdom,... http://www.rpod-owners.com/forum_posts.asp?TID=7712 - ouR escaPOD mods Former RPod 179 Current Cherokee Grey Wolf 24 JS |
Posted By: Grandpa Hiker
Date Posted: 23 Sep 2016 at 12:39pm
|
StephenH, Really like your "jacking block"!! I just added it to my "Gotta Do" list!! ------------- Rob & Becky 2014 Ford Explorer 3.5 SOHC V6 2015 R-179 Pod aka Piddle Pod "Life is not about waiting for the storms to pass, it is about learning to dance in the rain!!" |
Posted By: techntrek
Date Posted: 23 Sep 2016 at 3:41pm
|
Nice upgrades. Glad to see the factory is sealing the wire penetration for the spoiler - but c'mon they don't know to seal the screw holes? ------------- Doug ~ '10 171 (2009-2015) ~ 2008 Salem ~ http://www.rpod-owners.com/forum_posts.asp?TID=1723 - Pod instruction manual
|
Posted By: StephenH
Date Posted: 23 Sep 2016 at 3:56pm
|
That's not the only area where I found screws not properly sealed. The amber porch light was another one as was the AC outlet. The AC outlet was particularly troubling. Apparently, the hole had been cut too big so that one of the anchors that should have been holding it in place was instead holding onto nothing. I had checked it because the outlet looked crooked. ------------- StephenH Happy is the man that findeth wisdom,... http://www.rpod-owners.com/forum_posts.asp?TID=7712 - ouR escaPOD mods Former RPod 179 Current Cherokee Grey Wolf 24 JS |
Posted By: StephenH
Date Posted: 23 Sep 2016 at 8:46pm
|
This one is another upgrade. One time when we were at Camping World, I had the "brilliant" idea to purchase an LED bulb to replace the incandescent bulb in the porch light. They had one that, by the number, would have replaced the bulb. It was flat with a number of LED's on it. Unfortunately, the pins were 90 degrees off of what the fixture had. "No problem" I thought. "I'll just turn the socket so the pins will be in the right place." RIGHT! It did not work, so off to Amazon to order a new fixture. http:// - Lumitronics LED RV Oval Porch Utility Light This one was almost the same as the original fixture with two differences. It came with a cylindrical LED bulb and it lacked the heat shield of the original fixture (not needed since the LED generates much less heat). I had already removed the old fixture and cleaned up the old sealant. I laid down a bead of non-run lap sealant, making sure to seal the 3 screw holes. The old fixture had one screw at each end and an additional one at the top-center. The new fixture did not have a hole where the third screw was in the old fixture. I found out why when I attempted to use just the two holes. The right screw hole had been stripped. Whoever installed the fixture just went ahead and drilled a third hole and put a screw in. I did not care for that. It is another case of lack of attention to detail. I decided to put an anchor in the one hole, so I drilled it out to accept an anchor (one of the one that looks like plastic wings when it is in the package). I finally got that in and got the fixture installed. Again, no picture as it does not look any different. However, the light is nice, and I am waiting until our next trip to see if it performs as well as I expect it will. One other thing: When I took the old fixture off, it had a label on it which stated that it was not for wet locations. What is the outside of the R-Pod if not a wet location, especially when driving at any speed in a rainstorm? There is no real sealing to these fixtures. I made sure to seal around it with the exception of a small gap at the bottom as a weep hole. However, I may fill that in before we take the Pod out again. ------------- StephenH Happy is the man that findeth wisdom,... http://www.rpod-owners.com/forum_posts.asp?TID=7712 - ouR escaPOD mods Former RPod 179 Current Cherokee Grey Wolf 24 JS |
Posted By: StephenH
Date Posted: 25 Sep 2016 at 9:38pm
|
On my post on the 18th, I mentioned Dicor Self-Leveling Lap Sealant, and that I would say for what I used it. Well, I don't want to wait until I take the cover off the R-Pod (put on due to threat of rain after just finishing the spoiler re-do noted above). This is what I used it for: I wanted a vent fan cover for the Fantastic Fan on our RP-179. I had previusly been told that a cover would not fit. I was encouraged though by reading about how others have installed a http://www.campingworld.com/shopping/item/fan-tastic-ultrabreeze-vent-cover-gray/86349 - Fantastic Ultrabreeze Vent Cover . So, at the same time I purchased the lap sealant, I also purchased one of these covers. I got the gray one because it is translucent, not opaque. My test fit showed that it would fit with no problems. I think there may be some variation in placement of the TV antenna and/or vent stack near the fan. In my case, there was no problem, so I installed it. Installation is pretty simple. There are several videos available showing the process. After making sure all the parts were present, I installed the grid per the instructions. I then verified the placement and marked where the slots were. This assisted in locating the appropriate screws which were buried under old lap sealant. I used a putty knife to remove enough to reveal the screw heads, which I removed. I then used the bracket to be installed to mark out its placement. After that, I used a putty knife to remove the old sealant from the area where the bracket needed to sit so that it would be as flush as possible to the frame of the fan and the roof. I followed this up with denatured alcohol. While I was at it, I cleaned the old Dicor sealant all the way around. This is because I noticed some cracking in the sealant on the edge which was toward the front of the R-Pod. Since I was up there, I wanted to make sure there would be no areas where water could penetrate. Once I finished cleaning, I sealed the areas that were cracked. I then put down a bead of Dicor self-leveling sealant along the edges where had cleaned away the old lap sealant for one of the brackets, ensuring to also add sealant to the screw hole. I used one of the included screws to fasten the bracket to the frame. I repeated this with the remaining brackets. I made sure to seal the edges of the old Dicor sealant I had cut as well. The final step was to put the cover on and insert the locking pins. It was then that I found that one of the holes in the bracket's pin was drilled incorrectly. The locking pin would not go through. I ended up drilling that one out so that the pin fit. There was no problem with the other three. This was the only problem I had with installation. I'm glad I had the tools on hand. I would not have wanted to take it back for many reasons, one of which was the fix was easy and it would have left me with an incomplete job with rain threatening. Once I drilled the hole out to the correct size, completing installation was simple. Just put the cover on over the four brackets and insert the locking pins. The finished cover looks good and functions quite well. I can even leave the vent cover open with the R-Pod's http://www.amazon.com/gp/product/B00VRM05RS/ref=oh_aui_detailpage_o00_s00?ie=UTF8&psc=1 - Classic Accessories cover installed as the Ultrabreeze prevents the cover from pressing down on the fan's lid. I don't feel bad about leaving the fan's lid open now. I don't have to worry about rain getting in, even when I don't have the CA cover installed. ------------- StephenH Happy is the man that findeth wisdom,... http://www.rpod-owners.com/forum_posts.asp?TID=7712 - ouR escaPOD mods Former RPod 179 Current Cherokee Grey Wolf 24 JS |
Posted By: Patriot Dave
Date Posted: 26 Sep 2016 at 5:32am
------------- Dave & Joyce Never Forget, In God We Trust; This Our National Motto. Member; Patriot Guard Riders, Michigan Chapter Retired; So Every Day is Saturday.... Except Sunday |
Posted By: StephenH
Date Posted: 26 Sep 2016 at 1:32pm
I only used a partial tube for the Ultrabreeze installation. I did not remove the old sealant all the way around, just where the brackets needed to be. That reduced the amount of sealant needed. I did follow the instructions I saw to clean the area with denatured alcohol. It was surprising the amount of old dirt that came off of the old sealant. Proper preparation should ensure a good seal. ------------- StephenH Happy is the man that findeth wisdom,... http://www.rpod-owners.com/forum_posts.asp?TID=7712 - ouR escaPOD mods Former RPod 179 Current Cherokee Grey Wolf 24 JS |
Posted By: Patriot Dave
Date Posted: 26 Sep 2016 at 2:44pm
Thanks Stephen for the tips. I will be installing mine this week......that is if I can get a day or two without rain. ------------- Dave & Joyce Never Forget, In God We Trust; This Our National Motto. Member; Patriot Guard Riders, Michigan Chapter Retired; So Every Day is Saturday.... Except Sunday |
Posted By: StephenH
Date Posted: 27 Sep 2016 at 10:24pm
|
One thing that made me scratch my head, wondering what the designers were thinking were the drawers for the RP-179 wardrobe. When I looked, there was easily six inches of wasted space behind the drawers. In addition, the drawers are shallow. There is a big opening and a little drawer. I decided to do something about it. First a trip to Lowe's again to purchase materials. I got 1/2" birch plywood for the frame and 1/4" birch plywood for the bottom. I cut the framework so that it would retain the same width as the original drawer when finished. I cut the length six inches longer and the height 1-1/2" higher. I cut a notch for the bottom and assembled with glue and used a nailer to fasten the corners. I verified that the drawers were square. Then I sanded them to smooth the edges with 80 grit sandpaper on a power sander followed by 220 grit to smooth it out in preparation for the finish. I used 3 coats of satin polyurethane which I got in the spray can to seal and protect them. I used the old front of the drawer to help guide me for drilling holes to fasten the faceplate. After I got it assembled and the sliders from the old drawer attached, I took it out for a test fit. While the additional 1-1/2" on the sides works well, it didn't work so well for the front and back due to the catch. Only adding 1" to the front and back panels would have worked. Since I have them built, I decided to make a notch for the catch both on the front and back panels. Once I did that, it fit well with just enough space top and bottom to clear the original opening without rubbing. I still need to transfer the faceplate and sliders for the other two drawers. I hope to get that done tomorrow. Until then, here is a picture to show the difference between the old and new drawers. 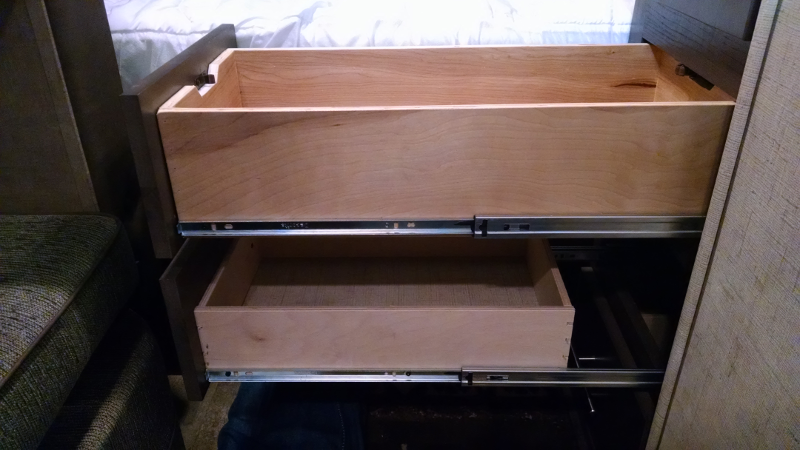 Edit: I would have liked to use the 3/8" plywood like the original drawers, but I could not find 3/8" birch plywood at either Lowe's or Home Depot. The only place I could find 3/8" birch plywood was at our local Michael's store. They would not have had enough to build all three drawers. For anyone interested, I used a table saw to do all of the cuts except the notch for the catch. That was done with a jigsaw and a clean-cut blade. ------------- StephenH Happy is the man that findeth wisdom,... http://www.rpod-owners.com/forum_posts.asp?TID=7712 - ouR escaPOD mods Former RPod 179 Current Cherokee Grey Wolf 24 JS |
Posted By: Patriot Dave
Date Posted: 28 Sep 2016 at 5:47am
------------- Dave & Joyce Never Forget, In God We Trust; This Our National Motto. Member; Patriot Guard Riders, Michigan Chapter Retired; So Every Day is Saturday.... Except Sunday |
Posted By: Shelpod
Date Posted: 28 Sep 2016 at 12:16pm
|
Nice work. That is on my list to do some time soon. So I take it the original drawer slides still worked for the new drawers. That should make it all easier. Thanks for the write-up ------------- Pod: 2013 178 TV: 2014 Explorer Limited with tow package |
Posted By: StephenH
Date Posted: 28 Sep 2016 at 12:23pm
|
The original slides work great. I put the bottom edge of the slide 1/4" from the bottom edge of the drawer. There was now also room to put a third screw in each side also, which should help make it more stable too. I did have to adjust the bottom drawer's catch as it was not positioned correctly. I saw that it had been in one position and moved by whoever installed it. Thus, I have extra holes there, but they aren't visible unless one looks there. I may fill the extra holes when I get a chance.The final position is very close to the original set of holes before it was moved by the installer. It is a very minor fit-and-finish item. Here's a picture of the completed project: 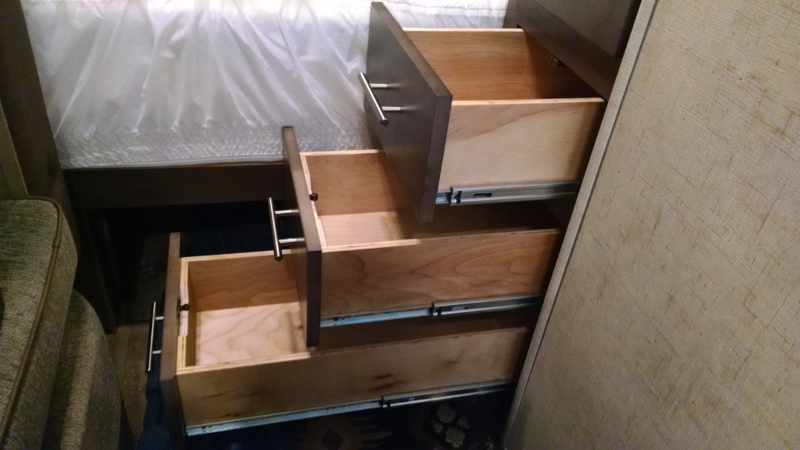 ------------- StephenH Happy is the man that findeth wisdom,... http://www.rpod-owners.com/forum_posts.asp?TID=7712 - ouR escaPOD mods Former RPod 179 Current Cherokee Grey Wolf 24 JS |
Posted By: StephenH
Date Posted: 09 Oct 2016 at 8:58pm
|
This is one instance of one upgrade requiring another one. I noticed that the vinyl tank cover was deteriorating. It was less than a year old, and I had already repaired it once, patching with black silicone sealant one area where the vinyl had split, showing the underlying padding. Not only was that splitting again, but other areas on the cover, such as the binding with the elastic were splitting. When I looked at replacements, I was not happy to see what another one of the same type would cost. When I saw that the 2017 R-Pods now have a hard cover, I decided that I would go that route also. I purchased the https://smile.amazon.com/gp/product/B010Y82OQU/ref=oh_aui_detailpage_o01_s00?ie=UTF8&psc=1 - Camco 40578 Black Heavy Duty Single Propane Tank Cover (20lb) . It arrived and I assembled it. One thing I did not like was the way the parts were in a bag that was hot-glued inside one of the half-sections of the cover and the lid hardware in a bag hot-glued to the inside of the cover. This was not glue that would peel off. The glue was stronger than the bags the parts were in. I ended up scraping some of the glue off, using hot water to help soften it a little. When I write my review of this cover on Amazon, I will address this. Once it was assembled, I removed the old cover so I could install this one. The new cover has two tabs, one on each half. These are to fasten a bungee cord to help ensure the cover stays on. However, the bracket for the regulator is in the way, preventing access to the tab. I took my tools, including drill, jigsaw, and Dremel tool and cut a notch in the metal after bending the bracket a little to give more clearance between it and the cover. I also had to adjust my generator mount to allow an inch more space between the front support leg and the tank. Once I did these two things, the cover dropped on with some maneuvering and I was able to both get it into position and attach a bungee cord. This is where the 2nd mod became necessary. The original propane hose was not long enough to reach the valve unless a hole were cut into the cover. Since I did not want to do that, I purchased a longer propane hose. The problem is that the stock 24" hose came with a 1/4" male NPT thread fitting for the regulator. The longest hose I could find with a 1/4" male NPT fitting was 24", which was way too short. I ended up getting a https://smile.amazon.com/gp/product/B00LWW83EA/ref=oh_aui_detailpage_o00_s00?ie=UTF8&psc=1 - Mr. Heater 3-foot Propane Hose Assembly and a https://smile.amazon.com/gp/product/B00LWW83EA/ref=oh_aui_detailpage_o00_s00?ie=UTF8&psc=1 - Camco 59953 Propane Fitting . I already had purchased https://smile.amazon.com/gp/product/B00LWW83EA/ref=oh_aui_detailpage_o00_s00?ie=UTF8&psc=1 - Slik-Tite PTFE Gas Line Pipe Thread Tape so I had that on hand. This is a heavy, yellow-colored tape, not the thin, white tape used for water plumbing. I used the PTFE tape to wrap the male NPT threads of the fitting and attached it to the regulator. I had read that for the 1/4" inverted male flare fitting, no pipe thread or sealant should be used, so I did not use any. After attaching the hose to the fitting and making sure all was tight, I threaded the hose under the bottom of the cover and up to the valve. After I attached the hose and turned the gas valve on, the first thing I did was to use some soapy water to test for leaks. There were no leaks. The 3' hose allowed enough slack so that there is no stress being put on the hose or fittings. The new cover looks good, and it should last much longer than the vinyl cover it replaced. 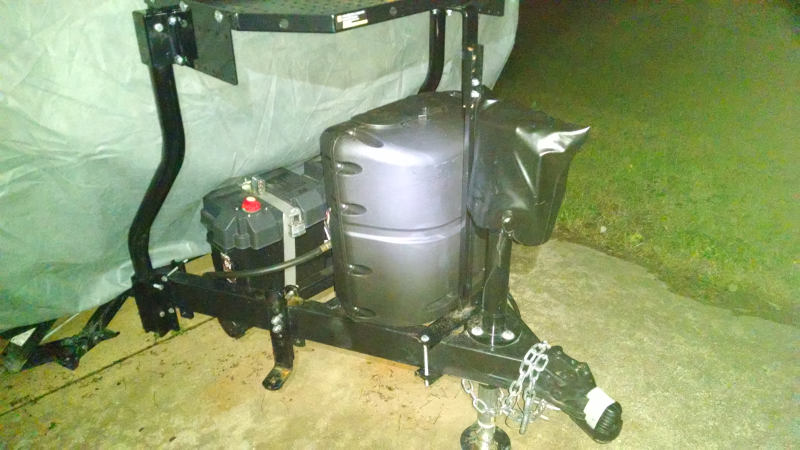 I had previously replaced the propane hose. The original one started leaking where the hose was crimped on to the fitting for the regulator. Sine I could not find one from the same maker, and since I needed it quickly, I had replaced the original one with a 20" Mr. Heater hose since it had the correct male NPT fitting. I did find that while it fit, the extra 4" was needed as the 20" hose did not have any slack once it was attached. The longer hoses all came with the inverted male fitting. I had written the manufacturer of the original hose, but never heard anything back. I hope the Mr. Heater hose will hold up better than the original one. ------------- StephenH Happy is the man that findeth wisdom,... http://www.rpod-owners.com/forum_posts.asp?TID=7712 - ouR escaPOD mods Former RPod 179 Current Cherokee Grey Wolf 24 JS |
Posted By: jglynn55
Date Posted: 14 Oct 2016 at 9:11am
| I can't figure out how to take the kitchen drawers off in my 179. |
Posted By: StephenH
Date Posted: 14 Oct 2016 at 10:30am
|
Pull the drawer out all the way. On each side, there is a little black, plastic lever in the middle of the track. Press it up or down depending on which side it is to release the inner track from the outer track and ball-bearing race. You can then pull the drawer and inner slide out and remove it. Edit: To reinsert the drawer and slides, align the inner slide attached to the drawer with the outer slide. I find it easier to then pull the outer slide over the inner slide, keeping it aligned. The inner slide's locking lever will click into place. Do this for both sides. You can then push the drawer in. ------------- StephenH Happy is the man that findeth wisdom,... http://www.rpod-owners.com/forum_posts.asp?TID=7712 - ouR escaPOD mods Former RPod 179 Current Cherokee Grey Wolf 24 JS |
Posted By: StephenH
Date Posted: 15 Oct 2016 at 9:14am
I didn't post a picture of the Fan-tastic Ultrabreeze vent cover in my description above. I had put the cover on before I could take a picture. I removed the cover and now will post a picture.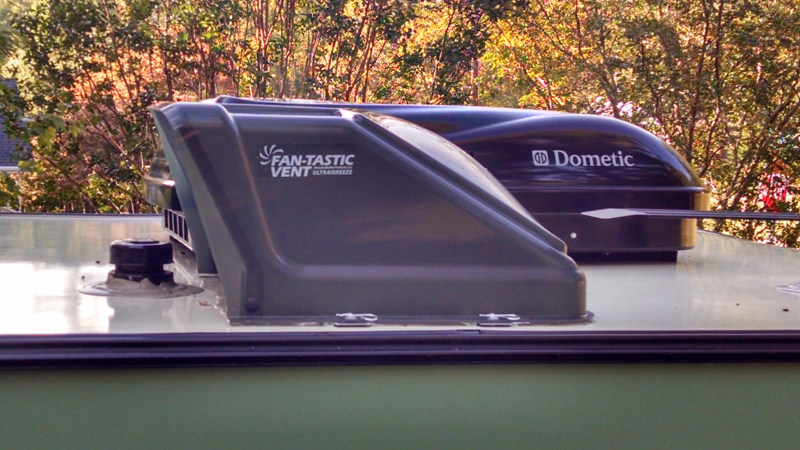 As you can see, there is no problem with either the antenna or the vent stack on our R-179. Given that each Pod might have variation in antenna placement, I wouldn't be able to guarantee that it would fit any other R-Pods. ------------- StephenH Happy is the man that findeth wisdom,... http://www.rpod-owners.com/forum_posts.asp?TID=7712 - ouR escaPOD mods Former RPod 179 Current Cherokee Grey Wolf 24 JS |
Posted By: StephenH
Date Posted: 18 Oct 2016 at 10:34pm
|
Time for another one. After seeing what others had done to make a stove-topper/cutting board, I thought I would try my hand at it. First thing: buy a cutting board. I found one that looked big enough. It is a bamboo cutting board. I did not have bamboo pieces I could use for legs, so I used some oak that I had on hand. After cutting and gluing them, I sanded the corners to try to match the radius of the cutting board. I also sanded the other edges for a smoother look. I sealed each piece with two coats of Formby's Tung Oil finish, which I had on hand. I left one surface unfinished on each leg as I planned on using that surface to glue the legs to the cutting board along with a screw. I used Liquid Fusion glue to glue the legs and screws which I had on hand to hold it. Because I glued the legs, I felt that one screw would be adequate. I had a dowel jig and used that to drill straight holes. It beat me trying to drill freehand. I finished them off with some silicone pads, one on each corner. Here are some pictures: Top View: 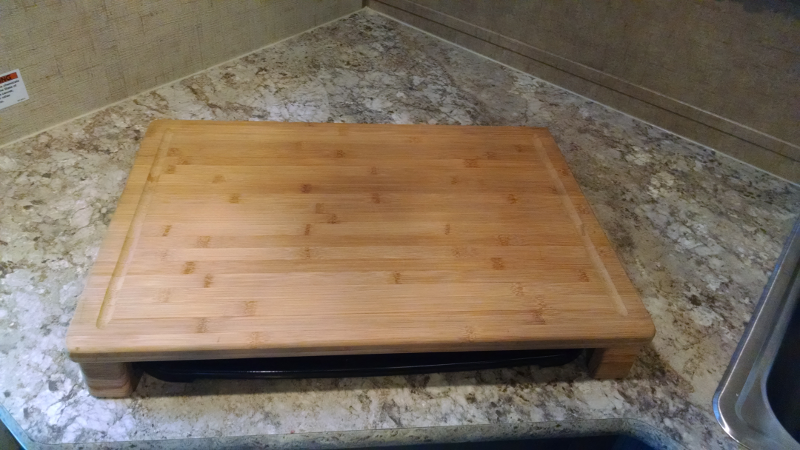 Bottom view: 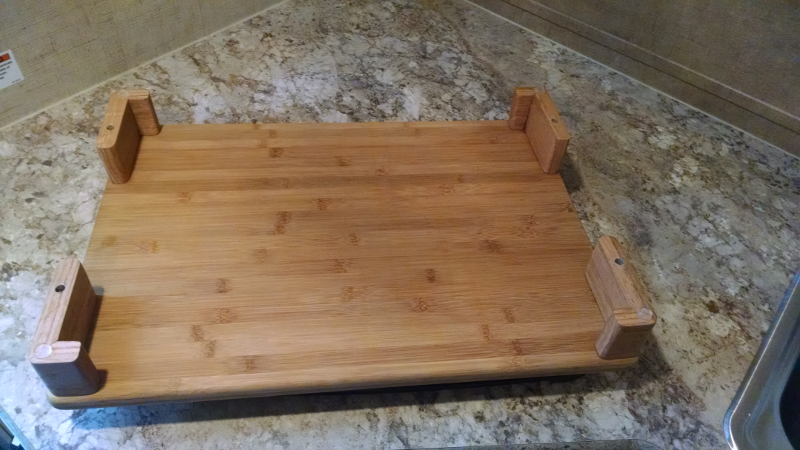 Side view: 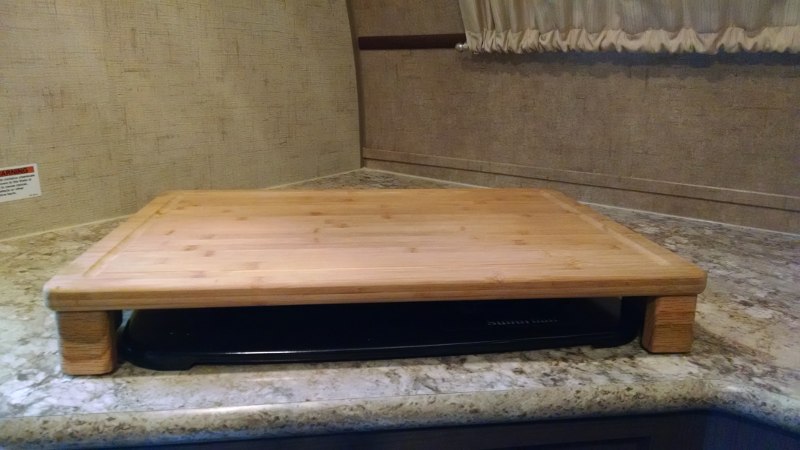 The cover just fits over the top of the stove. It is tight enough that it does not shift around. The silicone pads also help it to stay put. I don't know if it would stay on while towing, especially if we hit a big bump. I'll find out. Here's a bonus: I brought home a spice rack from a rummage sale. It is one meant to mount on the inside of a cabinet door. It had adjustable metal pieces which could slide to adjust for width. I did not want to use them, so I removed them and drilled though the wood rail to which the metal pieces had been attached. I used screws long enough to hold, but short enough so that there was no risk of going through the side of the R-Pod. Here it is: Spice Rack: 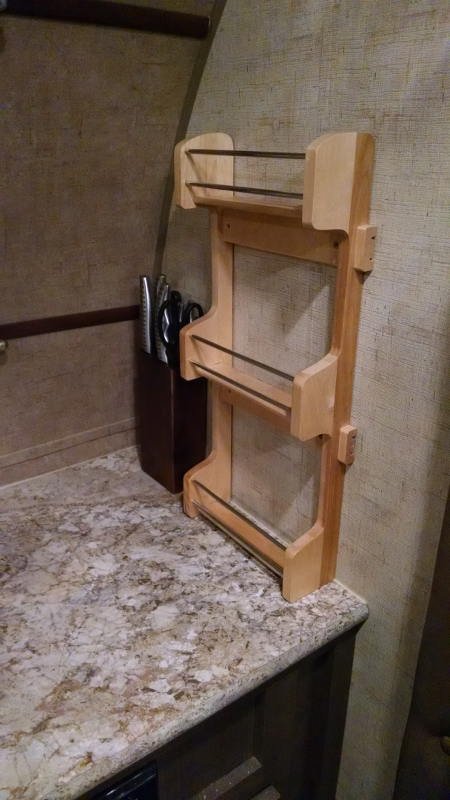 You can see the knife rack behind the spice rack. It was one that started out angled. I modified it for vertical storage after seeing how knifes did not stay in it when it was angled. I think they will stay put better now that it is nearly vertical. ------------- StephenH Happy is the man that findeth wisdom,... http://www.rpod-owners.com/forum_posts.asp?TID=7712 - ouR escaPOD mods Former RPod 179 Current Cherokee Grey Wolf 24 JS |
Posted By: Patriot Dave
Date Posted: 19 Oct 2016 at 6:45am
|
Excellent thanks for sharing. ------------- Dave & Joyce Never Forget, In God We Trust; This Our National Motto. Member; Patriot Guard Riders, Michigan Chapter Retired; So Every Day is Saturday.... Except Sunday |
Posted By: StephenH
Date Posted: 19 Oct 2016 at 10:03am
|
I did not explain what Liquid Fusion is. It is a clear, Urethane adhesive. It claims to be "Non-foaming, Waterproof, fast drying, and dries clear. I like it better than the white or yellow glue for a number of reasons. It can be used indoors or outdoors on a number of surfaces. Before it dries, it can be cleaned up with water. It is manufactured by iLoveToCreate, 5673 East Shields Avenue, Fresno, CA 23727, USA. RM# 0026946. It comes in a 2 oz bottle. I find it in craft shops like Michaels, AC Moore, or Hobby Lobby. I have not seen it in hardware stores.
------------- StephenH Happy is the man that findeth wisdom,... http://www.rpod-owners.com/forum_posts.asp?TID=7712 - ouR escaPOD mods Former RPod 179 Current Cherokee Grey Wolf 24 JS |
Posted By: StephenH
Date Posted: 20 Oct 2016 at 10:48pm
|
Here's another fix to a Forest River "What were they thinking?" situation. I had wondered why the water pump with its winterization valve and hose were put in a place that could not be reached without removing the whole bed platform. While I had previously modified the bed to give better access to the water heater, I had neglected to address the problem of access to the water pump. I didn't want to have to remove the mattress and remove the whole platform to work with the water pump. My answer: Install an access hatch. I still need to move the mattress, but I can hold it up or fold it over in order to access the new hatch I made. Since I had previously installed hinges, I removed the screws holding the back part of the platform in place and folded it over to get it out of the way I had removed screws from the hinge, thinking I would need to do so to cut the platform. It turns out I did not need to do so, which will become clear later. Steps: 1. Fold back half of the platform over the front part, allowing access to the water pump. 2. Using cleat stock or scrap lumber, add additional wood to the perimeter of the opening to provide more support for the hatch. Unfasten wire anchors as needed and cut notches as needed so it fits over the existing screw heads so it can be tight against the original frame. 2. I used an oscillating tool with a wood/metal blade to cut through the hinge and the platform just where the hinge was plus a little more. I did not cut the whole length as I wanted to draw a cutting line. After figuring out where the wood needed to be cut to rest properly, I used a straight-edge to mark the line and cut it to meet up with the cut I made previously. 3. With the line cut, I made sure the new hatch would open and close without hitting the window shade. Then I took the insulation which I had previously removed from the opening and fit it to the resized opening. I then used Locktite construction adhesive to glue the insulation to the hatch lid. 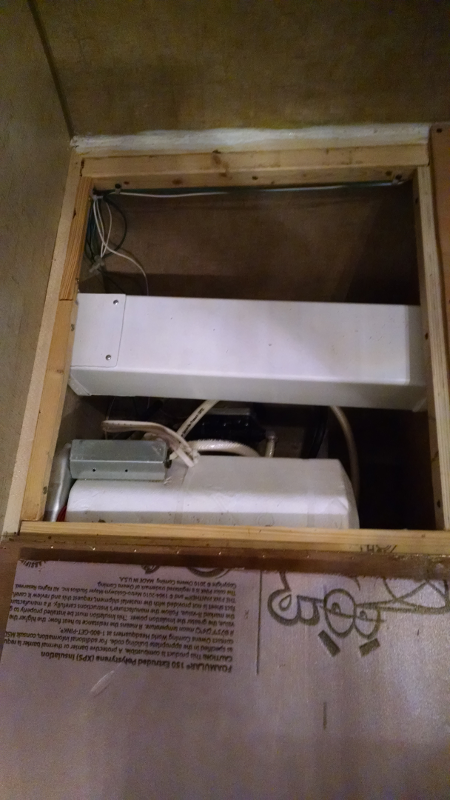 I left the project overnight so the glue could cure. The last step was figuring out how to open the hatch without having a bulky pull. I wanted something that would be relatively flat. I had an old shoelace from a worn-out pair of hiking shoes. I did some creative folding and wrapping to make a handle with extra lace hanging out from each end. I sealed it with glue so it would not come undone. I drilled two holes and fed the lace ends through. Then I brought the ends together and tied them in a square knot. Now I have a hatch through which I can access the water pump. The other side of the platform did not need to open now. It has the handle I had put in if I needed to open the whole back end of the platform. Since I did not want to leave a hole, I left the handle in place. I did use screws to permanently attach that part of the platform after using some glue to fix the insulation which had started to fall through to the basement storage. The finished hatch looks like this: 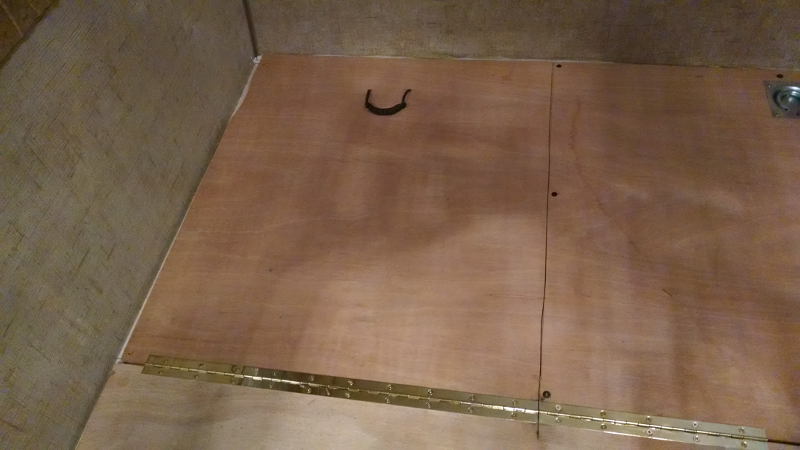 I'll see how well it works when I go to winterize the R-Pod. That won't happen until after it gets more toward winter. We will be making a short camping trip first. ------------- StephenH Happy is the man that findeth wisdom,... http://www.rpod-owners.com/forum_posts.asp?TID=7712 - ouR escaPOD mods Former RPod 179 Current Cherokee Grey Wolf 24 JS |
Posted By: StephenH
Date Posted: 31 Oct 2016 at 9:37pm
Here is one suggested by rGod2013 ( http://www.rpod-owners.com/forum_posts.asp?TID=8957&PID=84019&title=cooling-off#84019 - See this link ). He painted the cover for his AC and said it helps the AC to run better. It makes sense that it would make it more efficient since the black cover would absorb more solar energy and get hotter than a white cover. I liked the idea, so I did so also. Here are the results: 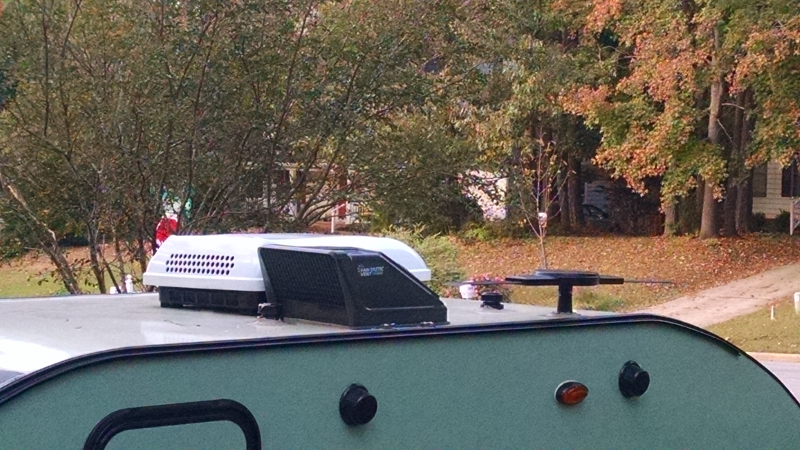 I think it turned out great. Hopefully, it will hold up. The preparation work I did should help ensure it does. I decided not to do the refrigerator vent covers, at least not yet. I would prefer to try to match the color of the side, which would work for the top cover, but the decals on either side of the bottom cover would mean some very finicky work to try to get everything to match. Leaving them black is simpler at this point. ------------- StephenH Happy is the man that findeth wisdom,... http://www.rpod-owners.com/forum_posts.asp?TID=7712 - ouR escaPOD mods Former RPod 179 Current Cherokee Grey Wolf 24 JS |
Posted By: Gregm
Date Posted: 01 Nov 2016 at 7:11am
|
Looks good. Something else added to my to do list ------------- Gregm 2014 171 2015 Toyota Tacoma Prerunner |
Posted By: Grandpa Hiker
Date Posted: 01 Nov 2016 at 9:10am
|
I just added it my list as well. ------------- Rob & Becky 2014 Ford Explorer 3.5 SOHC V6 2015 R-179 Pod aka Piddle Pod "Life is not about waiting for the storms to pass, it is about learning to dance in the rain!!" |
Posted By: StephenH
Date Posted: 09 Nov 2016 at 9:46pm
|
Here are two simple mods that are quite useful: 1. We had previously purchased a couple of LED lights from Aldi. These are a little light bar that has a motion sensor. One is in our laundry area at home. I had the second one for a while and was thinking of how I could use it. I came up with the idea to mount it in the wardrobe closet, which is rather dark. I think you will see that it provides good light and since it has a motion detector, it turns on automatically when the door is opened. To save battery life, I have it set for a short time-out after which it shuts itself off.  The light also does a good job of lighting the drawers when they are pulled out.  2. My wife had complained about the lighting for the sink area. The two lights that are in the kitchen area are located so that they do not provide much light for the sink. I was originally going to use the light above, but decided it just did not look good enough to use there. I found instead this https://www.amazon.com/gp/product/B00847B96A/ref=oh_aui_detailpage_o02_s00?ie=UTF8&psc=1 - Rite Lite LED Track Light on Amazon. It turns out that this not only provides much better lighting for the sink area, but it solves the problem of having a switch near the door so we can turn a light on and not come in to a dark R-Pod. It has a remote which I will mount to the wall (right now, it is sitting on the counter next to the door). I don't have to mess with any wiring this way. 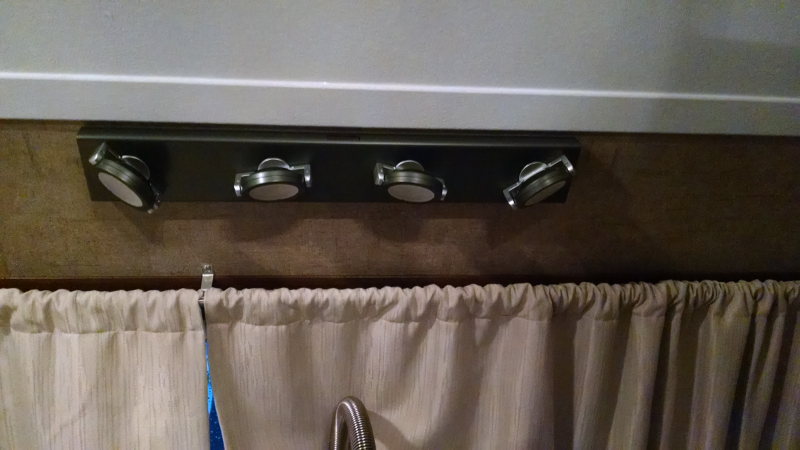 And lit: 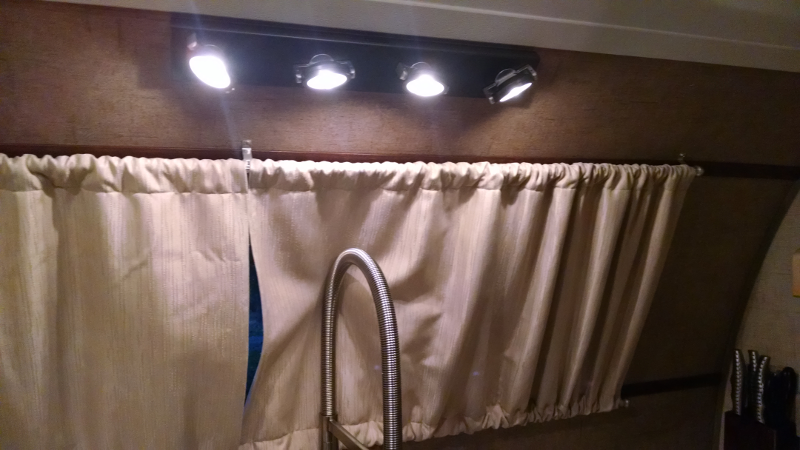 The heads swivel so that I can aim them to provide the best task lighting, not only for the sink, but for the sides as well. My wife is happy with this mod. ------------- StephenH Happy is the man that findeth wisdom,... http://www.rpod-owners.com/forum_posts.asp?TID=7712 - ouR escaPOD mods Former RPod 179 Current Cherokee Grey Wolf 24 JS |
Posted By: Gregm
Date Posted: 10 Nov 2016 at 7:10am
|
Nice lights. For the one above the sink,how does it mount? Screws or adhesive? Thanks, ------------- Gregm 2014 171 2015 Toyota Tacoma Prerunner |
Posted By: StephenH
Date Posted: 10 Nov 2016 at 9:41am
|
The light has a mounting bracket that removes from the back. The bracket came with both hook and loop adhesive fasteners and short screws. I chose to use the screws as I did not know if the adhesive would hold adequately or weaken with time. There is a template for the screws on the instructions page. I figure that the screws should hold with the motion of the trailer. We have hit some significant potholes in our travels that rearranged some of the cabinets for us, so the screws seem like a better option.
------------- StephenH Happy is the man that findeth wisdom,... http://www.rpod-owners.com/forum_posts.asp?TID=7712 - ouR escaPOD mods Former RPod 179 Current Cherokee Grey Wolf 24 JS |
Posted By: Gregm
Date Posted: 10 Nov 2016 at 9:47am
|
I prefer the screws as well. With the Florida heat adhesive does not hold up well inside our Pod. Another thing to add to my to do list.Thanks. ------------- Gregm 2014 171 2015 Toyota Tacoma Prerunner |
Posted By: StephenH
Date Posted: 10 Nov 2016 at 10:36am
|
Glad to be of assistance.
------------- StephenH Happy is the man that findeth wisdom,... http://www.rpod-owners.com/forum_posts.asp?TID=7712 - ouR escaPOD mods Former RPod 179 Current Cherokee Grey Wolf 24 JS |
Posted By: Weekend Warrior
Date Posted: 12 Nov 2016 at 1:08pm
|
I'm curious why you go through all the hassles of winterizing and accessing the shut off valves under the bed frame.
If you use an air compressor and blow out all the water lines, there's no need to remove beds and access the valves. Once all the lines are blow free of water just pour half a cup of anti freeze into your drains and your done. Whole process takes 15 minutes. |
Posted By: ParPod
Date Posted: 12 Nov 2016 at 1:48pm
|
I'm not sure it's that easy for everybody. Our Pod is parked for the winter and here the temps over the winter are a long long way south of zero so the units freeze solid. I fill the system with antifreeze just to be sure, so SH's helpful mods are...well...really helpful. I plan on copying the bed mod for next fall. ------------- Bob&Margaret 2017 179 2016 Toyota 4Runner 2 sets of Golf Clubs |
Posted By: jato
Date Posted: 12 Nov 2016 at 2:13pm
|
I hear you weekend warrior. I went the traditional route of filling everything with antifreeze the first year we owned our 177 back in November 2011. Took many attempts to rid the cold water line of that nasty antifreeze 'flavor.' Since then we have used compressed air to blow out the system by hooking into the open line downsteam of the 3 way valve under the sink. I timed myself closing the 3 bypass valves under the bed, then attaching the compressed air into the plastic line, blowing out hot and cold water lines and toilet twice. Takes about 3 minutes. Before that happens don't forget to release the pressure in the hot water tank and then open drain to empty the tank. Final step, I use 1 pint of rv antifreeze for the 2 sink and 1 shower trap. We probably don't get as cold as you Manitoba, but will hit -15 F or more during January, normally our coldest month. ------------- God's pod '11 model 177 '17 Ford F-150 4WD 3.5 Ecoboost Jim and Diane by beautiful Torch Lake "...and you will know the Truth and the Truth will set you free." |
Posted By: Weekend Warrior
Date Posted: 12 Nov 2016 at 2:35pm
|
Posted By: Weekend Warrior
Date Posted: 12 Nov 2016 at 2:39pm
| Cool, yep makes sense to blow out the lines than to mess with the traditional methods. There's a real neat rpod video on you tube that explains all the steps to totally ridding all the water out of the entire system by using compressed air but I can't recall the link off hand but it works great on these pods. |
Posted By: jato
Date Posted: 12 Nov 2016 at 5:05pm
|
What is nice is that with such a small trailer and short runs from the blow out, the blow out procedure takes less than a minute. I have been doing this since 2012 and never knew about the low point drains until last winter, because they put a ton (not actually) of foam around them so I had to cut most of it away to actually find the drains, when I opened them after blowing out, maybe a couple drops came out of each.
------------- God's pod '11 model 177 '17 Ford F-150 4WD 3.5 Ecoboost Jim and Diane by beautiful Torch Lake "...and you will know the Truth and the Truth will set you free." |
Posted By: StephenH
Date Posted: 12 Nov 2016 at 5:11pm
|
For those who choose to use RV antifreeze, the mod to access the valves will be useful. For those who choose to use just air,. it will not seem necessary. Air is easier, but I do recall reading some posts of those who used air who still had things freeze and break. RV antifreeze is more reliable, but has the downside of residual taste. After last winter, I sanitized the tank with chlorine bleach and then used a baking soda solution to help remove the odor and taste of chlorine. In the end, I don't recall any residual RV antifreeze taste, so I guess I did something right. ------------- StephenH Happy is the man that findeth wisdom,... http://www.rpod-owners.com/forum_posts.asp?TID=7712 - ouR escaPOD mods Former RPod 179 Current Cherokee Grey Wolf 24 JS |