
|
|
Post Reply 
|
Page 123 7> |
| Author |
 Printable Version Printable Version Google Google Delicious Delicious Digg Digg StumbleUpon StumbleUpon Windows Live Windows Live Yahoo Bookmarks Yahoo Bookmarks reddit reddit Facebook Facebook MySpace MySpace Newsvine Newsvine Furl Furl Topic Search Topic Search  Topic Options Topic Options
|
Retroactive 
Senior Member 

Joined: 15 Mar 2016 Location: Bolton, MA Online Status: Offline Posts: 270 |
 Topic: Diary of a Madmodder Topic: Diary of a MadmodderPosted: 26 Mar 2016 at 9:16pm |
|
I am going to be doing quite a few mods on my new 171 this summer. I like to take photos to document my projects, because it is in my nature as an engineer. So I though I would start a thread. So here we go...
|
|
 |
|
|
Leo B
podders Helping podders - pHp
Joined: 13 Jan 2012 Location: Lyndonville, VT Online Status: Offline Posts: 4508 |
Posted: 26 Mar 2016 at 9:28pm |
|
Sounds like it will be an adventure!
|
|
|
Leo & Melissa Bachand
2017 Ford F150 2021 Vista Cruiser 19 csk Previously owned 2015 Rpod 179 2010 Rpod 171 |
|
|
|
|
Retroactive
Senior Member
Joined: 15 Mar 2016 Location: Bolton, MA Online Status: Offline Posts: 270 |
Posted: 26 Mar 2016 at 9:33pm |
|
First Mod - Most Important Mod (aka make the wife happy): Letter the name on the pod.
Tools: Straight Edge Level, Measuring Tape, Pencil Materials: Boat quality stick on letters. Skill: Novice Time: 1 hour 1) Get some boat ID letters. "Stiffie" brand seems to have an endless variety of fonts and colors. 2) Pick the height you want. Too high, and the roof might slope making the text hard to read. Too low and it might get blocked if you have the bike rack on etc. Make a small mark with pencil. 3) Find the center of the pod with a measuring tape. Mark with pencil. 4) If pod is already level, you can use a level to make a faint line with the pencil. If not you can measure up from the bottom of the pod to make a parallel line. 5) Make sure area is clean. 6) Cut out the letters you need first, and lay them on a table. So you can get a rough idea of spacing, and which letter you want to be in the center - so you can place that one first and work out from there to get an even look. 7) Apply the labels carefully as to not overstretch them, and not to create air bubbles. 8) Carefully "burnish" the labels to set them, applying moderate force while smoothing them with your fingers. 9) Wife says thumbs up!  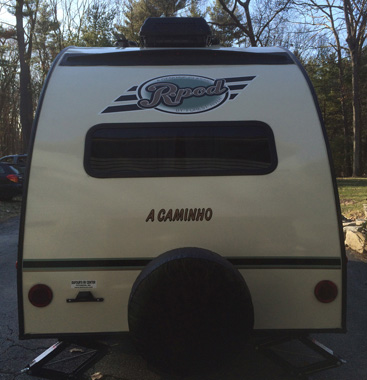 |
|
|
|
|
Leo B
podders Helping podders - pHp
Joined: 13 Jan 2012 Location: Lyndonville, VT Online Status: Offline Posts: 4508 |
Posted: 26 Mar 2016 at 9:37pm |
 a happy wife is a must! a happy wife is a must!
|
|
|
Leo & Melissa Bachand
2017 Ford F150 2021 Vista Cruiser 19 csk Previously owned 2015 Rpod 179 2010 Rpod 171 |
|
|
|
|
Retroactive
Senior Member
Joined: 15 Mar 2016 Location: Bolton, MA Online Status: Offline Posts: 270 |
Posted: 26 Mar 2016 at 9:55pm |
|
It's always better to start ANY adventure that way.

|
|
|
|
|
Retroactive
Senior Member
Joined: 15 Mar 2016 Location: Bolton, MA Online Status: Offline Posts: 270 |
Posted: 27 Mar 2016 at 9:55am |
|
Privacy Curtain Mod Tools: Measuring Tape, Pencil, Scissors. Materials: Curtain Panel, Tension Rod, Command Hook, Command Strips, Velcro “One Wrap”. Skill: Novice Time: 1-2 hours 1) Pick a height for the rod. I recommend at least 3” higher than the tallest person, YMMV. Mark the height on both sides of the hallway, making sure to mark the corners of the wall - as this is the strongest point, see Fig1. 2) Cut command strips to approx size of the rod end caps. Place on wall at height marks, making sure to only place them on the corner…see Fig1 again! 3) Expand tension rod to width of hallway at height marked in step 1, and make a pencil mark at the rod joint. Now make another mark by extendeding the rod ½” longer, align and hold the joint in place and tighten screw. See Fig2. 4) Peel off paper off the mounted command strips. 5) Slide Curtain onto rod. 6) Compress rod and carefully install it so the ends contact the command strips. Note: this will take good hand and upper body strength, to get it placed correct the first time. 7) Pick a spot for the command hook. I put it fairly high so I don’t catch it with my shoulder, but I think this would definitely come down to personal choice. See Fig3. 8) Cut Velcro “one wrap” strips to length, to secure curtain as desired. An important thing to keep in mind, when deciding on the location of the wraps, is not to block the thermostat with the curtain - otherwise it will not sense the actual cabin temp. Three strips seemed to be a good compromise, and allows it to be pulled away from the thermostat. see Fig4. 9) Yay!… see Fig 5. 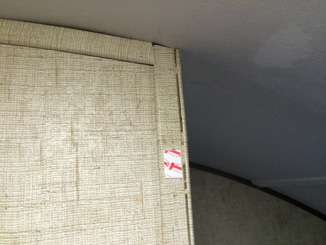 L L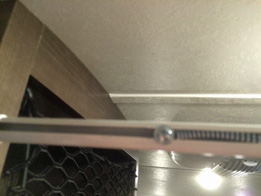 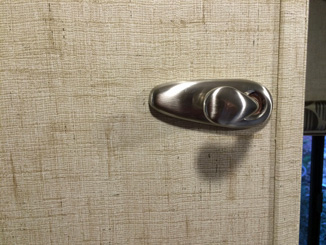 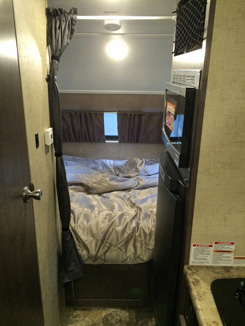 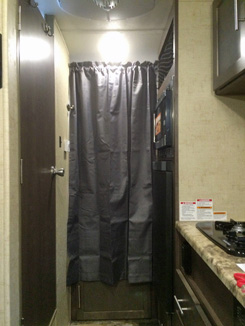 |
|
|
|
|
Q7-retired
Senior Member

Joined: 26 Dec 2014 Location: Pittsboro, NC Online Status: Offline Posts: 100 |
Posted: 27 Mar 2016 at 6:55pm |
|
Boa viagem!
|
|
|
Best regards, Jim
2015-RP178 TV 2015 Audi Q7 TDI and 2017 Ford F150 At home in "Our Pod" |
|
|
|
|
Retroactive
Senior Member
Joined: 15 Mar 2016 Location: Bolton, MA Online Status: Offline Posts: 270 |
Posted: 27 Mar 2016 at 7:52pm |
|
Obrigado! Hopefully we can get some grilled fresh sardinhas at one the festas when we're down the coast, it's all about the timing!
|
|
|
|
|
Patriot Dave
Senior Member

Joined: 06 Feb 2016 Location: LaSalle, Mi. 48 Online Status: Offline Posts: 206 |
Posted: 28 Mar 2016 at 8:46pm |
I am a newbie and just made a down payment on a 179 tonight. Thanks for the info regarding placing the name on the rear. I will be using your directions. Thank You |
|
|
Dave & Joyce
Never Forget, In God We Trust; This Our National Motto. Member; Patriot Guard Riders, Michigan Chapter Retired; So Every Day is Saturday.... Except Sunday |
|
|
|
|
Retroactive
Senior Member
Joined: 15 Mar 2016 Location: Bolton, MA Online Status: Offline Posts: 270 |
Posted: 28 Mar 2016 at 10:03pm |
|
No problem. I am happy to document all this to share, one of the great things about the Rpod is that it lends itself to so many mod possibilites. I don't know how long the stickers will last, but they are used for small freshwater boat reg ID so they have to be relativley durable. The hardest part for me is getting it centered, it still came out about 1" left of center. Tomorrows mod is upgrading the inside speakers to some sweet JBL 6" units!
|
|
|
|
|
Post Reply
|
Page 123 7> |
| Forum Jump | Forum Permissions You cannot post new topics in this forum You cannot reply to topics in this forum You cannot delete your posts in this forum You cannot edit your posts in this forum You cannot create polls in this forum You cannot vote in polls in this forum |


 Diary of a Madmodder