
|
|
Post Reply 
|
Page <1 4567> |
| Author |
 Printable Version Printable Version Google Google Delicious Delicious Digg Digg StumbleUpon StumbleUpon Windows Live Windows Live Yahoo Bookmarks Yahoo Bookmarks reddit reddit Facebook Facebook MySpace MySpace Newsvine Newsvine Furl Furl Topic Search Topic Search  Topic Options Topic Options
|
|
GLBCamper 
Senior Member 
Joined: 30 Jun 2015 Location: Oregon Online Status: Offline Posts: 274 |
 Topic: Diary of a Madmodder Topic: Diary of a MadmodderPosted: 21 Apr 2016 at 1:44am |
|
|
Back to a speaker question. Will any 6" speaker work?
|
||
|
Old: 2014 177 HRE
2015 Tacoma V6 4x4 Double Cab New: 2016 EVO ATS 200rd 2016 F150 4x4 Sport |
||
 |
||
|
Retroactive
Senior Member

Joined: 15 Mar 2016 Location: Bolton, MA Online Status: Offline Posts: 270 |
Posted: 21 Apr 2016 at 7:50am |
|
Yes. The standard size is actually called 6.5" which is a very common automotive size. You should have no problems unless your speakers are ceiling mounted.
|
||
|
||
|
Patriot Dave
Senior Member

Joined: 06 Feb 2016 Location: LaSalle, Mi. 48 Online Status: Offline Posts: 206 |
Posted: 24 Apr 2016 at 5:15am |
|
I have ceiling mounted speakers in our 17................is the problem due to the lack of depth? |
||
|
Dave & Joyce
Never Forget, In God We Trust; This Our National Motto. Member; Patriot Guard Riders, Michigan Chapter Retired; So Every Day is Saturday.... Except Sunday |
||
|
||
|
Grandpa Hiker
Senior Member

Joined: 04 Jan 2015 Location: Martinsville, V Online Status: Offline Posts: 143 |
Posted: 24 Apr 2016 at 5:45am |
|
|
Yes the issue is the thickness of the ceiling, but you can use spacers. Here is a thread that discusses the issue.
https://www.facebook.com/groups/56931970807/permalink/10153156787425808/?hc_location=ufi
|
||
|
Rob & Becky
2014 Ford Explorer 3.5 SOHC V6 2015 R-179 Pod aka Piddle Pod "Life is not about waiting for the storms to pass, it is about learning to dance in the rain!!" |
||
|
||
|
Retroactive
Senior Member
Joined: 15 Mar 2016 Location: Bolton, MA Online Status: Offline Posts: 270 |
Posted: 24 Apr 2016 at 11:45am |
|
|
For cheap money you can buy "speaker depth extenders". One brand is "American International". There are other brands out there, and sometimes they call them "speaker rings" etc. They are basically black plastic rings. I highly recommend going with a 6.5" if possible, the bass response will be so much better. Don't cheap out on the speakers, you will be glad you didn't. If you want to hear something in person, I highly recommend the JBL ones they sell at Best Buy - bring a CD of your favorite music and have a listen. I found them to be very good for the price point, I have thousands of dollars invested in my Home Theater and am picky when it comes to sound - so I was pleasantly surprised.
|
||
|
||
|
Patriot Dave
Senior Member
Joined: 06 Feb 2016 Location: LaSalle, Mi. 48 Online Status: Offline Posts: 206 |
Posted: 24 Apr 2016 at 12:03pm |
|
Hey Thank You for the info. I definitely want to improve the sound inside my Rpod. Thanks Again |
||
|
Dave & Joyce
Never Forget, In God We Trust; This Our National Motto. Member; Patriot Guard Riders, Michigan Chapter Retired; So Every Day is Saturday.... Except Sunday |
||
|
||
|
Retroactive
Senior Member
Joined: 15 Mar 2016 Location: Bolton, MA Online Status: Offline Posts: 270 |
Posted: 24 Apr 2016 at 7:37pm |
|
|
TV Mount Mod: "fwunder" gets the credit for inspiring this mod. I bought the same mount he used, on Amazon it is only $12.99 (link below). It worked perfectly for the TV's and locations like both of ours.
1) Remove everything, including cables. But do not cut off the special screw mount zip ties. 2) Observe existing bolt pattern on walls. When locating the new mount, stay within the bolt pattern boundary so that you know the screws will be going into the stud behind the paneling. 3) Mark new holes. I was able to move the axis of the new mount approx 1.5" to the right, and more importantly 1" lower...the TV in my 171 is mounted way too high IMHO. 4) The screws that come with the mount are far too large, and the old screws are too small because the new mount only allows two screws. I got two medium sized screws that I happened to find in my random hardware junk box. I strongly advise getting some new screws for this project. 5) Pre-drill holes for the screws. 6) Attach new mount to the wall. Make sure the bracket is plumb when tightening. 7) Attach TV to mount. 8) Re-attach cables to TV, and "arm" of the mount. Note how I secured the cable conduit to the underside of the arm so it doesn't get jammed between the arm and wall - letting it sit as flat as possible. You could alternatively mount it to the top side of the arm. 9) Re-attach the screw zip-ties to the wall. Re-attach all cables to the wall outlets. The mod worked perfectly and took about 90 minutes. Between the downward angle range of the new mount, and the fact I was able to move the mount 1" lower, it was absolutely perfect for viewing the TV form the Lava Lounge (aka the dinette we leave permanently as a bed). My "reward" for my hard work, was getting to test the A/V system by watching The Notebook...yay? Bonus points for knowing what I also mounted, on the upper right side of the wall. 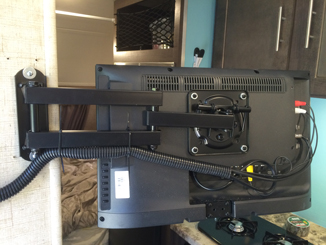 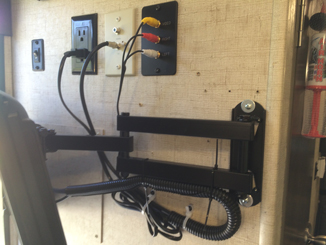  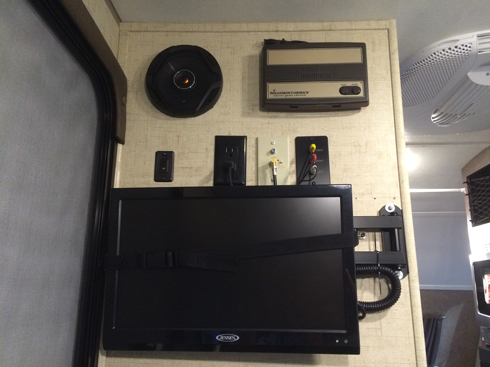 |
||
|
||
|
Retroactive
Senior Member
Joined: 15 Mar 2016 Location: Bolton, MA Online Status: Offline Posts: 270 |
Posted: 25 Apr 2016 at 12:55pm |
|
|
Ergonomic Mod: Entry/Exit Handle for bed compartment. One downside to the 171 is how tight it is to get out of the bed compartment. I sleep on the backside under the rear window, so I have to crawl over my wife to get out of bed. I decided to add a handle to help me spiderman over her. I bought one of the Moen bathroom stability handles, they are available in a variety of finishes and lengths.
I'm not going into detail on this one, to do this mod right you need to be able to locate structural members behind the wall. The top mount catches the corner stud as well as the horizontal member that supports the shelf in back. The bottom mount only catches the corner stud. The other three holes I used expanding wall anchors. I was surprised at how solid it came out, no wiggle and no creaking, I put quite a bit of side-side and up-down stress on it to test it out. This is going to be a lifesaver in the dark when I don't have my glasses on! 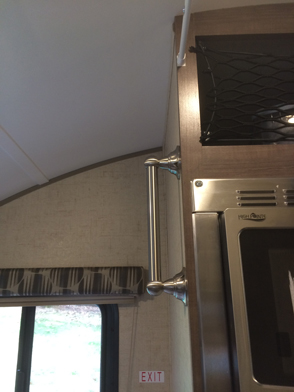 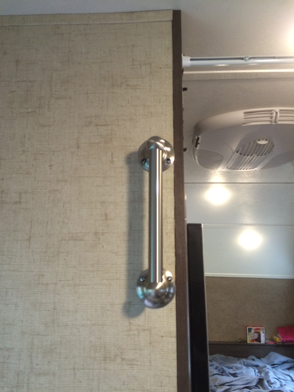 |
||
|
||
|
Retroactive
Senior Member
Joined: 15 Mar 2016 Location: Bolton, MA Online Status: Offline Posts: 270 |
Posted: 25 Apr 2016 at 9:41pm |
|
|
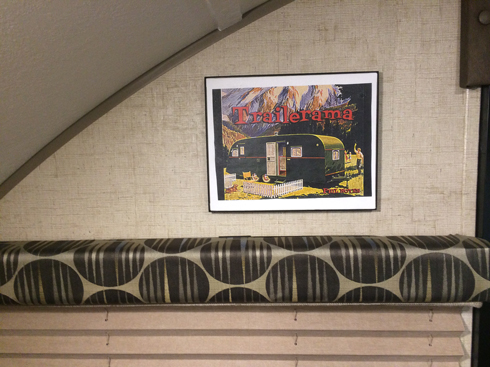
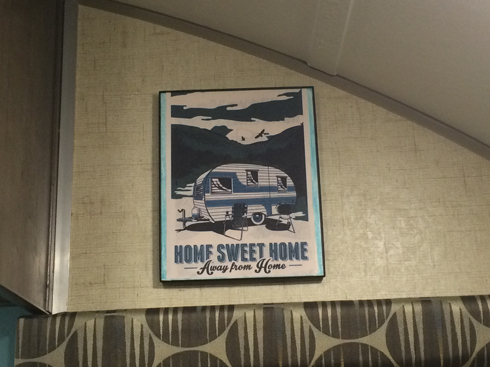
Gotta have art! We needed to make the pod a little more homey and wanted to add some art. This was a classic collaboration between the wife and I, she comes up with the initial concept and I work out the execution. What kind of art do you put in a camper? Camper Art!
  |
||
|
||
|
larbear
Newbie 

Joined: 05 May 2016 Online Status: Offline Posts: 12 |
Posted: 28 May 2016 at 6:13pm |
|
|
Wil...You are really inspiring!
We ended up getting a 2010 171 Escape Pod in excellent shape...getting "necessary stuff"...trying to spray wax between rainstorms...going to do the water purifying when I can (even tho dealer said it was all set) charging the new battery up (the case had a good 3-4 inches of rain in bottom- should I drill some holes to drain? Brought home last week and found I need to get risers so just got them from forest river for $150 plus tax and shipping. Now waiting to hear from my local car mechanic to see if he'll put them on. The directions were horrible but I found a great step by step on this site! I wish I could do it myself but no level yard or driveway at home. We're babysitting grandson til schools out then looking forward to a maiden voyage. Don't know how to tag yet Lar & Nan 2010 RP-171 "Escape Pod" 2012 Ram 1500 Quad 5.7L
|
||
|
||
|
Post Reply
|
Page <1 4567> |
| Forum Jump | Forum Permissions You cannot post new topics in this forum You cannot reply to topics in this forum You cannot delete your posts in this forum You cannot edit your posts in this forum You cannot create polls in this forum You cannot vote in polls in this forum |


 Diary of a Madmodder