
|
|
Post Reply 
|
Page <1 567 |
| Author |
 Printable Version Printable Version Google Google Delicious Delicious Digg Digg StumbleUpon StumbleUpon Windows Live Windows Live Yahoo Bookmarks Yahoo Bookmarks reddit reddit Facebook Facebook MySpace MySpace Newsvine Newsvine Furl Furl Topic Search Topic Search  Topic Options Topic Options
|
Retroactive 
Senior Member 

Joined: 15 Mar 2016 Location: Bolton, MA Online Status: Offline Posts: 270 |
 Topic: Diary of a Madmodder Topic: Diary of a MadmodderPosted: 30 May 2016 at 12:50pm |
Congratulations! Best of luck with the 171. Once you get used to the small hallway, then it doesn't really feel as cramped as one might think. That being said, I am definitely going to try to reclaim and/or re-purpose areas to maximize storage. I think you will like the simplicity, it is a good way to start. Bon Voyage!
|
|
 |
|
|
larbear
Newbie 

Joined: 05 May 2016 Online Status: Offline Posts: 12 |
Posted: 30 May 2016 at 2:45pm |
|
Thanks...for another "heads up" tip....we're loving our pod even tho it has yet to leave home!
I ended up drilling 4 corner bottom 1/4" holes in bottom of case to avoid the floods. |
|
|
|
|
StephenH
podders Helping podders - pHp

Joined: 29 Nov 2015 Location: Wake Forest, NC Online Status: Offline Posts: 6288 |
Posted: 30 May 2016 at 2:59pm |
|
I ended up drilling drain holes in my battery boxes as well after seeing them accumulate water. The lids are not sealed, so any water thrown up by the TV tires can get into the areas of the lid through which the wires are fed. If these batteries were down in the bilge of a boat, then the object would be to keep bilge water out, but here, there needs to be a way to drain water that gets in through the lid.
|
|
|
StephenH
Happy is the man that findeth wisdom,... ouR escaPOD mods Former RPod 179 Current Cherokee Grey Wolf 24 JS |
|
|
|
|
Retroactive
Senior Member
Joined: 15 Mar 2016 Location: Bolton, MA Online Status: Offline Posts: 270 |
Posted: 30 May 2016 at 3:00pm |
|
Good to know. I have not towed in the rain yet.
|
|
|
|
|
techntrek
Admin Group - pHp 
Joined: 29 Jul 2009 Location: MD Online Status: Offline Posts: 9059 |
Posted: 30 May 2016 at 8:37pm |
|
Yup, must drill those holes. Water *will* get into the box.
|
|
|
|
|
Retroactive
Senior Member
Joined: 15 Mar 2016 Location: Bolton, MA Online Status: Offline Posts: 270 |
Posted: 21 Jul 2016 at 11:36pm |
|
My next mod is turning the dinette into a permanent Daybed type situation. When inside the camper we prefer to lounge in the area in general, it is central to the TV and everything else. Plus we never use the dinette in the 171, it borders on impractical. The seat cushions as a mattress are simply unacceptable, so an upgrade was necessary. The other upgrade in this mod is turning the space under the table into open storage, now the both of us can put our luggage under there. We got the Twin size mattress in a box from wallyworld, it is almost perfect because it is only 2" less in width than the benches (FR says it is 42" but it is actually 41"), and the new Twin mattress is 39". We put a Full size foam topper on, and stuffed the extra width into the 2" space between the mattress and back wall (fills the gap perfectly). The nice thing about the mattress is that it folds very easily, allowing access to the storage spaces under the benches. The mod is very basic, and you can see all of it in the first pic.
1) Remove leg mechanism from table top, by removing the wood screws. 2) Add a few long screws to the two boards that support the table, by screwing them into the stud inside the bench. 3) Use at least one bracket on each side, to keep the table top from sliding back and forth. 4) Add mattress and bedding of choice. 5) "The Lava Lounge" is fully operational! 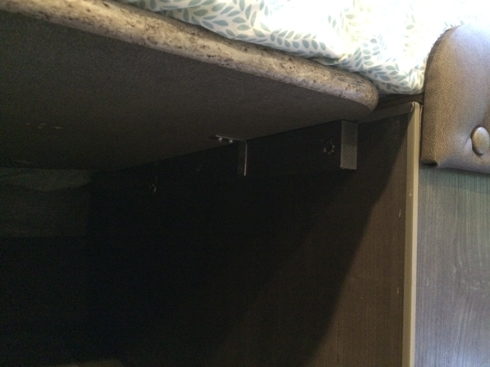 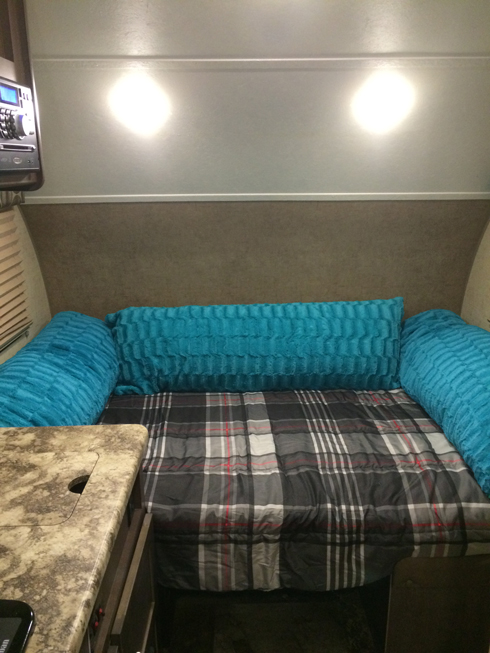 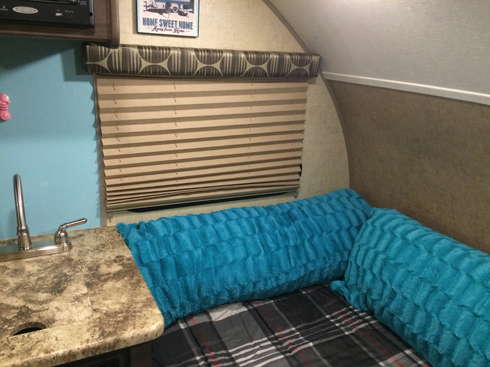 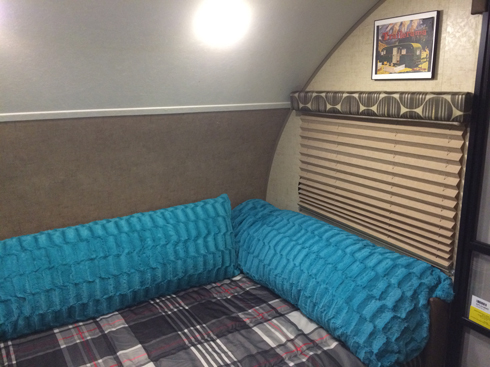 |
|
|
|
|
StephenH
podders Helping podders - pHp
Joined: 29 Nov 2015 Location: Wake Forest, NC Online Status: Offline Posts: 6288 |
Posted: 22 Jul 2016 at 9:24am |
|
Looks nice and appears to be quite practical.
|
|
|
StephenH
Happy is the man that findeth wisdom,... ouR escaPOD mods Former RPod 179 Current Cherokee Grey Wolf 24 JS |
|
|
|
|
Post Reply
|
Page <1 567 |
| Forum Jump | Forum Permissions You cannot post new topics in this forum You cannot reply to topics in this forum You cannot delete your posts in this forum You cannot edit your posts in this forum You cannot create polls in this forum You cannot vote in polls in this forum |


 Diary of a Madmodder