
|
List Your Mods: |
Post Reply 
|
Page <1 5152535455 77> |
| Author |
 Printable Version Printable Version Google Google Delicious Delicious Digg Digg StumbleUpon StumbleUpon Windows Live Windows Live Yahoo Bookmarks Yahoo Bookmarks reddit reddit Facebook Facebook MySpace MySpace Newsvine Newsvine Furl Furl Topic Search Topic Search  Topic Options Topic Options
|
Cap-n-Cray 
Senior Member 

Joined: 22 Feb 2014 Location: Bainbridge Is Online Status: Offline Posts: 121 |
 Post Options Post Options
 Quote Reply Quote Reply
 Topic: List Your Mods: Topic: List Your Mods:Posted: 20 Sep 2016 at 12:27am |
|
Jonknite can you post more photos of your install. Great job and idea. I though of making a type of shim, but your way is better...

|
|
|
Cary
2014 RP-177 |
|
 |
|
|
kkomorn
Newbie 
Joined: 17 Oct 2015 Online Status: Offline Posts: 7 |
Post Options
Quote Reply
Posted: 20 Sep 2016 at 11:28am |
|
Jonknite - where did you get the window?
Did you consider a slider? Doing that in the spring. Such a sweet adder. It's like a dungeon in the Pod during the day. Thanks! KK
|
|
|
|
|
Jonknite
Newbie
Joined: 25 May 2015 Location: Placitas, NM Online Status: Offline Posts: 19 |
Post Options
Quote Reply
Posted: 20 Sep 2016 at 11:30am |
|
Doug,
Can you recommend a good cover?
|
|
|
|
|
fwunder
Senior Member

Joined: 04 Oct 2013 Location: New Jersey Online Status: Offline Posts: 1676 |
Post Options
Quote Reply
Posted: 20 Sep 2016 at 12:26pm |
|
Wow Jonknite. Great work on that window! Brave!
This is the cover I bought (December 2013) for my 178. Still in good shape: fred
|
|
|
2014 RPod 178 => MyMods and Buying Habits
2008 4Runner Limited 4.0-liter V6 Yes, those are wild ponies dining on grass while dumping tanks! |
|
|
|
|
Jonknite
Newbie
Joined: 25 May 2015 Location: Placitas, NM Online Status: Offline Posts: 19 |
Post Options
Quote Reply
Posted: 20 Sep 2016 at 12:49pm |
|
For those that asked, here are the details of my dinette window add-on.
I got the window from Hehr International in Indiana. It is from their 5900 series. They have any size you want and you can get them with or without sliders, tinted etc. I chose a fixed window. If you look at the picture of the R-Pod framework below you can see the bottom rib that I used (Black Arrow). I cut through the middle rib (Blue Arrow) and added a rib below the Red Arrow. You could have a window as high as the red arrow. Once the window arrived (took 3-4 weeks) I traced the outline onto cardboard to make a template for the frame. I set the pencil so that the outline was about 1/8" bigger all around. To compensate for the curvature of the Pod I made the frame 2 1/4" high. This way the window will be sealed against a flat surface inside and out. I then made a gluing jig for the frame 3/4" smaller than the template as I was using 3/4" pine for the frame. 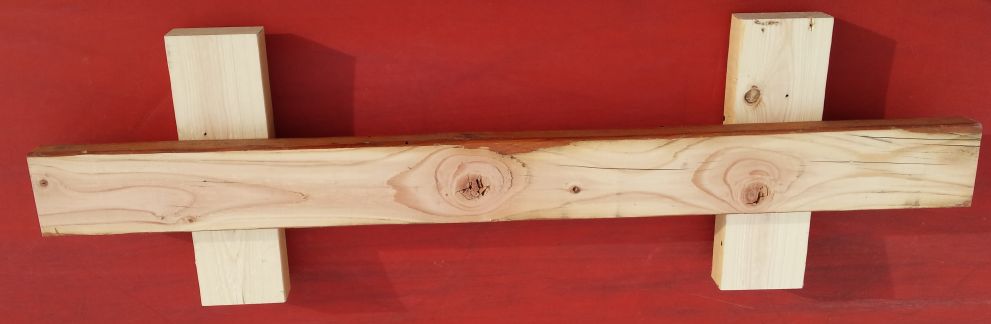 I traced the four rounded corners onto 2X4's and cut them with a bandsaw. I then cut the 1X3" Pine (trimmed to 2 1/4" wide) pieces to fit between the round corners. I used a good quality exterior wood glue and clamped the whole thing against the jig. I then sanded the whole thing smooth with the following result. 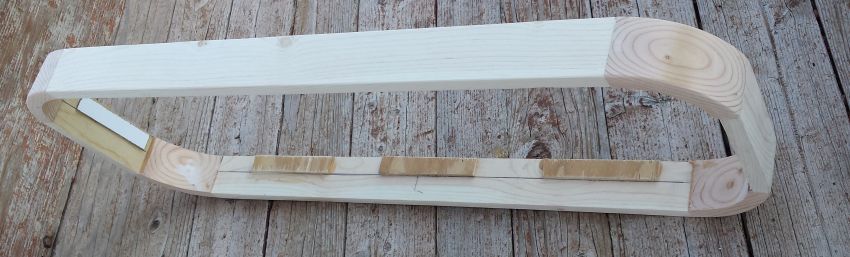 The plywood shims were added because the glass side of the window has a smaller ID than the inside frame and I didn't want it to shift while I installed the window. I then painted it with black Rust-Oleum to match the window frame. I cut a hole on the inside of the POD at about the center point of the window location so that i could accurately find the lower rib. I then cut along the bottom rib as my starting point. Next hold the finished frame against the wall with the bottom lined up with the lower rib and trace around the frame. A jig saw with a short blade was then used to cut out the rest of the wall. I used a short blade so it wouldn't penetrate the outer wall. 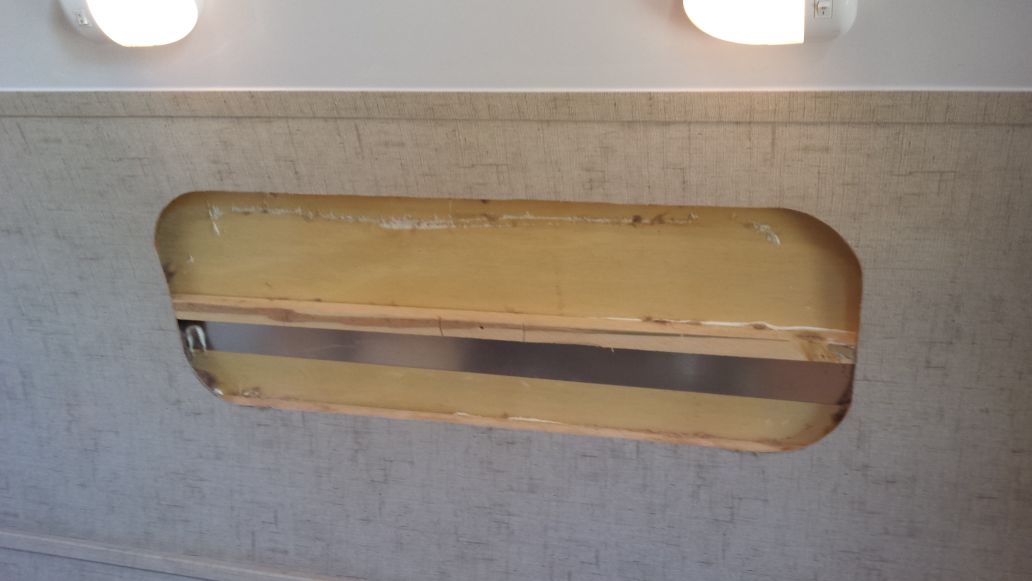 Next I used a pencil to transfer the inner cut to the outside wall and cut that out with a longer blade. 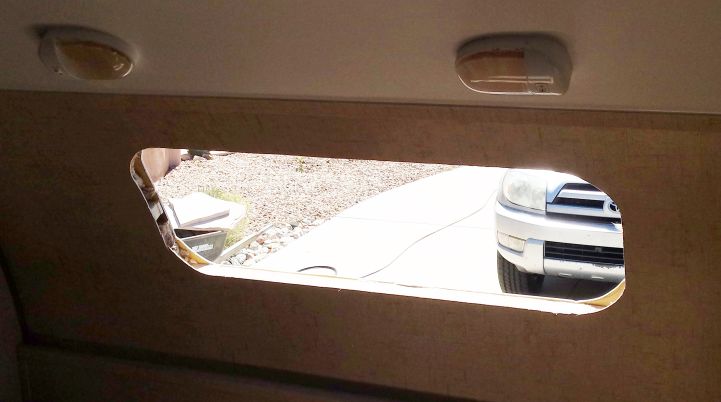 Now I glued in a 36" long rib between the inner and outer wall at the top of the hole to give stability to the walls and to have a strong anchor point for the top of the frame. I used high strength construction adhesive. 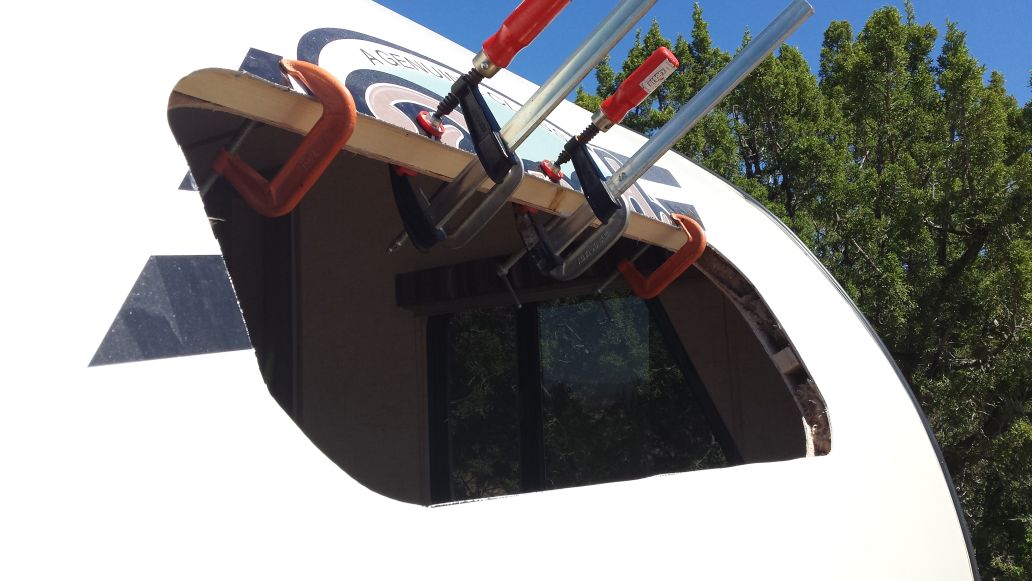 Next I inserted the frame and screwed it to the bottom and top ribs as well as the ends of the middle (blue arrow) rib that was cut with the hole. 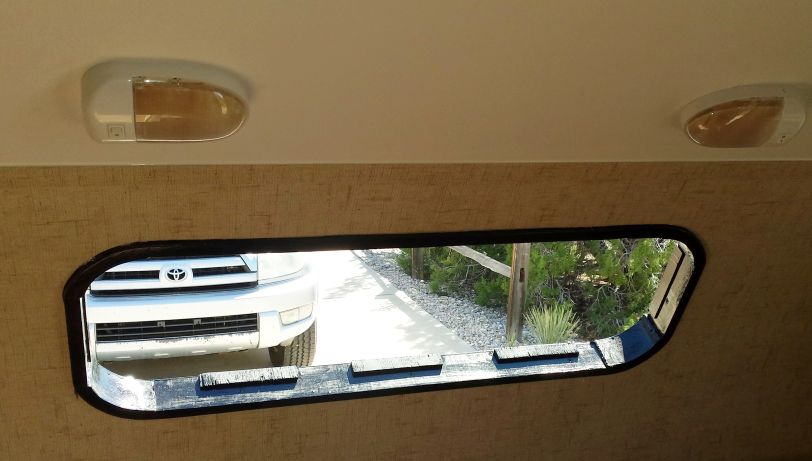 I then applied a liberal amount of silicone caulk to the outside and ran a nice bead on the inside to seal the whole thing up. It was then a simple matter to install the window according to the manufacturers directions. 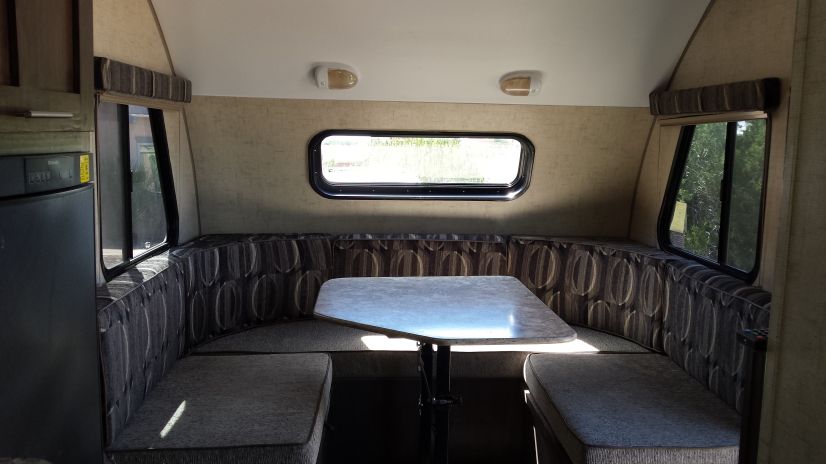  |
|
|
|
|
Shelpod
Groupie 
Joined: 14 Sep 2015 Location: Arizona Online Status: Offline Posts: 74 |
Post Options
Quote Reply
Posted: 20 Sep 2016 at 1:18pm |
|
Could you reuse the cut out for a cover for the window? That would maintain the r-pod decal. You would have to build a frame for that also but it is an idea.
|
|
|
Pod: 2013 178
TV: 2014 Explorer Limited with tow package |
|
|
|
|
techntrek
Admin Group - pHp 
Joined: 29 Jul 2009 Location: MD Online Status: Offline Posts: 9059 |
Post Options
Quote Reply
Posted: 20 Sep 2016 at 9:05pm |
|
The cover I'm referring to is a hard cover over the window. You'll have to custom match one to your window. I think you were smart to order a solid window to prevent leaking going down the road. There is a lot of air pressure on that surface.
I could see mounting a window above the red arrow for more of a skylight feel.
|
|
|
|
|
grand beaver
Groupie
Joined: 07 Feb 2016 Location: Western Oregon Online Status: Offline Posts: 52 |
Post Options
Quote Reply
Posted: 21 Sep 2016 at 6:35pm |
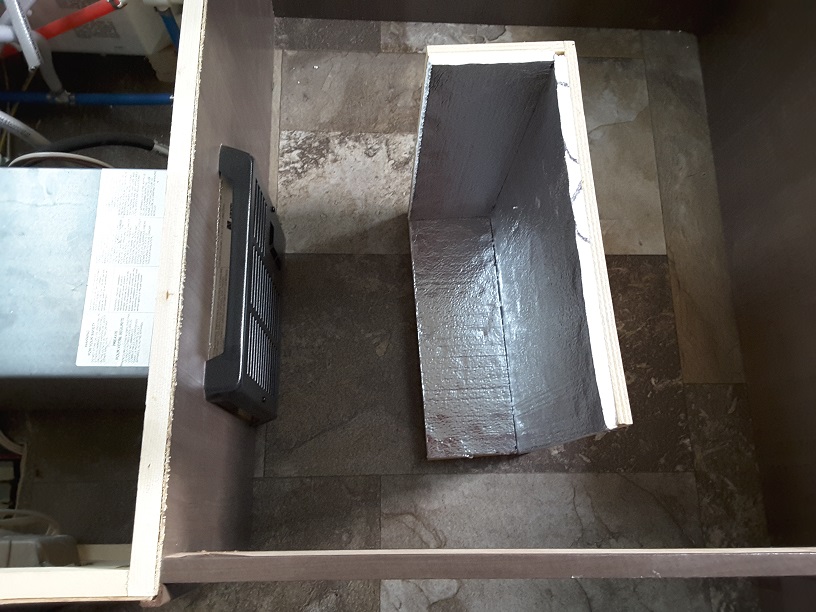 ....I built an air deflector for the heater. ....I built an air deflector for the heater.
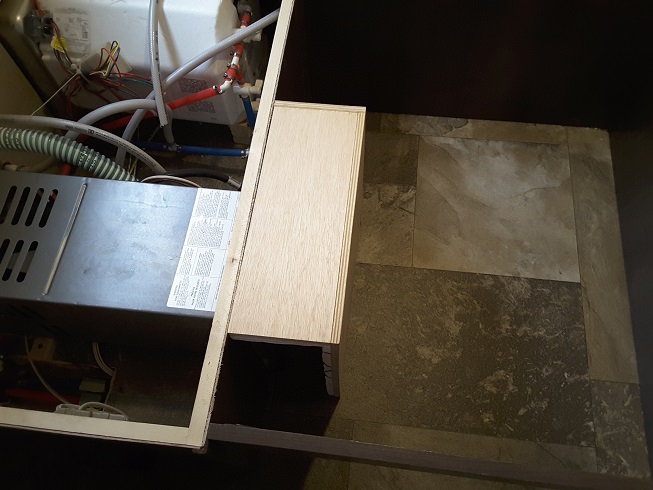 ....Installed looking down from the top. ....Installed looking down from the top.
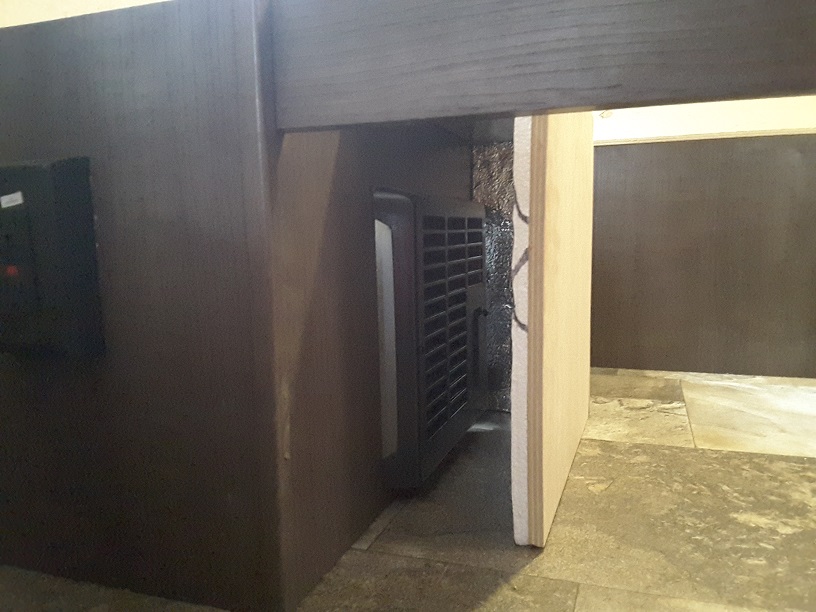 From the front. From the front.
 ....Added a wire shelf over the bed....... ....Added a wire shelf over the bed.......
|
|
|
|
|
NutPod
Newbie

Joined: 29 Jul 2016 Location: Canada Online Status: Offline Posts: 25 |
Post Options
Quote Reply
Posted: 21 Sep 2016 at 7:21pm |
|
Hey Groupie I like what you built to redirect the air flow from the heater but can you tell me how hot it gets being that close to the furnace. I built something out of ducting metal and it gets very hot and I'm not sure I like that.
I find that Forest River should have vented the heat out the front of the bed instead of underneath the bed. We just got the R-Pod 180 and when camping in the Rockies for a week and had to use the furnace every night and found the furnace airflow needed to be redirected to get heat to the other side of the Pod. |
|
|
|
|
Leo B
podders Helping podders - pHp
Joined: 13 Jan 2012 Location: Lyndonville, VT Online Status: Offline Posts: 4508 |
Post Options
Quote Reply
Posted: 21 Sep 2016 at 8:21pm |
|
That is a really great window mod!!
|
|
|
Leo & Melissa Bachand
2017 Ford F150 2021 Vista Cruiser 19 csk Previously owned 2015 Rpod 179 2010 Rpod 171 |
|
|
|
|
Post Reply
|
Page <1 5152535455 77> |
| Forum Jump | Forum Permissions You cannot post new topics in this forum You cannot reply to topics in this forum You cannot delete your posts in this forum You cannot edit your posts in this forum You cannot create polls in this forum You cannot vote in polls in this forum |


