
|
|
Post Reply 
|
Page <1 2425262728 33> |
| Author |
 Printable Version Printable Version Google Google Delicious Delicious Digg Digg StumbleUpon StumbleUpon Windows Live Windows Live Yahoo Bookmarks Yahoo Bookmarks reddit reddit Facebook Facebook MySpace MySpace Newsvine Newsvine Furl Furl Topic Search Topic Search  Topic Options Topic Options
|
texman 
Senior Member 
Joined: 24 Jul 2014 Location: TeXas Online Status: Offline Posts: 446 |
 Topic: Texman 182g Mods Topic: Texman 182g ModsPosted: 23 Feb 2019 at 9:27pm |
|
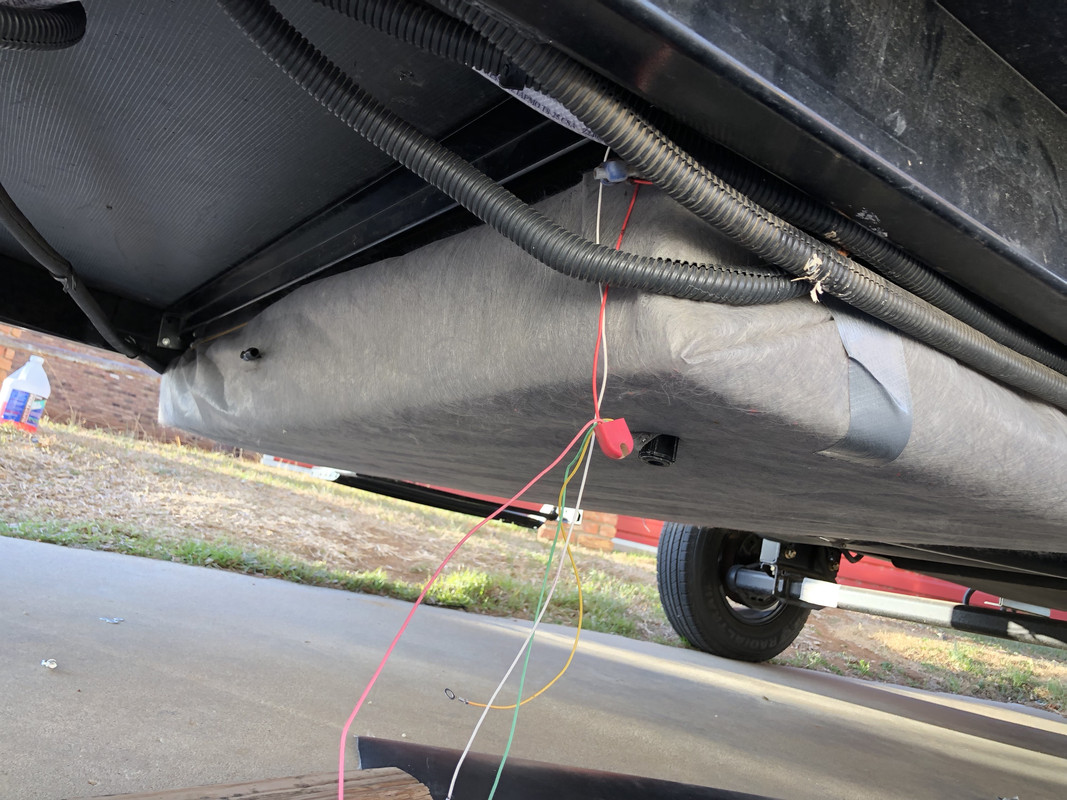
Got the tank out. Planning to use a couple of layers of ¾” Polyisocyanurate and then wrap all that in 60 mil tpo
|
|
 |
|
|
offgrid
Senior Member
Joined: 23 Jul 2018 Online Status: Offline Posts: 5290 |
Posted: 24 Feb 2019 at 6:07am |
|
progress....
texman, any particular problems found/tricks learned from taking the tank out?
|
|
|
1994 Chinook Concourse
1995 RV6A Experimental Aircraft 2015 Rpod 179 - sold |
|
|
|
|
texman
Senior Member
Joined: 24 Jul 2014 Location: TeXas Online Status: Offline Posts: 446 |
Posted: 24 Feb 2019 at 8:31am |
|
Og
The tank is held in place by four bolts into angle metal , 2 bolts at each end into frame. The Angle piece is fore and act but the fore piece is the only removable piece. 4 screws to four wires for sensors. Take a pic of those or mark for replacement. Remove hose clamps inside the pod at the wall where they exit. The lower clamps for the freshwater fill and overflow are inaccessible due to floor. Once all that is loose, the tank I had minimal adhesion from the foam around the floor penetration. Just lower the tank and slide slightly forward. The only tricks were getting to the four bolts because wiring and propane runs and the getting the tank past the same. Once I removed the water line that feeds to the pump, my tank drained another 5 gallons at least and the more once I lowered the front edge. The tank itself weighs about 10 lbs I think. Pliant is to use 100% silicone to adhere the polyiso to the tank and for the layer. I only want it to hold well enough to get the tank wrapped in the tpo. Once it is cocooned it will all stay put. Don’t know if the silicone is the right stuff. But gonna try it. I will wrap the tpo and make folds at the corners and cover the top. That way the tank frame holds the tpo in place. The two layers will be r10 with no air gap plus the tpo Tank removal took about 45 minutes I think. Mainly because of working around the wiring and propane lines. Get a hose removal tool if you don’t have one and I would suggest warm weather too. I ended up wet and cold from the dripping water and cold wind. Make the hoses harder to remove as well. |
|
|
|
|
offgrid
Senior Member
Joined: 23 Jul 2018 Online Status: Offline Posts: 5290 |
Posted: 25 Feb 2019 at 5:04am |
|
Thanks texman, very useful practical information. I've thought about relocating the fresh tank in my 179 to where the black tank is now and eliminating the black tank in favor of a composting RV toilet. That would reduce the tongue weight significantly.
It's interesting that you drained another 5 gallons of water from the tank when you dropped it. I assume that was after draining it as much as possible using the drain fitting first? That would imply that we are all carrying around an unusable 40 lbs of water in our tanks. I doubt the silicone will work well for you on polyethylene (not much does) and also because it cures slowly, but you can certainly give it a try. Since you're only looking for a fast cure to hold the insulation temporarily to the tank until you can wrap it, if you're dissatisfied with the silicone you could try surface treating the tank first. Now that you have the tank out a flame surface treatment would be pretty easy I think. Wave a propane torch with a flame spreader over the tank surface, you're not trying to melt the tank just remove the surface gloss and get a dull finish. You can also test this with a little water, if water sheets on the surface rather than beading up the flame treatment has done its job. You might also want to check out this adhesive, either to use directly or for use after flame treatment: Good luck! |
|
|
1994 Chinook Concourse
1995 RV6A Experimental Aircraft 2015 Rpod 179 - sold |
|
|
|
|
StephenH
podders Helping podders - pHp

Joined: 29 Nov 2015 Location: Wake Forest, NC Online Status: Offline Posts: 6288 |
Posted: 25 Feb 2019 at 8:12am |
|
I have noticed that the bottom of the tanks (fresh, gray, and black) may have been molded flat, but the weight of the contents causes them to become curved. Since the drain is not in the middle where the curve is lowest, there is no way for the water to drain fully. One problem that may occur is that after the tank is insulated, the weight of the water will again push the center of the tank down, stressing the insulation and breaking it or breaking the bond holding it to the tank. It may need some form of support across the tank to support the center. This same curve is why the pump can't drain the tank fully. The pickup for the water is not at the bottom of the tank, but in that projection out of the side which is above the bottom of the tank. It pulls air long before the bottom of the tank is reached.
|
|
|
StephenH
Happy is the man that findeth wisdom,... ouR escaPOD mods Former RPod 179 Current Cherokee Grey Wolf 24 JS |
|
|
|
|
offgrid
Senior Member
Joined: 23 Jul 2018 Online Status: Offline Posts: 5290 |
Posted: 25 Feb 2019 at 9:03am |
|
StephenH, if you're right and the 3 tanks all have about 5 gallons left in them, that would explain most of the roughly 175 lbs of unaccounted for extra weight I have in my trailer. That residual water, the full water heater, dual batteries, one full propane tank, an aftermarket mattress and the usual options (micro, a/c, TV, riser kit) would put it at about 600 lbs over FR's listed empty weight before any tools, clothing, supplies, other mods, or useable water are added.
|
|
|
1994 Chinook Concourse
1995 RV6A Experimental Aircraft 2015 Rpod 179 - sold |
|
|
|
|
texman
Senior Member
Joined: 24 Jul 2014 Location: TeXas Online Status: Offline Posts: 446 |
Posted: 25 Feb 2019 at 9:05am |
|
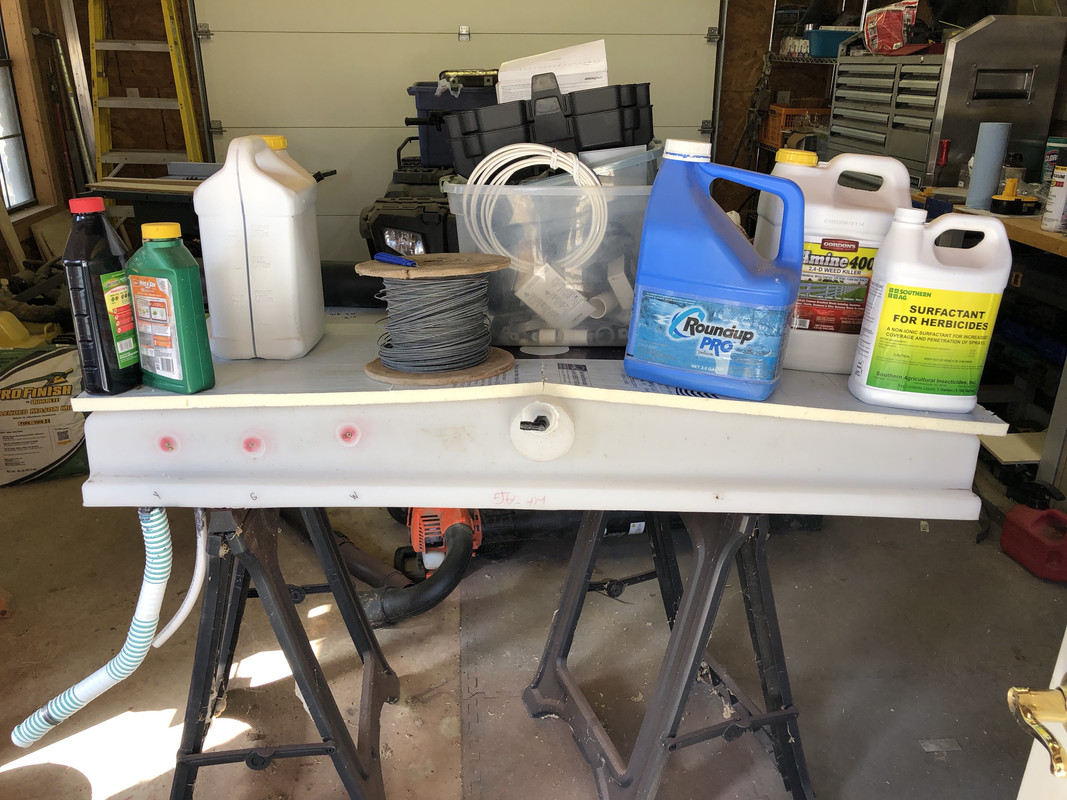
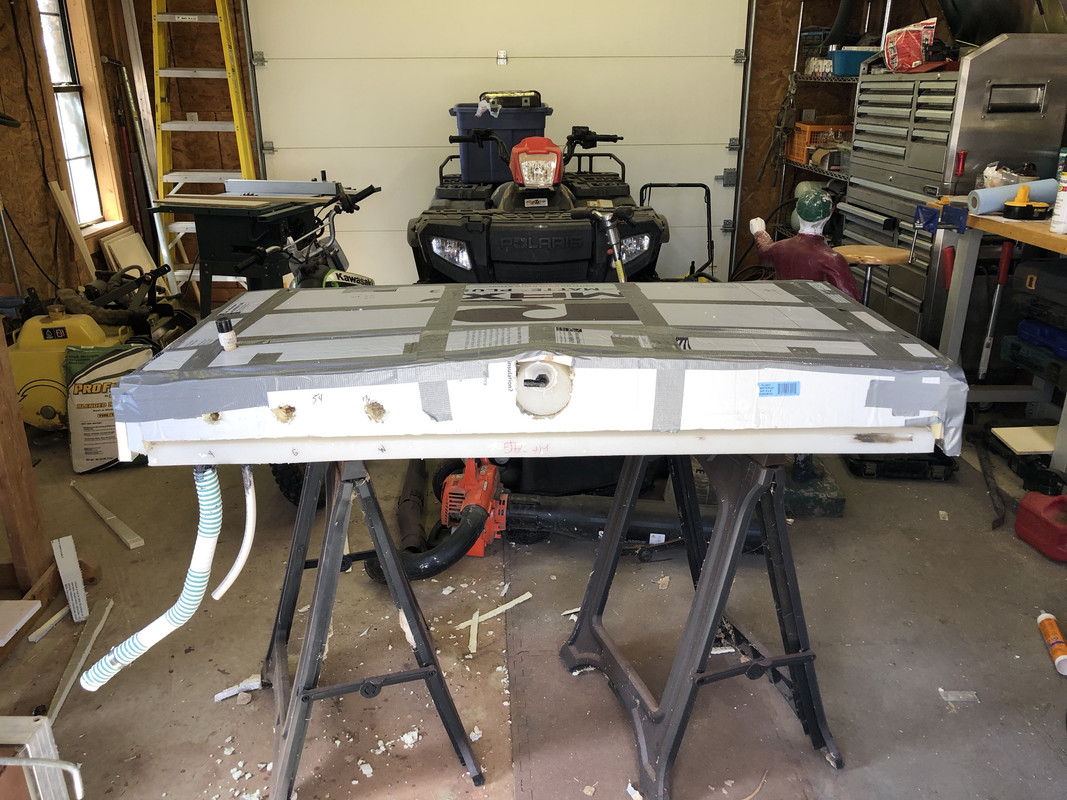
Stephen and OG the tank is definitely not flat on the bottom and the front is sloped as well to the middle. This is my attempt at the first layer of polyiso. i cut the outer layer and made the insulation form closer to the actual tank form. All the stuff setting on it was an attempt to get it to "Stick" not bond to the tank. It kinda stuck, about as good as i thought. Duct tape covers the seams and cuts. I had to change course on my plan. The TPO is 60 mil and just too tough to form the tank with. To cover the tank, it would have to make several sharp folds or bends and the stuff is just too rigid IMO to do what i had planned. I had some heavy duty landscape fabric laying around so i decided to try that since it is tough and breathable to handle condensation. I triple layered the tank with the four ft width of the fabric and folded it all at the corners. The whole time i was doing all this i kept thinking i should of just sprayed foamed it with the closed cell. AT this point, i could remove the whole insulation and fabric and start over even though the tank is back in the pod. To both your points that nothing sticks to the polyethylene being true, i had planned that the TPO wrap would snug it all up and hold it together. Since i was not able to do that, the fabric i used holds it but not too my satisfaction and the fabric would definitely absorb water if traveling in rain. So my plan B, at this point is to use the TPO to envelope the tank and affix that to the frame surrounding the tank. OR plan C, start over and get some foam.  BTW, getting the tank back in place covered with all that insulation and fabric was not fun or easy. i ended up pinching a wire with one of the bolts that holds the tank. It is still together, so i'll have to check that out now too. The point stephen made about supporting the insulation is true as well. That is my next step if i proceed on this path. I plan to use pipe strap from side to side front and back of the tank and use screws to the frame to hold. BTW, getting the tank back in place covered with all that insulation and fabric was not fun or easy. i ended up pinching a wire with one of the bolts that holds the tank. It is still together, so i'll have to check that out now too. The point stephen made about supporting the insulation is true as well. That is my next step if i proceed on this path. I plan to use pipe strap from side to side front and back of the tank and use screws to the frame to hold. My decision at this point is to either proceed or start over. if i start over, i think i can remove my days work in about 15 minutes and have only residual silicone to see left on the tank that would surely be easily removed if even necessary. Donate the insulation and duct tape to the trash. GEt some spray foam and hope it works. ( the crazy reviews of the small frothpacs left me concerned that i would have a mess) If that works then paint or do what ever and be done hopefully. If i proceed i think that i have to cover what i have because of the rain trip problem and that i dont trust what i have to withstand highway speeds and the force that will generate. that may be challenging as well Hope this helps anyone considering this. I knew it would be a challenge and it is for sure. I'll post my ugly stuff as well as the pretty stuff.
 post some pics next post some pics next |
|
|
|
|
texman
Senior Member
Joined: 24 Jul 2014 Location: TeXas Online Status: Offline Posts: 446 |
Posted: 25 Feb 2019 at 9:07am |
|
duct tape just holds the folds and would be removed.
 |
|
|
|
|
texman
Senior Member
Joined: 24 Jul 2014 Location: TeXas Online Status: Offline Posts: 446 |
Posted: 25 Feb 2019 at 9:08am |
|
attempt to stick to the tank. waste of time.
 |
|
|
|
|
texman
Senior Member
Joined: 24 Jul 2014 Location: TeXas Online Status: Offline Posts: 446 |
Posted: 25 Feb 2019 at 9:10am |
|
|
|
|
|
Post Reply
|
Page <1 2425262728 33> |
| Forum Jump | Forum Permissions You cannot post new topics in this forum You cannot reply to topics in this forum You cannot delete your posts in this forum You cannot edit your posts in this forum You cannot create polls in this forum You cannot vote in polls in this forum |


 Texman 182g Mods